Awesome
<!-- - SPDX-FileCopyrightText: 2016 Nextcloud GmbH and Nextcloud contributors - SPDX-License-Identifier: AGPL-3.0-or-later -->Deck
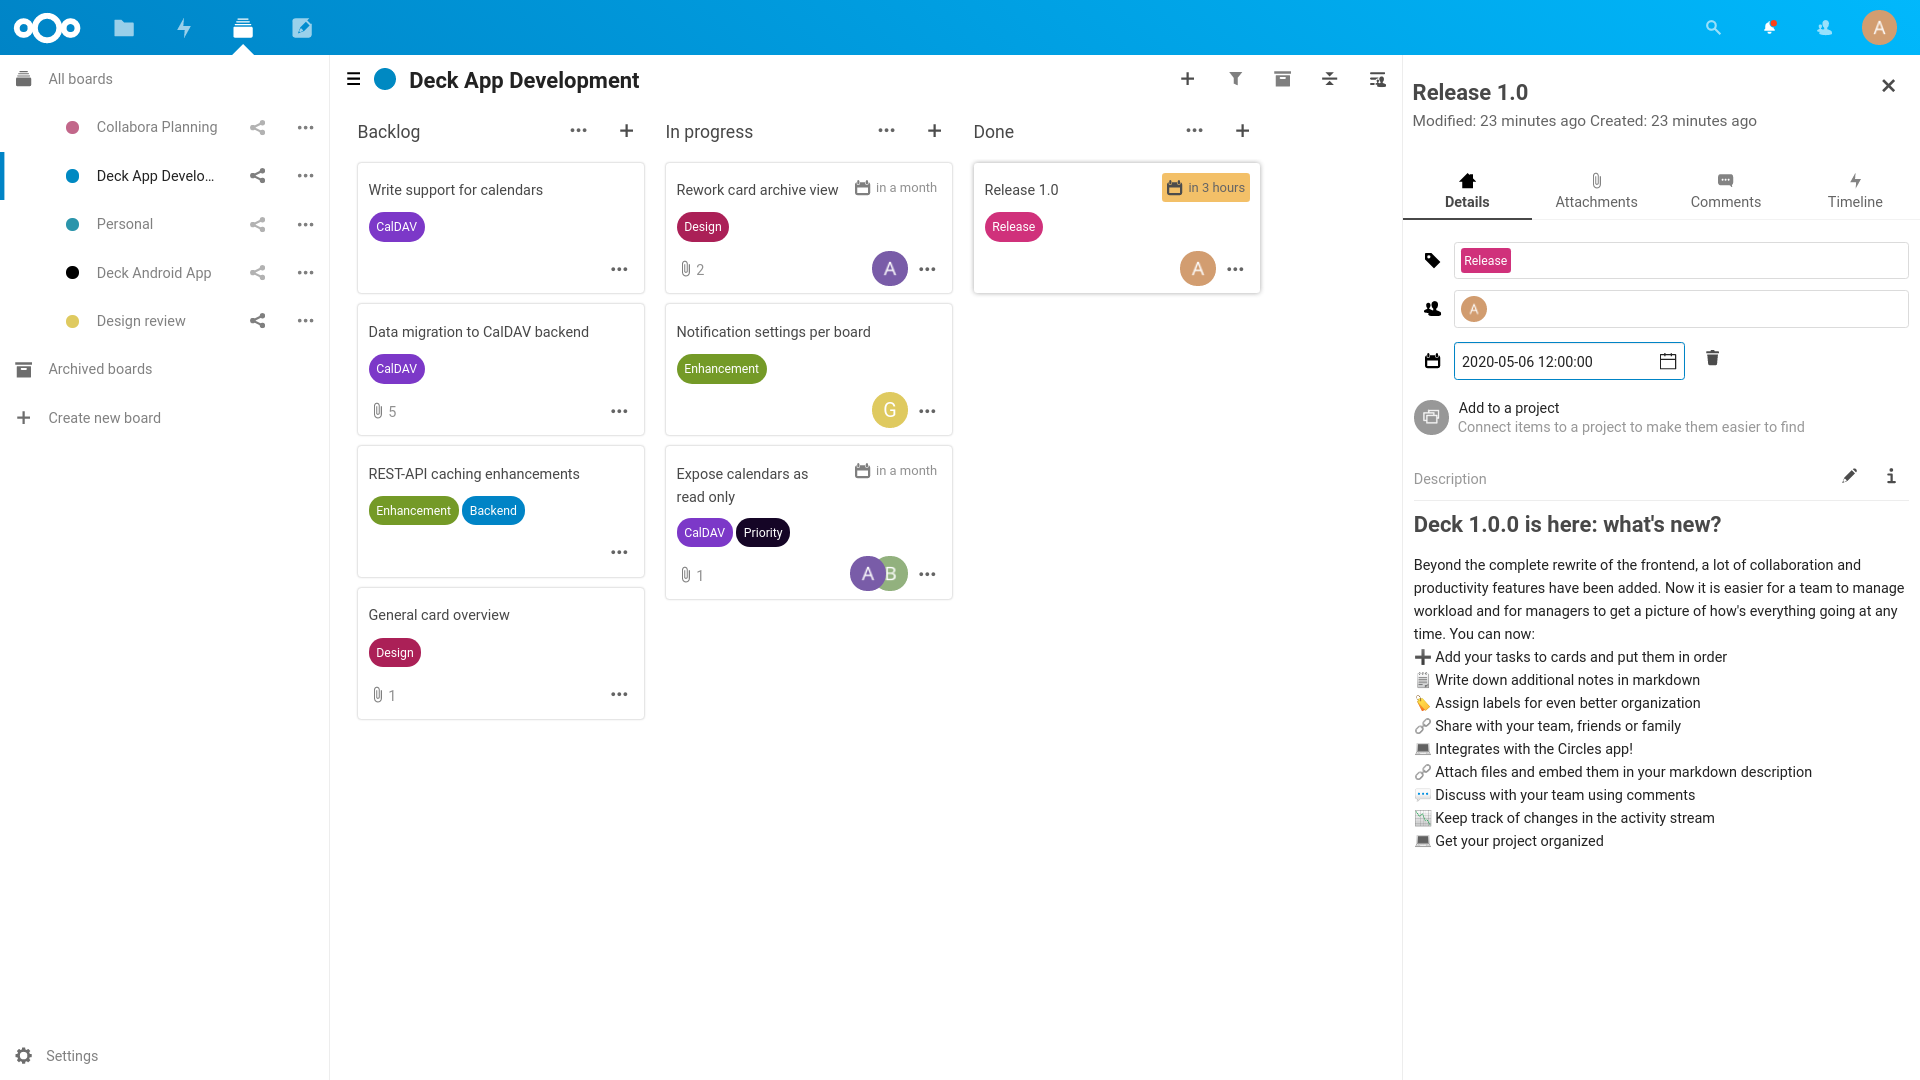
Deck is a kanban style organization tool aimed at personal planning and project organization for teams integrated with Nextcloud.
- Add your tasks to cards and put them in order
- Write down additional notes in markdown
- Assign labels for even better organization
- Share with your team, friends or family
- Integrates with the Circles app!
- Attach files and embed them in your markdown description
- Discuss with your team using comments
- Keep track of changes in the activity stream
- Get your project organized

Mobile apps
- Nextcloud Deck app for Android - It is available in F-Droid and the Google Play Store
- Nextcloud Deck app for iOS - It is available in Apple App store
- deck NG for Android and iOS - It is available in Google Play Store and Apple App Store
3rd-Party Integrations
- trello-to-deck - Migrates cards from Trello
- mail2deck - Provides an "email in" solution
- A-deck - Chrome Extension that allows to create new card in selected stack based on current tab
- QOwnNotes - Quickly creates cards and links to them in Markdown notes
Installation/Update
The app can be installed through the app store within Nextcloud. You can also download the latest release from the release page.
Performance limitations
Deck is not yet ready for intensive usage. A lot of database queries are generated when the number of boards, cards and attachments is high. For example, a user having access to 13 boards, with each board having on average 100 cards, and each card having on average 5 attachments, would generate 6500 database queries when doing the file related queries which would increase the page loading time significantly.
Improvements on Nextcloud server and Deck itself will improve the situation.
Developing
There are multiple ways to develop on Deck. As you will need a Nextcloud server running, the individual options are described below.
General build instructions
General build instructions for the app itself are the same for all options.
To build you will need to have Node.js and Composer installed.
- Install PHP dependencies:
composer install --no-dev - Install JS dependencies:
npm ci - Build JavaScript for the frontend
- Development build
npm run dev - Watch for changes
npm run watch - Production build
npm run build
- Development build
Faster frontend developing with HMR
You can enable HMR (Hot module replacement) to avoid page reloads when working on the frontend:
- ☑️ Install and enable
hmr_enablerapp - 🏁 Run
npm run serve - 🌍 Open the normal Nextcloud server URL (not the URL given by above command)
GitHub Codespaces / VS Code devcontainer
- Open code spaces or the repository in VS Code to start the dev container
- The container will automatically install all dependencies and build the app
- Nextcloud will be installed from the master development branch and be available on a port exposed by the container
Docker: Simple app development container
- Fork the app
- Clone the repository:
git clone https://github.com/nextcloud/deck.git - Go into deck directory:
cd deck - Build the app as described in the general build instructions
- Run Nextcloud development container and mount the apps source code into it
docker run --rm \
    -p 8080:80 \
    -v $PWD:/var/www/html/apps-extra/deck \
    ghcr.io/juliushaertl/nextcloud-dev-php81:latest
Full Nextcloud development environment
You need to setup a development environment of the current Nextcloud version. You can also alternatively install & run the nextcloud docker container.
After the finished installation, you can clone the deck project directly in the /[nextcloud-docker-dev-dir]/workspace/server/apps/ folder.
Running tests
You can use the provided Makefile to run all tests by using:
make test
Running behat integration tests
Within tests/integration/ run composer install and then choose one of the two options:
- Run tests with a local php server:
bash run.sh - Run against an existing Nextcloud installation:
BEHAT_SERVER_URL=http://nextcloud.local ./vendor/bin/behat --colors features/decks.feature
Documentation
The documentation for our REST API can be found at https://deck.readthedocs.io/en/latest/API/
Contribution Guidelines
Please read the Code of Conduct. This document offers some guidance to ensure Nextcloud participants can cooperate effectively in a positive and inspiring atmosphere, and to explain how together we can strengthen and support each other.
For more information please review the guidelines for contributing to this repository.
Apply a license
All contributions to this repository are considered to be licensed under the GNU AGPLv3 or any later version.
Contributors to the Deck app retain their copyright. Therefore we recommend to add following line to the header of a file, if you changed it substantially:
@copyright Copyright (c) <year>, <your name> (<your email address>)
For further information on how to add or update the license header correctly please have a look at our licensing HowTo.
Sign your work
We use the Developer Certificate of Origin (DCO) as a additional safeguard for the Nextcloud project. This is a well established and widely used mechanism to assure contributors have confirmed their right to license their contribution under the project's license. Please read developer-certificate-of-origin. If you can certify it, then just add a line to every git commit message:
Signed-off-by: Random J Developer <random@developer.example.org>
Use your real name (sorry, no pseudonyms or anonymous contributions).
If you set your user.name and user.email git configs, you can sign your
commit automatically with git commit -s. You can also use git aliases
like git config --global alias.ci 'commit -s'. Now you can commit with
git ci and the commit will be signed.

