Awesome
Node.js API Starter Kit
<a href="http://www.typescriptlang.org/"><img src="https://img.shields.io/badge/%3C%2F%3E-TypeScript-%230074c1.svg?style=flat-square" height="20"></a> <a href="http://patreon.com/koistya"><img src="https://img.shields.io/badge/dynamic/json?color=%23ff424d&label=Patreon&style=flat-square&query=data.attributes.patron_count&suffix=%20patrons&url=https%3A%2F%2Fwww.patreon.com%2Fapi%2Fcampaigns%2F233228" height="20"></a> <a href="https://discord.gg/GrqQaSnvmr"><img src="https://img.shields.io/discord/643523529131950086?label=Chat&style=flat-square" height="20"></a> <a href="https://github.com/kriasoft/node-starter-kit/stargazers"><img src="https://img.shields.io/github/stars/kriasoft/node-starter-kit.svg?style=social&label=Star&maxAge=3600" height="20"></a> <a href="https://twitter.com/koistya"><img src="https://img.shields.io/twitter/follow/koistya.svg?style=social&label=Follow&maxAge=3600" height="20"></a>
Node.js API Starter Kit is a project template for building Node.js backend applications optimized for serverless infrastructure such as Google Cloud Functions, AWS Lambda, Azure Functions, etc. Use it as an API server for your front-end app.
Features
- Database first design; auto-generated strongly typed data models (TypeScript)
- Authentication and authorization using OAuth 2.0 providers (Google, Facebook, GitHub, etc.)
- Stateless sessions implemented with JWT tokens and a session cookie (compatible with SSR)
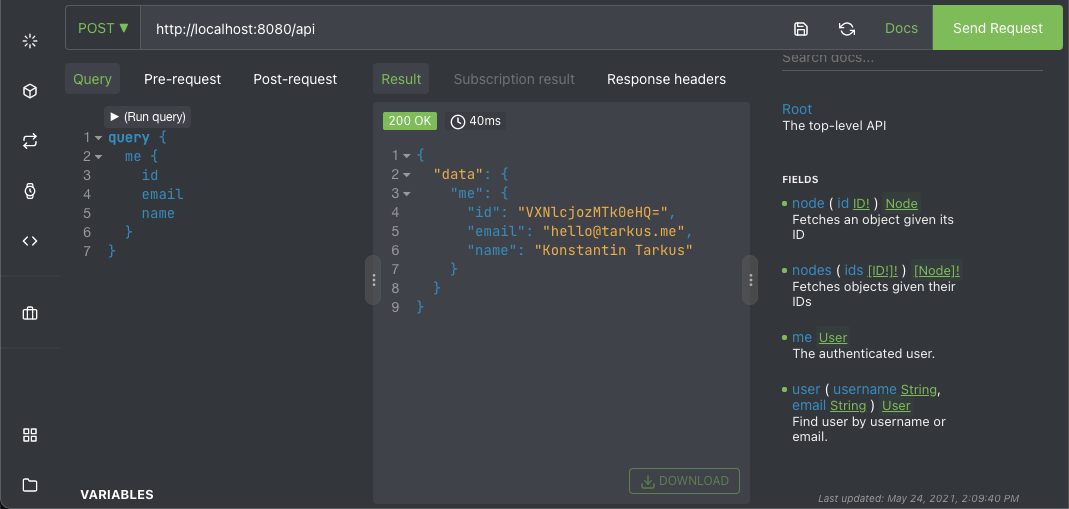
- GraphQL API example, implemented using the code-first development approach
- Database schema migration, seeds, and REPL shell tooling
- Transactional emails using Handlebars templates and instant email previews
- Structured logs and error reporting to Google StackDriver
- Pre-configured unit testing tooling powered by Jest and Supertest
- Application bundling with Rollup as an optimization technique for serverless deployments
- Rebuilds and restarts the app on changes when running locally
- Pre-configured for
local,dev,test, andprodenvironments - The ongoing design and development is supported by these wonderful companies:
<a href="https://reactstarter.com/s/1"><img src="https://reactstarter.com/s/1.png" height="60" /></a> <a href="https://reactstarter.com/s/2"><img src="https://reactstarter.com/s/2.png" height="60" /></a> <a href="https://reactstarter.com/s/3"><img src="https://reactstarter.com/s/3.png" height="60" /></a>
This project was bootstrapped with Node.js API Starter Kit. Be sure to join our Discord channel for assistance.
Tech Stack
- Node.js v14, Yarn package manager, TypeScript, Babel, Rollup, ESLint, Prettier, Jest
- PostgreSQL, GraphQL.js, Knex, Express, Nodemailer,Email Templates, Handlebars, Simple OAuth2
Directory Structure
├──.build — Compiled and bundled output (per Cloud Function)<br>
├──.vscode — VSCode settings including code snippets, recommended extensions etc.<br>
├──api — Cloud Function for handling API requests using GraphQL.js<br>
├──auth — Authentication and session middleware<br>
├──core — Common application modules (email, logging, etc.)<br>
├──db — Database client for PostgreSQL using Knex<br>
├──emails — Email templates for transactional emails using Handlebars<br>
├──env — Environment variables for local, dev, test, and prod<br>
├──migrations — database schema migrations (Cloud SQL, Knex)<br>
├──scripts — Deployment scripts, REPL shell, etc.<br>
├──test — Unit tests and benchmarks<br>
├──views — HTML templates using Handlebars<br>
└── ... — add more cloud functions such as worker, notifications, etc.
Requirements
- Node.js v14, Yarn package manager
- Local or remote instance of PostgreSQL (see Postgres.app, Google Cloud SQL)
- VS Code editor with recommended extensions
Getting Started
- Clone the repo —
git clone -o seed https://github.com/kriasoft/node-starter-kit.git. - Update environment variables for
local,dev,test, andprodenvironments (./env). - Install project dependencies —
yarn install - Bootstrap PostgreSQL database —
yarn db:create - Finally, launch the app —
yarn start, it will become available at http://localhost:8080.
Use APP_ENV environment variable to execute scripts for different environments, for example:
$ APP_ENV=test yarn db:migrate
$ APP_ENV=test yarn start

IMPORTANT: Ensure that VSCode is using the workspace versions of TypeScript and ESLint.

Scripts
yarn start— Launches the app in development mode onhttp://localhost:8080yarn build— Compiles and bundles the app for deploymentyarn lint— Validate code using ESLintyarn tsc— Validate code using TypeScript compileryarn test— Run unit tests with Jest, Supertestyarn repl— Connect to the database using Knex REPL shellyarn psql— Connect to the database using PostgreSQL CLIyarn db:create— Create a new databaseyarn db:version— Check the current version of the databaseyarn db:migrate— Migrate database schema to the latest versionyarn db:rollback— Rollback the latest migrationyarn db:seed— Seed database with sample / reference datayarn db:reset— Re-apply the latest DB schema migration fileyarn update-types— Generate strongly typed data models from database schema
Optionally set APP_ENV to local (default), dev, test, or prod before running these scripts.

How to Configure 0Auth 2.0 Login Flow
For each 3rd party identity provider that needs to be enabled for your app, you will need to obtain application credentials, often called client ID/secret.
- Go to Google Cloud Console
- Create a new GCP project
- Configure OAuth concent screen
- Create OAuth 2.0 client
with
http://localhost/auth/google/returnas the callback URL - Update
GOOGLE_CLIENT_ID,GOOGLE_CLIENT_SECRETenvironment variables found in./env/.env.*for each environment that you need.
From there on, visiting http://localhost:8080/auth/google
(or, opening it in a popup window) would initiate login flow via Google.
- Go to Facebook Developer website
- Create a new Facebook App, enable Facebook Login for this app
- Close Quickstart dialog and go straight to the app settings
- Add
http://localhost/auth/facebook/returnas the callback URL for the login flow - Copy and paste the newly created Facebook App ID and secret to
FACEBOOK_APP_ID,FACEBOOK_APP_SECRETvariables found inenv/.env.*files for each environment that you need.
From there on, visiting http://localhost:8080/auth/facebook
(or, opening it in a popup window) would initiate login flow via Facebook.
How to Deploy
The deployment script (yarn deploy) relies on Google Cloud CLI (gcloud) tool
that you can download from here. For
CI/CD workflows you may need a Docker image like this one.
gcloud auth login — Authorize Google Cloud SDK (CLI) tool to use your Google account.
Create a new GCP project for
your app with IDs such as example for production, and example-test for test
/ QA environments. Ensure that Cloud Build API and Cloud Functions API are
enabled in your GCP project's settings here.
Create a Cloud SQL database instance here in the same region where your app needs to be deployed. Using a micro instance of Cloud SQL with 0.6 GB RAM should be OK for testing and low traffic websites.
Ensure that GOOGLE_CLOUD_PROJECT, GOOGLE_CLOUD_REGION, PGDATABASE, PGUSER
and the other environment variables are correctly set for the target deployment
environment (e.g. /env/.env + /env/.env.prod
for production).
Finally, compile and deploy the app by running:
yarn build— Compiles the app into the.buildfolderAPP_ENV=<env> yarn db:migrate— Migrates database (schema) to the latest versionAPP_ENV=<env> yarn deploy— Deploys the app to Google Cloud Functions (GCF)
Where <env> is the target environment, e.g. APP_ENV=prod yarn deploy.
How to Update
yarn set version latest— Bump Yarn to the latest versionyarn upgrade-interactive— Update Node.js modules (dependencies)yarn pnpify --sdk vscode— Update TypeScript, ESLint, and Prettier settings in VSCode
Backers
<a href="https://reactstarter.com/b/1"><img src="https://reactstarter.com/b/1.png" height="60" /></a> <a href="https://reactstarter.com/b/2"><img src="https://reactstarter.com/b/2.png" height="60" /></a> <a href="https://reactstarter.com/b/3"><img src="https://reactstarter.com/b/3.png" height="60" /></a> <a href="https://reactstarter.com/b/4"><img src="https://reactstarter.com/b/4.png" height="60" /></a> <a href="https://reactstarter.com/b/5"><img src="https://reactstarter.com/b/5.png" height="60" /></a> <a href="https://reactstarter.com/b/6"><img src="https://reactstarter.com/b/6.png" height="60" /></a> <a href="https://reactstarter.com/b/7"><img src="https://reactstarter.com/b/7.png" height="60" /></a> <a href="https://reactstarter.com/b/8"><img src="https://reactstarter.com/b/8.png" height="60" /></a>
Related Projects
- GraphQL API Starter Kit — monorepo template, pre-configured with TypeScript, GraphQL, React, and Relay.
- React Starter Kit — project template, pre-configured with Webpack and React
How to Contribute
Anyone and everyone is welcome to contribute. Start by checking out the list of open issues marked help wanted. However, if you decide to get involved, please take a moment to review the guidelines.
License
Copyright © 2016-present Kriasoft. This source code is licensed under the MIT license found in the LICENSE file.
<sup>Made with ♥ by Konstantin Tarkus (@koistya, blog) and contributors.</sup>