Awesome
Watchdog 
<p align="center">
<img src="https://raw.githubusercontent.com/flipkart-incubator/watchdog/master/Frontend/static/images/watchdog-logo.png?sanitize=true" height="400" width="400"alt="Watchdog"/>
</p>
Tool Description
Watchog is an integration of open source security tools aimed to provide a holistic security view for a given domain/IP. The way Watchdog is built, it can be used by product security teams, red teams and also by bug bounty hunters to get a 360° view of any Internet property it scans. Given a list of domains/IP's it has the capability to perform a network scan, feed the output to open source web app scanners like Google's skip-fish and wapiti, perform tech stack analysis and determine if the stack has any known CVE’s.
Watchdog is designed considering the use case necessary to know all open services and its corresponding technologies for the endpoints you own, exposed over the Internet. As a company grows, it’s foot-prints grow on the World Wide Web leaving it's product security team with herculean task of maintaining an inventory of all the services and technologies exposed. This becomes further crucial at the event of a zero-day outbreak for a particular protocol or a third party product which might affect public endpoints of the company
WatchDog has the ability to scan all endpoints and perform technology version analysis on the services it detects and map this information with it’s rich CVE database maintained and updated locally.
Scan Engine:
- Nmap
- Skipfish
- Wapiti
- BuiltWith
- Phantalyzer
- Wappalyzer
Databases and collections:
Watchdog installs a local copy of CVE database which is a collection of following DB's :
- cves (Common Vulnerabilities and Exposure items) - source NVD NIST
- cpe (Common Platform Enumeration items) - source NVD NIST
- cwe (Common Weakness Enumeration items) - source NVD NIST
- capec (Common Attack Pattern Enumeration and Classification) - source NVD NIST
- ranking (ranking rules per group) - local cve-search
- d2sec (Exploitation reference from D2 Elliot Web Exploitation Framework) - source d2sec.com
- MITRE Reference Key/Maps - source MITRE reference Key/Maps
- ms - (Microsoft Bulletin (Security Vulnerabilities and Bulletin)) - source Microsoft
- exploitdb (Offensive Security - Exploit Database) - source offensive security
- info (metadata of each collection like last-modified) - local cve-search
- via4 VIA4CVE cross-references.
What happens when you run watchdog:
Test domain: www.scanthis.com
Watchdog will perform following task on this domain:
a. Scan the domain to find visible open ports.
{e.g. output}
* 80  [Apache httpd 2.4.7 ((Debian))]
* 443 [Apache httpd 2.4.7 ((Debian))]
* 22  [OpenSSH 5.8p1_hpn13v10 (FreeBSD 20110102; protocol 2.0)]
* 21  [ProFTPD 1.3.3e]
* 993 [Plesk Courier imapd]
b. Perform tech-stack fingerprinting and identify all front-end and service level technologies running.
* jquery [1.8.1]
* php [5.5.9]
* twitter bootstrap [2.3]
* font awesome [**]
* google analytics [**]
* piwik []
c. Map the tech-stack versions with known vulnerabilities found in the master CVE database.
* [e.g. jquery 1.8.1 version has multiple CVE's - CVE-2012-6708, CVE-2015-9251]
* [e.g. php 5.5.9 version has multiple CVE's - CVE-2016-4073, CVE-2015-8835]
* [e.g. apache 2.4.7 version has multiple CVE's - CVE-2017-7679, CVE-2014-0226]
d. If step 1 detects any http services running [80/443] it will go ahead and perform a web application security scanning with wapiti and Skipfish.
f. Once the scan is complete the data will get populated on Watchdog’s UI which can be found at http://localhost/index.php
Installing Watchdog:
Prerequisites & Softwares
- Ubuntu 16.04+
Install PyV8:
Incase of any issues while installing, follow the below steps (workaround for Ubuntu 16+)
$ export LC_ALL=C
$ cd /tmp
$ pip install -e git://github.com/brokenseal/PyV8-OS-X#egg=pyv8
$ git clone https://github.com/emmetio/pyv8-binaries.git
$ unzip pyv8-binaries/pyv8-linux64.zip (or unzip appropriate zip file based on kernel version)
$ mv *PyV8* src/pyv8/pyv8/.
Clone Watchdog repository
$ git clone https://github.com/flipkart-incubator/watchdog.git
$ cd watchdog
Update the subdomains.txt file with your target subdomains
scanme.nmap.org
testphp.vulnweb.com
Run the installation script below
$ sudo chmod +x install.sh
$ sudo ./install.sh
* During installation, script prompts for web root directory.
  Default directory /var/www/html will be taken automatically if not provided explicitly with-in 10 secs
Scanning with Watchdog:
- Watchdog can be run using following command:
$ sudo python run.py

root@projectWatchdog:/watchdog# python run.py
usage: run.py [-h] [-c] [-iA INVENTORY_APPEND] [-iR INVENTORY_REPLACE]
              [-u {install,map,update}] [-s]

optional arguments:
  -h, --help            show this help message and exit
  -c, --config          to configure db structure
  -iA INVENTORY_APPEND, --inventory-append INVENTORY_APPEND
                        to append target to IP Inventory
  -iR INVENTORY_REPLACE, --inventory-replace INVENTORY_REPLACE
                        to replace targets in IP Inventory
  -u {install,map,update}, --updateCVEs {install,map,update}
                        to configure or update CVE database
  -s, --start           to start scanning engine
Configuring CVE-DB
a. Install cve-db using below command (Required to run at least once)
$sudo python run.py -u install
b. Map cves with cpes using below command [Required to run at-least once. The first run generally takes around 30~45 mins for the entire db to get populated. Recommended time: minimum 30mins]
$sudo python run.py -u map
c. Update the DB by using below command (optional / can run this once a month)
$sudo python run.py -u update
Adding new domains to the scan database:
Update the scan database with subdomains.txt file with new domains/IP's and run below commands
$ sudo python run.py -iA subdomains.txt (for appending targets to existing inventory)

$ sudo python run.py -iR subdomains.txt (for replacing targets in existing inventory)
Start Scanning:
$ sudo python run.py -s
Frontend can be accessed from http://localhost/index.php (or replace localhost with your web server address)
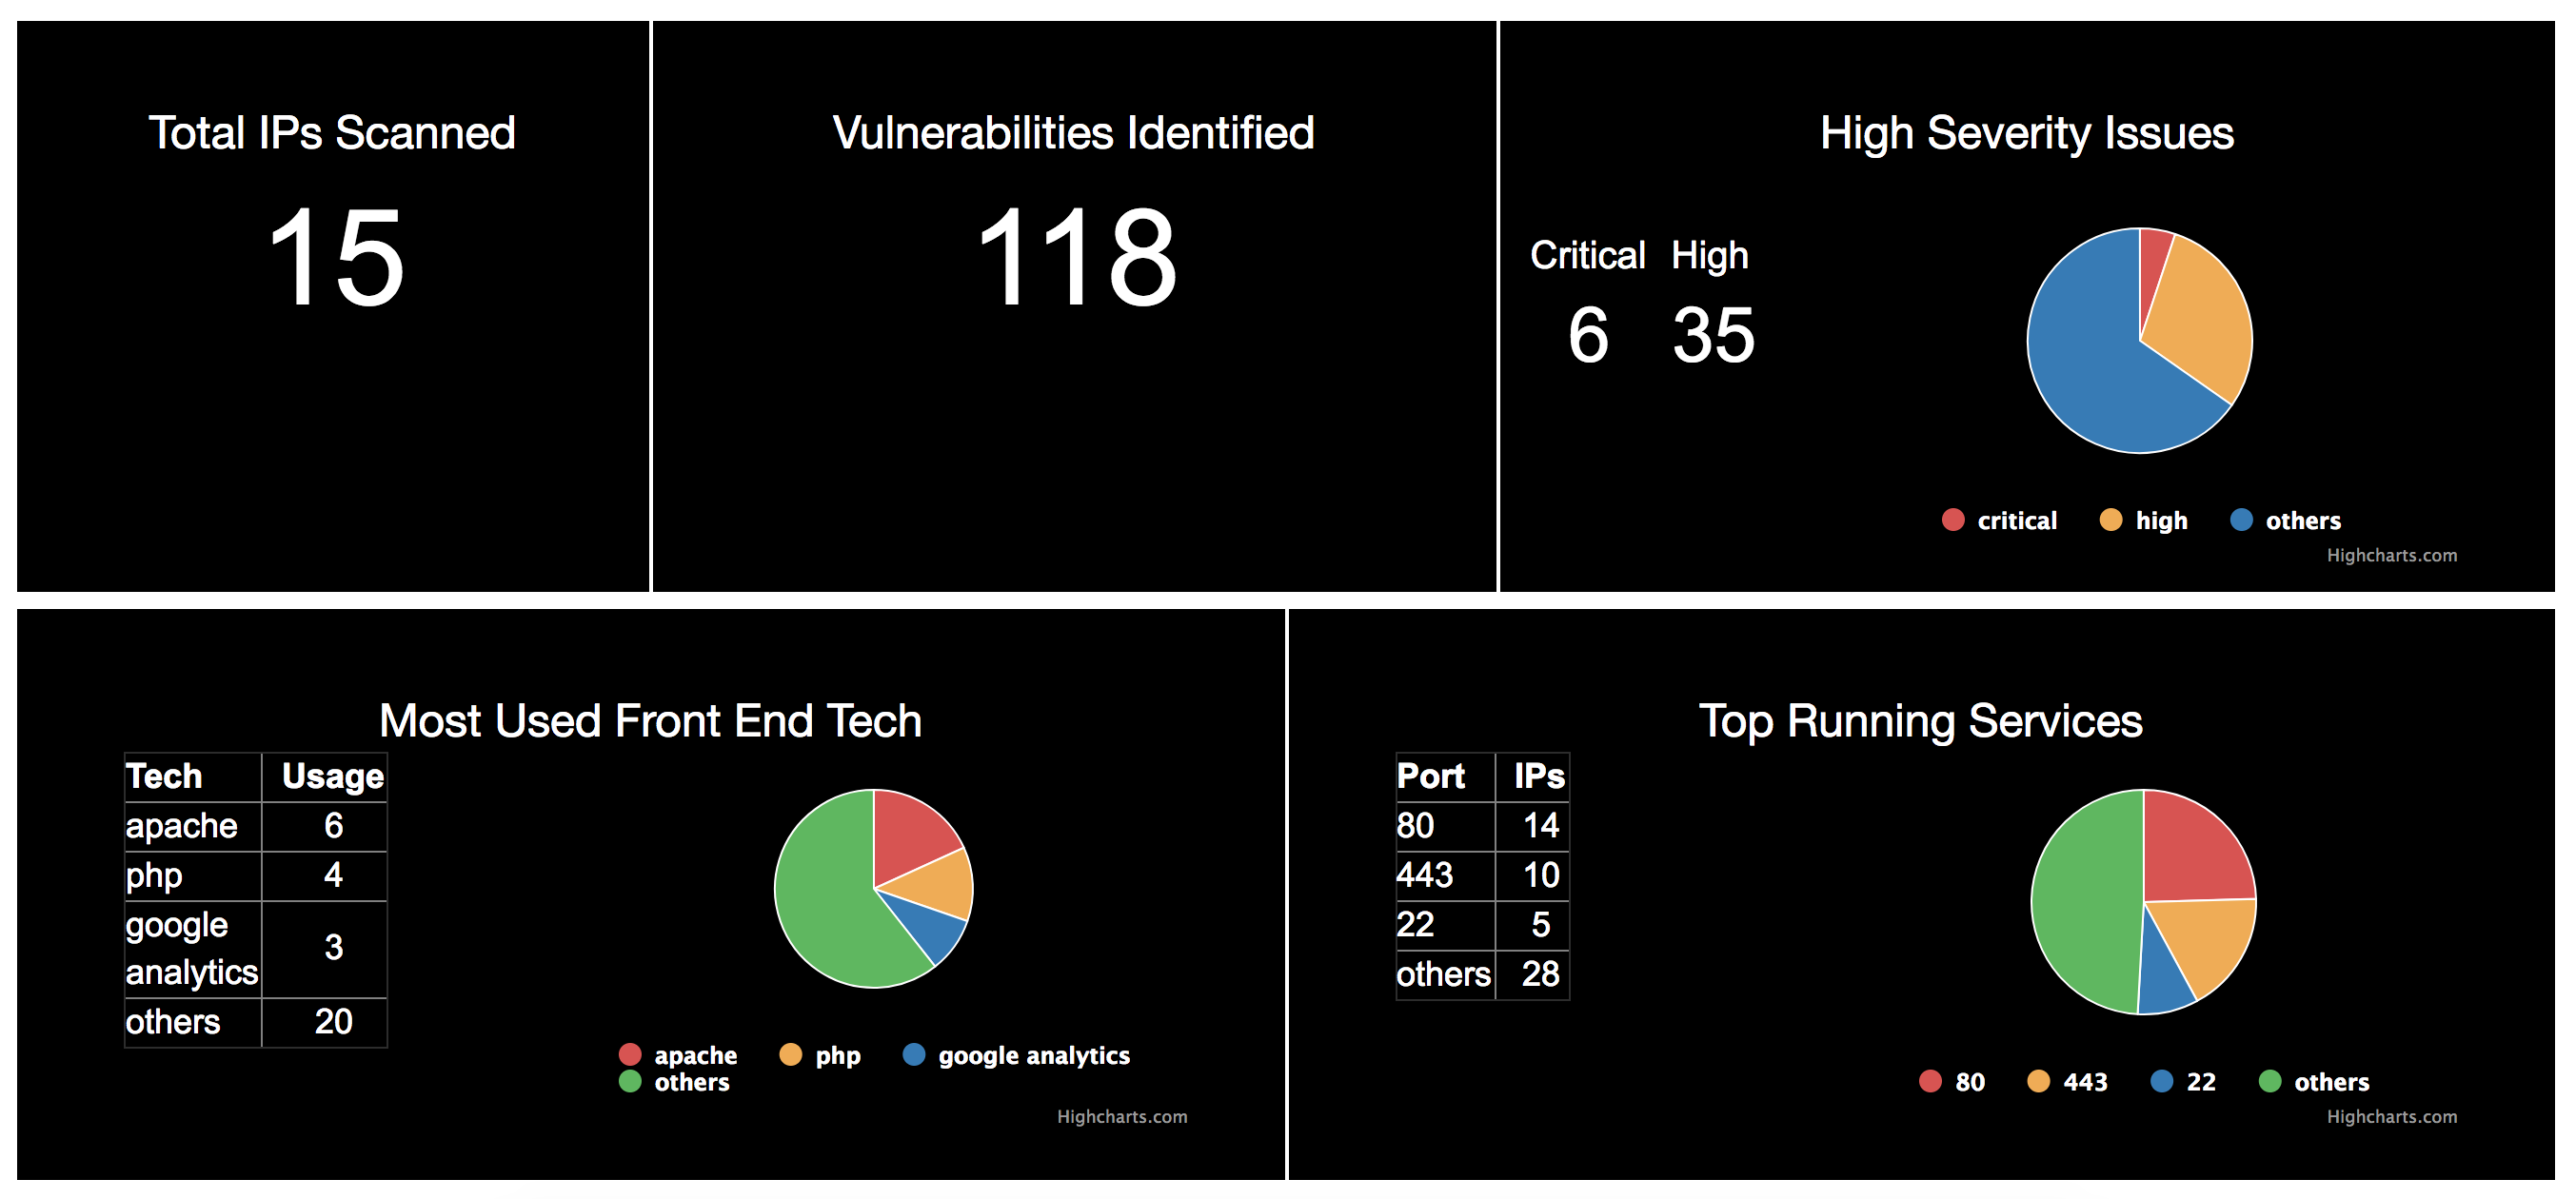
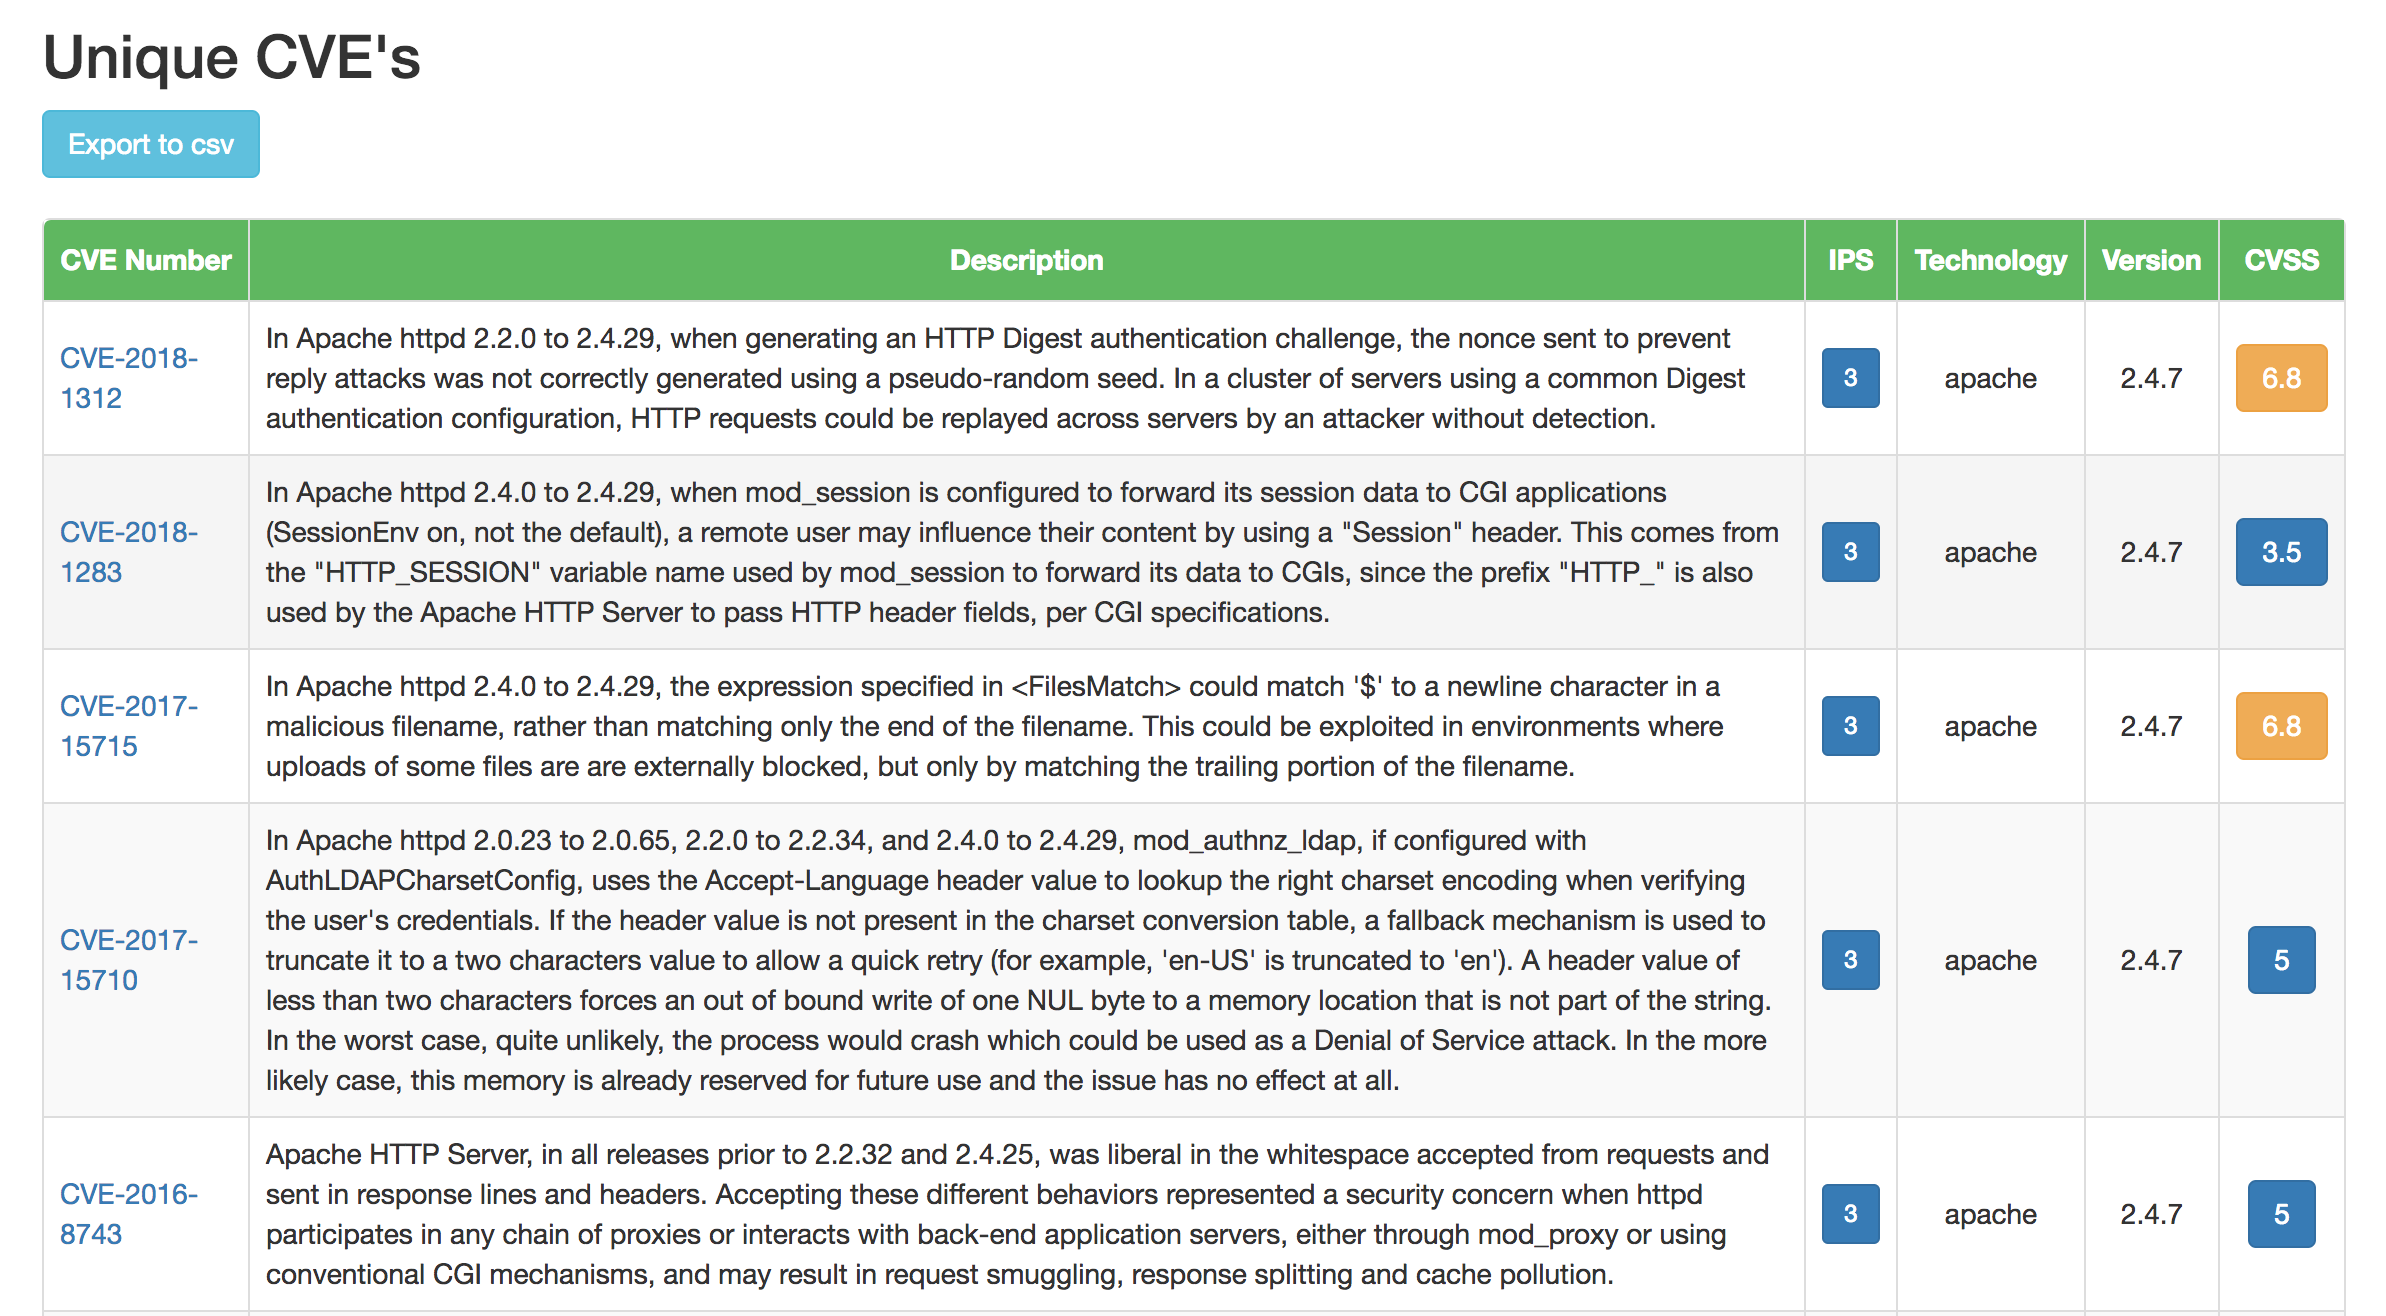
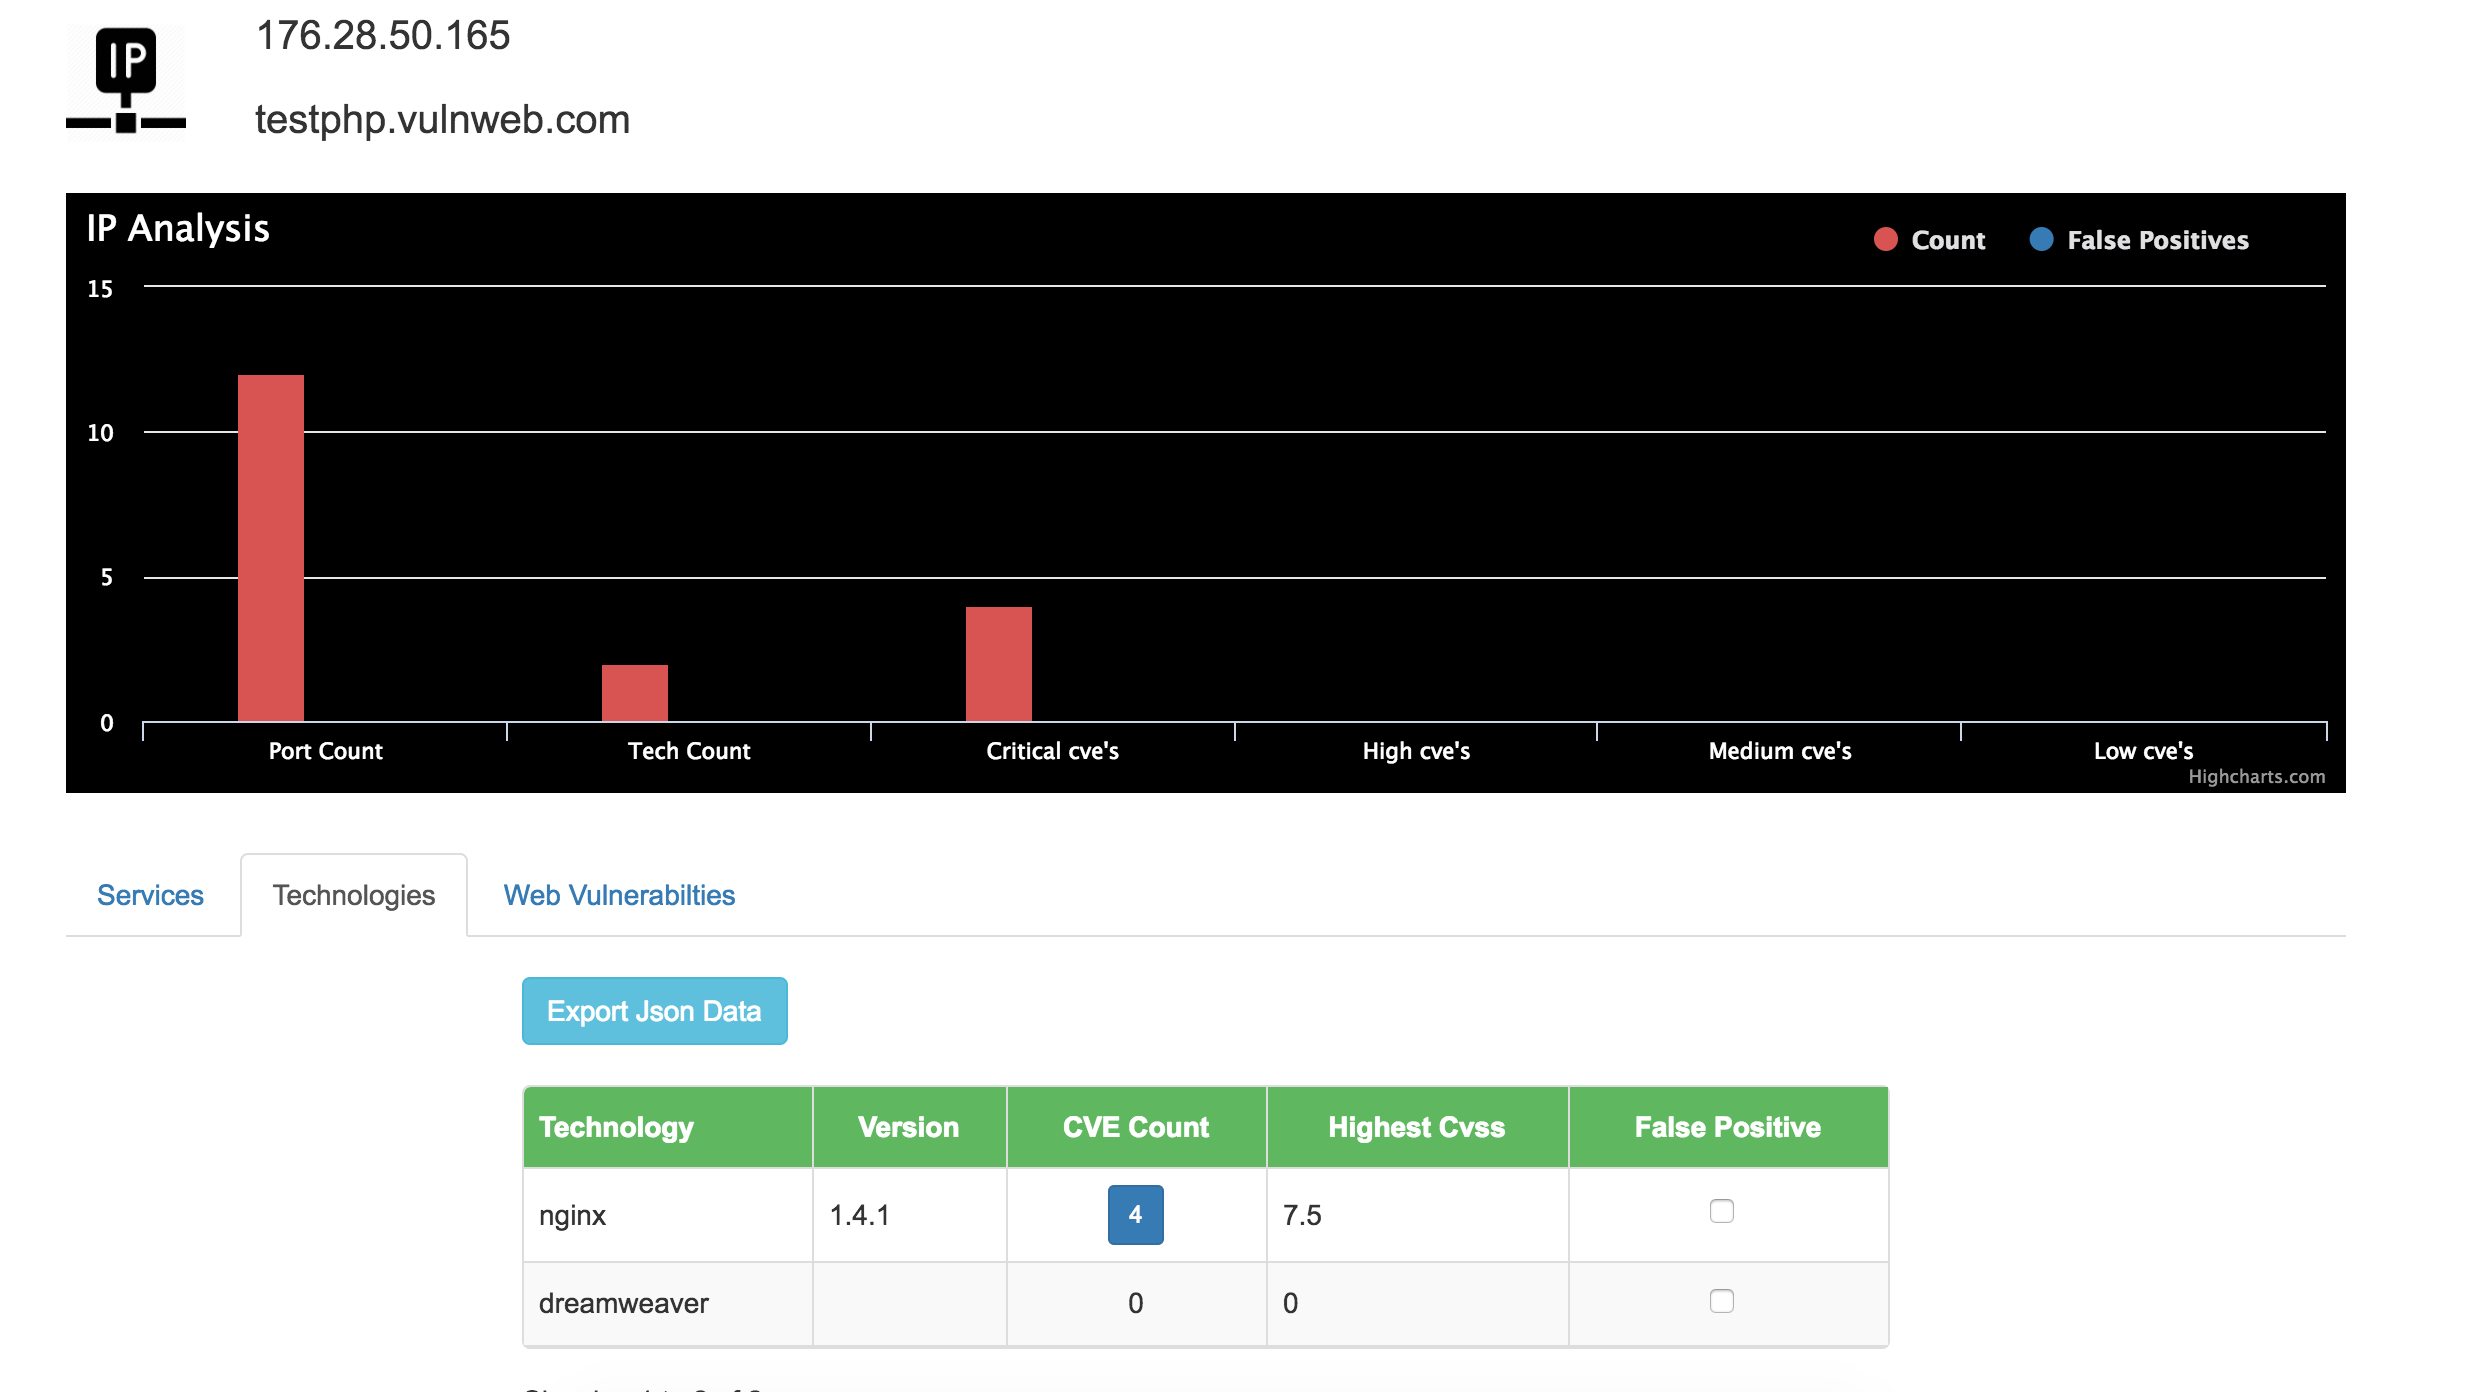
Dashboard Screenshots


Future Enhancements
- The next release of watchdog will also support code scanning. Given a organisation's github link it will perform vulnerability analysis mapping with CVE database.
- More tools to get added to the external scanning engine.
Contribution:
Lead Developer
- Mohan KK @MohanKallepalli
Project Lead
Project Team
Credits
- Flipkart Security Team
- NMAP
- Wapiti
- Skipfish
- Phantalyser
- CVE Search


