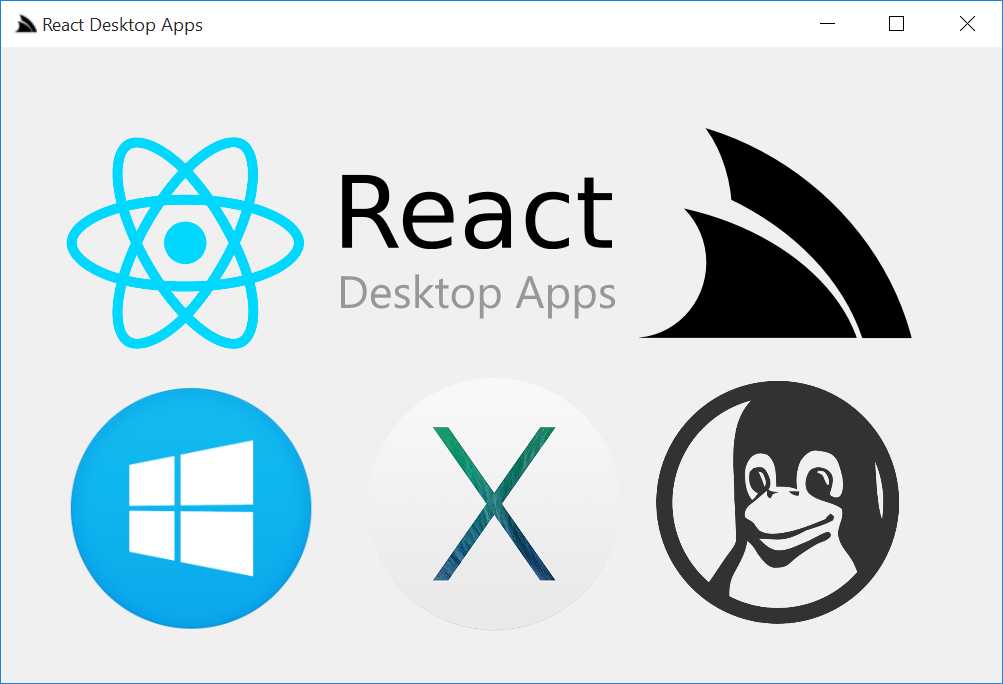
Awesome
React Chat Apps
A port of React Chat built with the new React Desktop Apps VS.NET template which is used to package the ASP.NET React Chat Web App into a native Winforms App on Windows, a Cocoa App on OSX and a cross-platform Console App runnable on Win/OSX/Linux. The primary ASP.NET Web App remains unaffected and includes build task for easy deployments using MS Web Deploy which is used to deploy the reactchatapps.servicestack.net Live Demo.
The template takes advantage of CefSharp on Windows and a Safari WebView on OSX to allow targeting of modern WebKit Browsers whilst integrating within a native application to enable a rich Desktop App User Experience. On Windows, the application is packaged using Squirrel.Windows to have native installation, updates and fast startup from a single distributed Setup.exe and a single packaged executable for OSX.
The React Desktop Apps template is setup ready to deploy to multiple target platforms, just by running a Gulp task after creating our solution, we have 3 working applications from Visual Studio including:
- Web - Ready to deploy.
- Console - Single portable, cross platform executable that utilises the user's default browser.
- Windows - Native Windows application using an embedded browser, packaged ready to be installed/distributed.
Additionally, an OSX project using Xamarin.Mac is generated preconfigured and ready to run! Web resources and services are shared between the Xamarin.Mac and Visual Studio solutions maximizing code reuse and having the ability to hook into native functionality in OSX using Xamarin.Mac.
This template requires the use of Typings 0.8.1+. If you are having problems, please update by running
npm install typings -gto install the latest version.
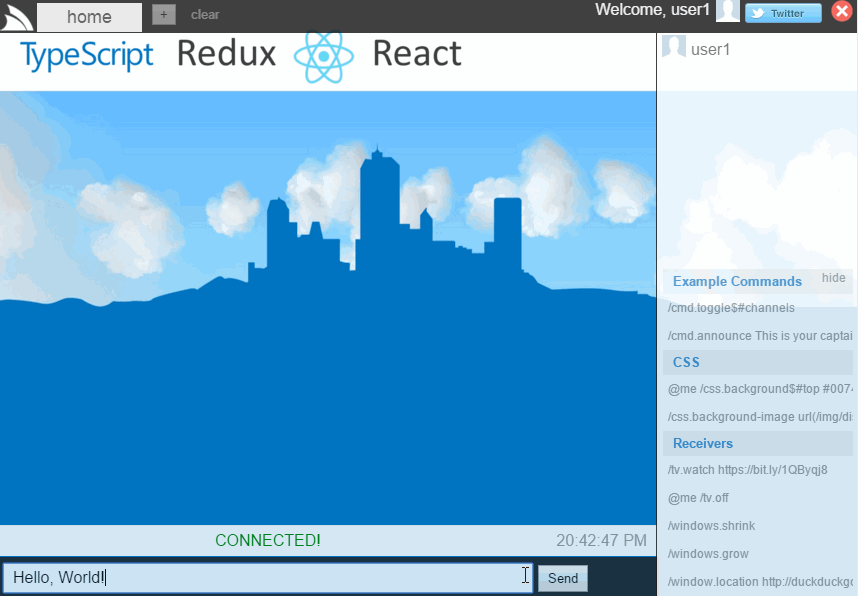
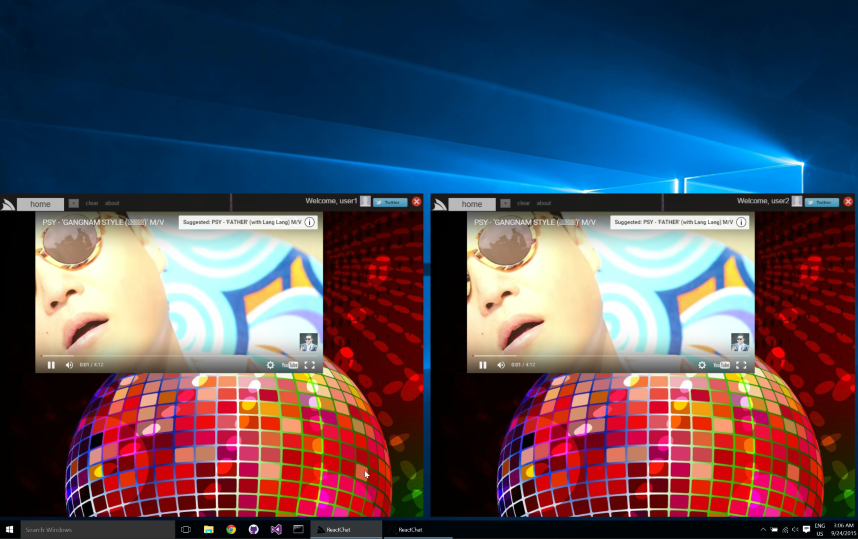
Controlling multiple Windows with Server Events
React Chat uses Server Events for real-time communication with JavaScript, which is able to control
multiple window clients naturally just by having each Windows Application subscribe to the same
remote /event-stream URL. You can do this in React Chat just by opening multiple windows, as all subsequent
Windows Apps opened listen to the self-hosting listener of the first one that was opened.
The /windows.dance chat message provides a nice demonstration of this in action :)
YouTube Live Demo
Downloads
Windows Winforms App
ReactChat Setup.exe (44.3 MB)
OSX Cocoa App
ReactChat.AppMac.mono.app.zip (16.9 MB)
Without Mono Embedded (requires Mono):
ReactChat.AppMac.app.zip (4.51 MB)
Console App (Windows/OSX/Linux)
ReactChat-console.exe (5.33 MB) or DefaultApp-console.zip (1.93MB)
Project Structure
Just like other templates in ServiceStackVS, the React Desktop Apps template provides the same recommended structure as well as 3 additional other projects for producing the Console and WinForms applications.

- ReactChat - Web applicaton which contains all our resources and files used while developing.
- ReactChat.AppConsole* - Console application, launches default browser on users application
- ReactChat.AppWinForms* - WinForms application using CefSharp and Chromium Embedded Framework to output our web application in a native application.
- ReactChat.Resources* - Embedded resources that are used by our AppWinForms and AppConsole application and target of
01-bundle-allGulp task. This project has references to all minified client resources (CSS, JavaScript, images, etc) and includes each of them as an Embedded Resource. - ReactChat.ServiceInterface - Contains ServiceStack services.
- ReactChat.ServiceModel - Contains request/response classes.
- ReactChat.Tests - Contains NUnit tests.
ReactChat Project
This project contains all our development resources, TypeScript/TSX, CSS, images, html/cshtml, etc. This project also has all the required Gulp tasks used for deploying the 3 application outputs. Taking advantage of Visual Studio 2015's Task Runner Explorer, we can look at the Gulp tasks to get an idea of how we can build and deploy our console, winforms and web application.

- default - Gulp task builds and packages all 3 clients (web, console and winforms) ready to be deployed/distributed.
- 01-bundle-all - bundles all the application resources into the
Resourcesproject and intowwwrootto stage the web application for deployment - 02-package-console - bundles and packages the console application and produces the result in
wwwroot_build\appsdirectory. - 03-package-winforms - bundles and packages the winforms application in a distributable installer and saves them in the
wwwroot_build\appsdirectory. - 04-deploy-webapp - bundles, packages and deploys the web application using the
wwwroot_build\publish\config.jsonfile settings and webdeploy to your existing IIS server.
This project also has includes ILMerge to help package the console application ready for release.
The /wwwroot_build folder contains the necessary files required for deployments including:
/wwwroot_build
  /apps                       # output directory of console and winforms applications
  /deploy                     # copies all files in folder to /wwwroot
    appsettings.txt           # production appsettings to override dev defaults
  /publish
    config.json               # deployment config for WebDeploy deployments
  /tools                      # deployment tools for console and winforms applications
    ILMerge.exe			      # ILMerge to merge console app output into single binary
  00-install-dependencies     # runs NPM install and bower install, used when getting started after cloning application
  package-deploy-console.bat  # runs ILMerge to package the console application
The minimum steps to deploy an app is to fill in config.json with the remote IIS WebSite settings as well as a UserName and Password of a User that has permission to remote deploy an app:
{
    "iisApp": "AppName",
    "serverAddress": "deploy-server.example.com",
    "userName": "{WebDeployUserName}",
    "password" : "{WebDeployPassword}"
}
ReactChat.AppConsole
This project is for producing a SelfHost ServiceStack application that utilizes the user's default browser. Combined with the Gulp and ILMerge, we can produce a cross-platform, single executable that has embedded resources used by our application.
This project uses the bundled resources from the web application that are bundled using the Gulp tasks. These resources are embedded in the ReactChat.Resources and the AppHost needs to be configured to look for these embedded resources.
SharedEmbeddedResources is a class in the ReactChat.Resources project so we can easily refer to it's assembly with typeof(SharedEmbeddedResources).Assembly.
For our other resources, we need to set the EmbeddedResourceBaseTypes to both our current project and the ReactChat.Resources using the SharedEmbeddedResources type.
SetConfig(new HostConfig
{
    EmbeddedResourceBaseTypes = { typeof(AppHost), typeof(SharedEmbeddedResources) }
});
We need to specify base types instead of assemblies so their namespaces are preserved once they're ILMerged into a single .exe
ReactChat.AppWinForms
This project utilizes the CefSharp project for embedding a high performing Chromium browser in a WinForms application. This project, also uses the bundled resources from the web application via the ReactChat.Resources project as well being a AppSelfHostBase based application, we need to set the same config as our ReactChat.AppConsole application in the AppHost.
SetConfig(new HostConfig
{
    EmbeddedResourceBaseTypes = { typeof(AppHost), typeof(SharedEmbeddedResources) }
});
To embed the Chromium web browser, we reference the CefSharp.WinForms project and instantiate a ChromiumWebBrowser specifying the applications URL, in this case http://localhost:2337/. When using CefSharp.WinForms reference, ChromiumWebBrowser is a WinForms control that is added to our Form. We also bind FormClosing, FormClosed and Load WinForms events to give the application more of a native feel.
public FormMain()
{
    InitializeComponent();
    VerticalScroll.Visible = false;

    ChromiumBrowser = new ChromiumWebBrowser(Program.HostUrl)
    {
        Dock = DockStyle.Fill
    };

    Controls.Add(ChromiumBrowser);

    Load += (sender, args) =>
    {
        FormBorderStyle = FormBorderStyle.None;
        Left = Top = 0;
        Width = Screen.PrimaryScreen.WorkingArea.Width;
        Height = Screen.PrimaryScreen.WorkingArea.Height;
    };

    ChromiumBrowser.RegisterJsObject("nativeHost", new NativeHost(this));
}
CefSharp also enabled integration between JavaScript and native calls via exposing JavaScript objects that are registered .NET classes. In ReactChat and the React Desktop Apps ServiceStackVS template, we wire a default nativeHost object to show how this can be leveraged. One to simply show a message box when "About" is clicked and the other to close the application. The .NET classes are POCOs that have matching function names with the JavaScript object registered. The default setting is to camel case the JS object following the common naming conventions when using JS.
public class NativeHost
{
    private readonly FormMain formMain;

    public NativeHost(FormMain formMain)
    {
        this.formMain = formMain;
        //Enable Chrome Dev Tools when debugging WinForms
#if DEBUG
        formMain.ChromiumBrowser.KeyboardHandler = new KeyboardHandler();
#endif
    }

    public string Platform
    {
        get { return "winforms"; }
    }

    public void ShowAbout()
    {
        MessageBox.Show(@"ServiceStack with CefSharp + ReactJS", @"ReactChat.AppWinForms", MessageBoxButtons.OK, MessageBoxIcon.Information);
    }

    public void ToggleFormBorder()
    {
        formMain.InvokeOnUiThreadIfRequired(() =>
        {
            formMain.FormBorderStyle = formMain.FormBorderStyle == FormBorderStyle.None
                ? FormBorderStyle.Sizable
                : FormBorderStyle.None;
            formMain.Left = formMain.Top = 0;
            formMain.Width = Screen.PrimaryScreen.WorkingArea.Width;
            formMain.Height = Screen.PrimaryScreen.WorkingArea.Height;
        });
    }
...
The NativeHost class is exposed by CefSharp as a JavaScript object with functions and properties. The NativeHost object is common on all platforms, but the implementation is different to get access to native functionality. For platforms other than AppWinForms, we need to provide the nativeHost JavaScript object via the embedded resource platform.js.
ReactChat.Resources
This project has references to the output files from the 01-bundle-all Gulp task. If any additional images or minified JS/CSS files are added to your project, they must be referenced by this project to be included as an embedded resource for use in both AppConsole and AppWinForms projects. The structure of the project follows what is deployed in the wwwroot project.
/wwwroot
  /css
    app.min.css
  /img              #  all application images
  /lib
    /css            # 3rd party css, eg bootstrap
    /fonts          # 3rd party fonts
    /js             # 3rd party minified JS
      lib.min.js
  app.js            # Result of JSPM bundle of application TypeScript and TSX files
  config.js         # JSPM config.js
  system.js         # JSPM system.js
  default.cshtml/default.html
All files have a Build Action of Embedded Resource so they are ready to be used from AppConsole and AppWinForms.

ReactChat.AppMac
The React Desktop Apps template also generates a Xamarin.Mac project and solution ready to run resuing the shared ServiceInterface, ServiceModel and Resources project. As all the shared web resources are embedded in the Resources dll, the 01-bundle-all stages the output of this project at the solution level under a lib folder.

If you are working across platform and want to update the AppMac project with the latest Resources, a common workflow might be to use Git and commit the lib folder to source control after changes and updating the local repository on an OSX machine to build the AppMac project.
Debugging CSS or JavaScript issues in the AppMac project can be done by using the native webview
Platform specific JavaScript and CSS
As a way to override styles and behaviour, by convention we load platform.js and platform.css. In the React Desktop Apps template these are use to provide or override platform specific hooks/behaviour, eg OSX about dialog.
/* mac */
document.documentElement.className += ' mac';
window.nativeHost = {
    quit: function () {
        $.post('/nativehost/quit');
    },
    showAbout: function () {
    	$.post('/nativehost/showAbout');
    },
    ready: function () {
        //
    },
    platform: 'mac'
};
platform.js and platform.css are included in each native platform project as embedded resource so they can be hosted in the outputed executable or in the case of shared resources, in the Resources project.
For AppWinForms, CefSharp is being used to provide the
nativeHostJavaScript object before page is rendered and the native hooks will be used instead.
Gulp Tasks
Gulp are used in the ReactChat project to automate our bundling, packaging and deployment of the applications. These tasks are declared as small, single responsibility Gulp tasks and then orchestrated using numbered tasks to be able to run these simply either from Visual Studio using the Task Runner Explorer or from the command line.
Including/Copying additional files
To provide an easy way to copy files to wwwroot and Resources project, eg images, fonts etc, a COPY_FILES array is declared at the top of the gulpfile.js where additional assets can be added. Each object added has a src,dest, host and afterReplace.
src* - Can be a single file or wildcard notation supported bygulp.src.dest- Destination folder relative to hosts. Must end with a/.host-webforwwwrootdirectory in main web project ornativeforResourcesproject.afterReplace- find replace object array expectingfromandtoproperties. UsesgulpReplace.
var argv = require('yargs').argv;
var WEB = 'web';
var NATIVE = 'native';

var webBuildDir = argv.serviceStackSettingsDir || './wwwroot_build/';

var COPY_FILES = [
    { src: './bin/**/*', dest: 'bin/', host: WEB },
    { src: './img/**/*', dest: 'img/' },
    { src: './App_Data/**/*', dest: 'App_Data/', host: WEB },
    { src: './Global.asax', host: WEB },
    { src: './jspm_packages/npm/bootstrap@3.2.0/dist/fonts/*.*', dest: 'lib/fonts/' },
    { src: ['./config.js', './platform.js', './platform.css'], dest: '/', host: WEB },
    { src: webBuildDir + 'deploy/*.*', host: WEB },
    {
        src: './web.config',
        host: [WEB],
        afterReplace: [{
            from: '<compilation debug="true" targetFramework="4.5"',
            to: '<compilation targetFramework="4.5"'
        }]
    }
];
01-bundle-all
Just like the AngularJS and React App template, we stage our application ready for release and avoid any build steps at development time to improve the simplicity and speed of the development workflow. This alias task is made up of small, simple tasks that use Gulp to process resources and perform tasks like minification, TSX transformation, copying/deleting of resources, etc.
The bundling searches for assets in any **/*.html file and follows build comments to minify and replace references. This enables simple use of debug JS files whilst still having control how our resources minify.
<!-- build:js system.js -->
<script src="jspm_packages/system.js"></script>
<!-- endbuild -->

<script src="config.js"></script>

<!-- build:remove -->
<script src="deps.lib.js"></script>
<!-- endbuild -->

<!-- htmlbuild:appbundle -->
<!-- endbuild -->

<script src="platform.js"></script>

<script>
    System.import("./src/app");
</script>
Since we are using JSPM and TypeScript/TSX files, when we add new files/components to our application, we don't have to update the default.html as JSPM will pickup any new files used by your application. If you find initial load times are slow due to lots of network requests, run the 00-update-deps-js Gulp task, this will pull in the library dependencies of your application and greatly reduce the number of network requests JSPM will have to perform during your whilst developing locally. See more info in the TypeScript Redux introduction.
02-package-console
This task also performs 01-build-all as well restoring NuGet packages and building the AppConsole project. Once the project resources are ready, it calls the package-deploy-console.bat batch file which, using ILMerge, produces the stand alone exe of the console application and copies it to apps output directory.
SET STAGING=staging-console

...

MD %STAGING%

SET TOOLS=.\tools
SET OUTPUTNAME=ReactChat.Console.exe
SET ILMERGE=%TOOLS%\ILMerge.exe
SET RELEASE=..\..\ReactChat.AppConsole\bin\x86\Release
SET INPUT=%RELEASE%\ReactChat.AppConsole.exe
SET INPUT=%INPUT% %RELEASE%\ReactChat.Resources.dll
SET INPUT=%INPUT% %RELEASE%\ReactChat.ServiceInterface.dll
SET INPUT=%INPUT% %RELEASE%\ReactChat.ServiceModel.dll
SET INPUT=%INPUT% %RELEASE%\ServiceStack.dll
SET INPUT=%INPUT% %RELEASE%\ServiceStack.Text.dll
SET INPUT=%INPUT% %RELEASE%\ServiceStack.Client.dll
SET INPUT=%INPUT% %RELEASE%\ServiceStack.Common.dll
SET INPUT=%INPUT% %RELEASE%\ServiceStack.Interfaces.dll
SET INPUT=%INPUT% %RELEASE%\ServiceStack.Server.dll
SET INPUT=%INPUT% %RELEASE%\ServiceStack.OrmLite.dll
SET INPUT=%INPUT% %RELEASE%\ServiceStack.Redis.dll

%ILMERGE% /target:exe /targetplatform:v4,"C:\Program Files (x86)\Reference Assemblies\Microsoft\Framework\.NETFramework\v4.5" /out:%STAGING%\%OUTPUTNAME% /ndebug %INPUT%

IF NOT EXIST apps (
MD apps
)

COPY /Y .\%STAGING%\%OUTPUTNAME% .\apps\
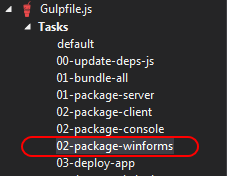
03-package-winforms
This task also performs 01-build-all as well restoring NuGet packages and building the AppWinForms project. Once the project resources are ready, it uses Squirrel.Windows to package your application into a Windows installer Setup.exe and places it in wwwroot_build/apps. The resultant Setup.exe and related NuGet package files are used to handle installation and updating client application.
![]()
The template is already setup to easily enable auto updates for your application using Squirrel.Windows and GitHub Releases. Once you've created a project from the React Desktop Apps template, we need to change two pieces of config within the App.config in the Host.AppWinForms project, specifically EnableAutoUpdate to true and UpdateManagerUrl to your GitHub project URL (exclude the trailing slash).
<configuration>
  ...
  <appSettings>
    <add key="EnableAutoUpdate" value="true" />
    <add key="UpdateManagerUrl" value="https://github.com/{Name}/{AppName}"/>
  </appSettings>
</configuration>
To package the Windows application we can use a preconfigured Gulp task called 02-package-winforms. This will build all the required resources for your application and package them into a Setup.exe Windows installer. These files are located in the main project under wwwroot_build\apps\winforms-installer. The Releases folder contains all the distributables of your Windows application.
MyReactApp
\wwwroot_build
  \apps
    \winforms-installer
      \Releases
        \MyReactApp-1.0.0.0-full.nupkg
        \RELEASES
        \Setup.exe
To publish your initial version to GitHub, create a Release in GitHub and upload these 3 files in your releases folder.

Steps to update your application, eg to 1.1, would be the following.
-
- Update the version of the AppWinForms project, either directly in
Properties/AssemblyInfo.csor through Project properties GUI.
- Update the version of the AppWinForms project, either directly in
-
- Save changes and run the
02-package-winformsGulp task.
- Save changes and run the
-
- Commit your changes and push them to GitHub. (This is required due to the new tag needs to be on a different commit)
-
- Create a new GitHub release and include the same 3 files, plus the delta NuGet package. Clients running
1.0.0.0will detect the new version and updates can be easily managed with Squirrel.Windows.
- Create a new GitHub release and include the same 3 files, plus the delta NuGet package. Clients running
During step 2 your new version is picked up by the Gulp task and Squirrel creates a delta NuGet package, eg
MyReactApp-1.1.0.0-delta.nupkgwhich will be used for quick updates to clients on the previous version (1.0).

Users that have installed version 1.0.0.0 will see a prompt already setup in the template that asks to update the application. By clicking update, the delta of 1.1.0.0 is downloaded and applied, then the application is restarted running the newer version of the application.

04-deploy-webapp
This Gulp task uses the same conventions as those found in the AngularJS and ReactApp template in ServiceStackVS. WebDeploy is used to deploy the application from the staged wwwroot folder to an existing IIS application. Config for the deployment, eg the IIS Server address, application name, username and password is located in the /wwwroot_build/publish/config.js.
{
    "iisApp": "YourAppName",
    "serverAddress": "deploy-server.example.com",
    "userName": "{WebDeployUserName}",
    "password" : "{WebDeployPassword}"
}
If you are using Github's default Visual Studio ignore, this file will not be included in source control due to the default rule of publish/ to be ignored. You should check your Git Repository .gitignore rules before committing any potentially sensitive information into public source control.
This task shows a quick way of updating your development server quickly after making changes to your application. For more information on use web-deploy using either Gulp or just Visual Studio publish, see WebDeploy with AWS.