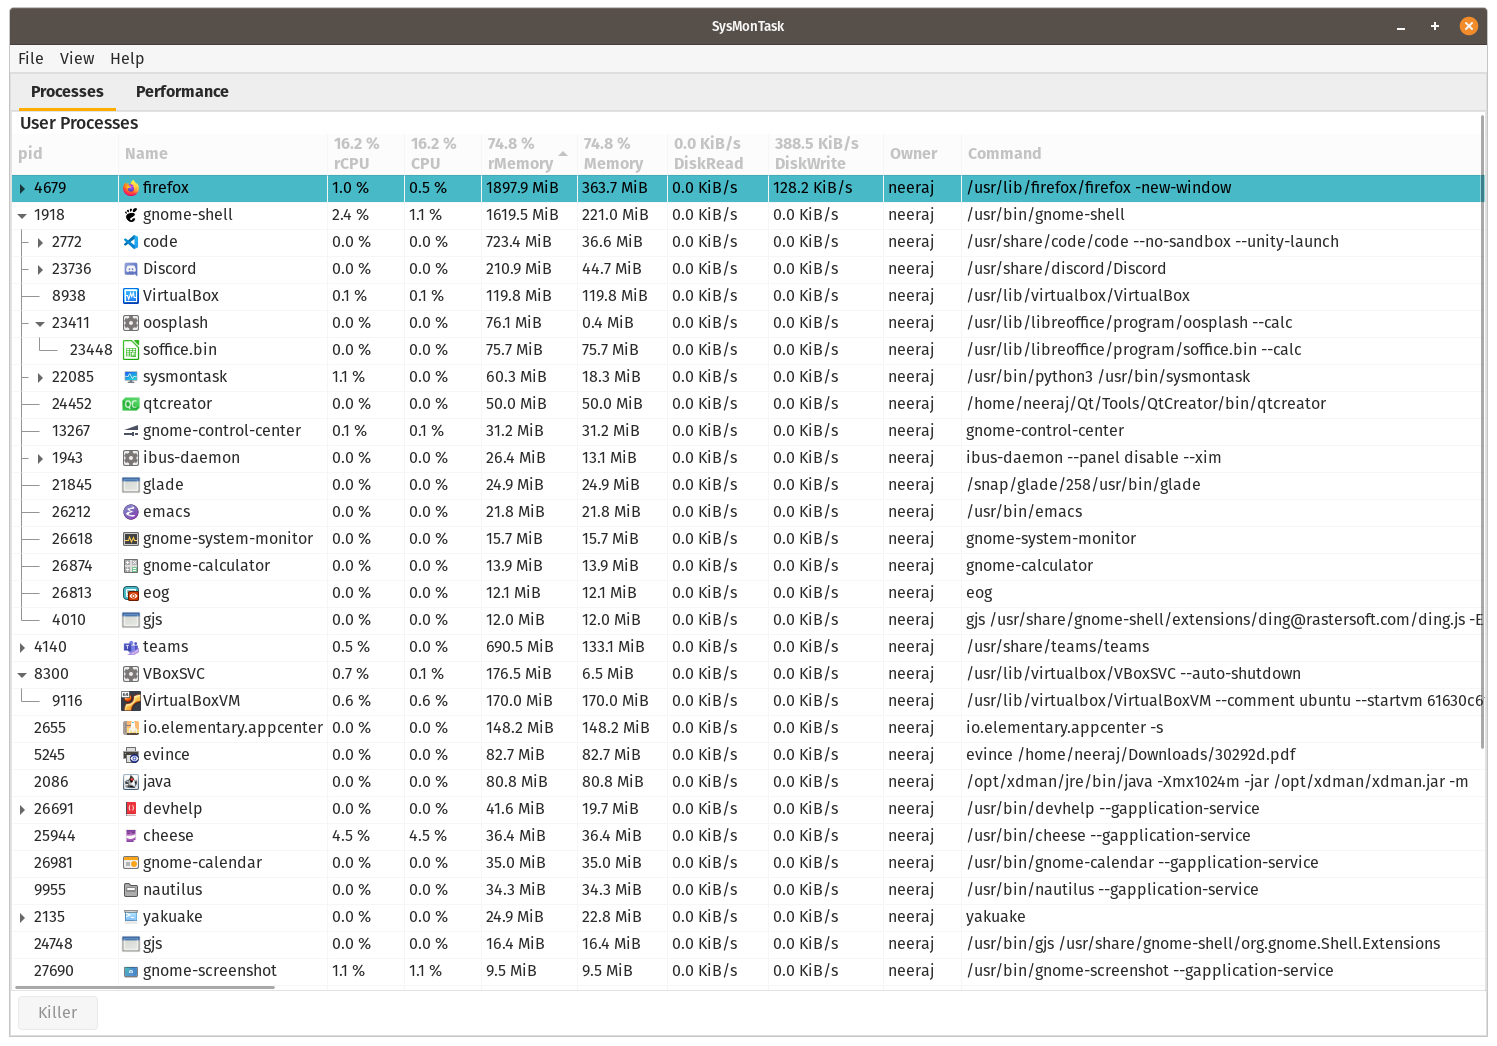
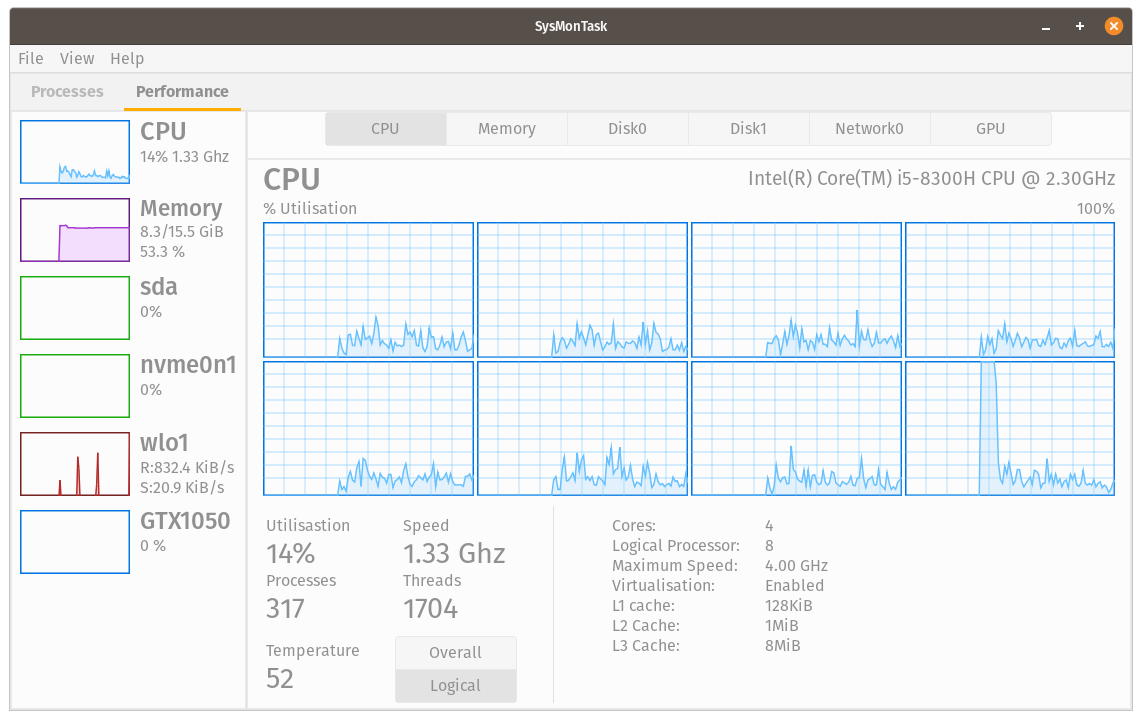
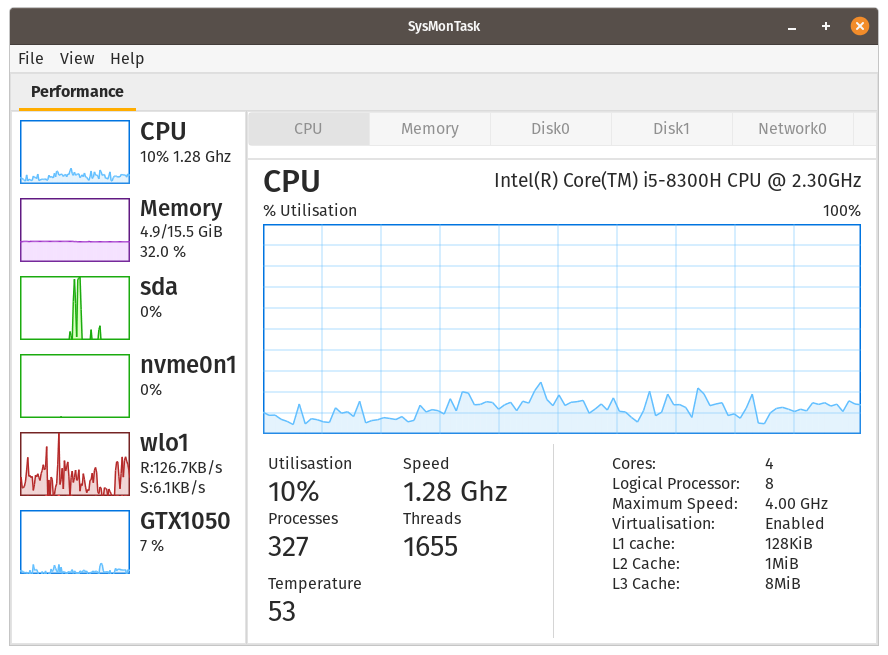
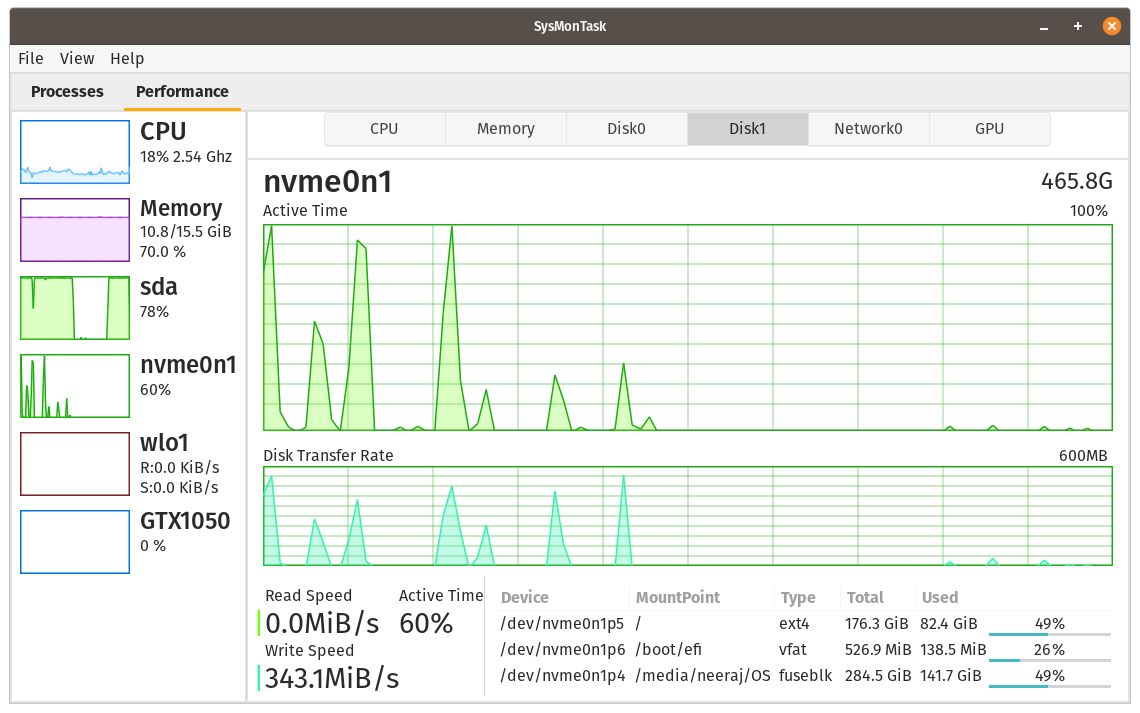
Awesome
SysMonTask <img align="right" width="100" height="100" src="https://user-images.githubusercontent.com/48773008/108200308-4d170080-7144-11eb-8354-0c528c7b1ac2.png">
<p align="left"> <a href="https://github.com/KrispyCamel4u/SysMonTask/commit-activity"> <img src="https://img.shields.io/badge/Maintained%3F-yes-green.svg"> </a> <a href="https://github.com/KrispyCamel4u/SysMonTask/tags/"> <img src="https://img.shields.io/github/v/tag/KrispyCamel4u/SysMonTask.svg"> </a> <a href="https://github.com/KrispyCamel4u/SysMonTask/master/LICENSE"> <img src="https://img.shields.io/github/license/KrispyCamel4u/SysMonTask.svg"> </a> <a href="https://github.com/KrispyCamel4u"> <img src="https://img.shields.io/badge/Need%20help%3F-Ask-27B89C"> </a> </p>Linux system monitor with the compactness and usefulness of Windows Task Manager to allow higher control and monitoring.
Important
Next major SysMonTask (v2) will be released with new architectural/backend changes to improve the code and performance with new features. Until, v1.x.x will follow a rolling release model where no new major feature will be added but fixes of buges will be provided.
Get A Glance Of The New Features
Installation
[need help in making a package for Suse, Redhat]
#Ubuntu and Its Family**(only for: 18.04, 20.04, 21.04, 21.10 and equivalent)**, run:
$ sudo add-apt-repository ppa:camel-neeraj/sysmontask
$ sudo apt install sysmontask
// Install psutil if Ubuntu<=20.04, other-wise skip this step(more info given below) :
$ sudo pip3 install -U psutil
$ sysmontask   // optional to run via terminal but recommended for the first time
Alternatively, if you don't want to add the PPA (Personal Package Archives) then download the binaries from releases, and install by double-clicking on it.
Note: Some information such as Memory static details(slots, Frequency) and Disk IO(disk usage per process) for the other user's processes(including root) requires root access, hence to run with root access:
$ sudo sysmontask
For Ubuntu<=20.04(for others it will be installed automatically), psutil will not be installed automatically with sysmontask(python3-psutil doesn't meet the version requirements), hence install with:
$ sudo apt install python3-pip  // skip if you already have pip3 installed
$ pip3 install psutil          // if you're not planning to use it with root access
  OR
$ sudo pip3 install -U psutil  // needed to run sysmontask with root access, hence recommended
#Arch Based:
Using any AUR helper tools like Yay:
$ yay -S sysmontask
Or, Manually:
$ git clone https://aur.archlinux.org/sysmontask.git
$ cd sysmontask
$ makepkg -si
$ sysmontask
Or, Install using pamac(gui for software add/remove), first enable the AUR(arch user repository) in preferences, then search sysmontask, install and enjoy.
#Fedora:
Available in official Fedora repos.
$ sudo dnf install sysmontask
#Installing From Source
Install the dependencies required, mentioned in the requirments.md. In case of issue related to PyGoject or pycairo OR to get the command for the specific package manager, follow the link given in requirements.md .
While installing from source, pip automatically installs some of the packages(which can be installed using pip) required others need to be installed using package manager.
After installing dependencies:
$ git clone https://github.com/KrispyCamel4u/SysMonTask.git
$ cd SysMonTask
$ sudo python3 setup.py install
$ sysmontask
It will install it in "/usr/local/lib/python<version>/dist-packages/". To uninstall it run the uninstall.sh script in the SysMonTask cloned directory, with:
$ ./uninstall.sh
  Done
Note: For Nvidia GPUs, nvidia-smi needs to be installed. Check if nvidia-smi is installed by running:
$ nvidia-smi
If not then install it for your system (generally it is automatically installed with Nvidia proprietary drivers).
Then start application from the menu or by the command "sysmontask" (recommended only in case of error/crashed) on terminal.
Hurray, you're good to go in understanding capabilities of your system:)
What's New: 

v1.x.x
[Enhancements]
- [#50] Color Customizations: Color of each devices can be changed now.
- [#61]Show/Hide Devices: Uninterested devices can be made hidden.
[Bug Fix]
- [#56,#57] Unneeded Column name, Better space management.
- [#58] Running it with superuser permission doesn't use the right theme, theme API bug.
- [#60] For some people Nvidia GPU usage is not showing and GPU graphs don't work.
- [#62] CPU cache NA value and Wifi adapter NA.
- [#63] Error trying to open sysmontask: Handling of large number of cores.
- [#64] SSD usage sometimes goes to 103%
- [#65,#76] Ubuntu hirsute release does not have a release file, Support 21.04.2
- [#72] Process Menu Need to Refresh Manually and Not Working: Python dictionary reverse error.
Previous Highlights
<details> <summary>Filter Dialog (Customisable Process Filtering Utility)</summary>Highly Customisable fearure to preicisely pin-point the unwanted process to filter them out. Can be accesed from View->Filter
Strict Syntex and semantic need to be followed to use it, Hence Must Read the Docs to use it
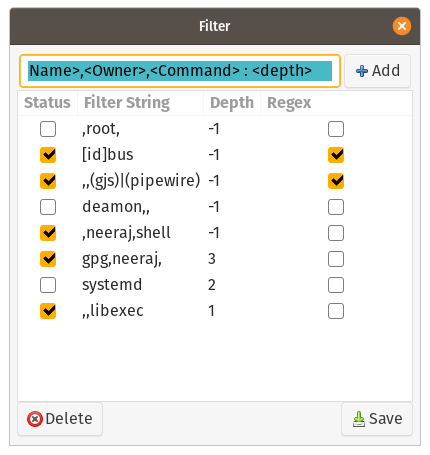
A simple TYPE:I use given below:
To filter out process which contains a peculiar word in its Name, Owner and Command, add the word in Filter as given below:
<word>:1
NOTE: Using without Filter will show all the processes. Since python is not a Fast executing language, the CPU utilisation will be more than 1% in steady state. Using Filter to remove all root process reduces the burden a improved performance can be seen. Hence for low end systems use FILTER.
</details> <details> <summary>Process Log Record and Log Plot</summary>Process performance metrics can be recorded as Logs in $HOME/sysmontask_log directory using Record button on selected process and can be visualised using Log_Plot. Read More
Record

Log_Plot utility uses matplotlib(python3-matplotlib) and it is not installed automatically. To use it install matplotlib via pip3 or pacakge manager.
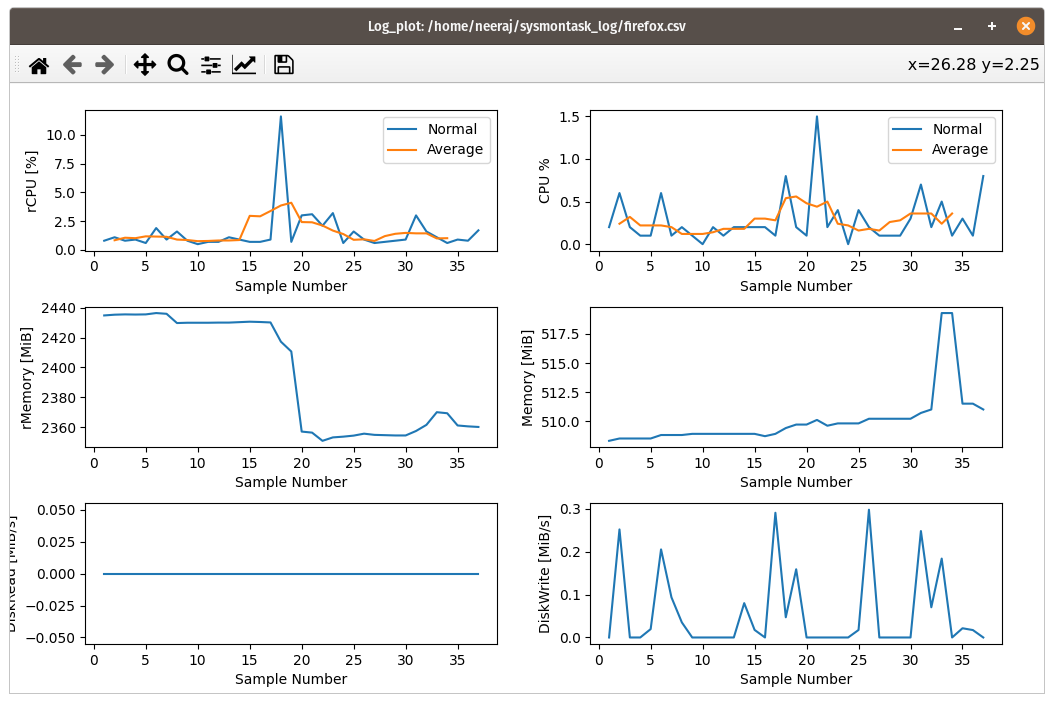
- Processes filtering for user for fast look-ups. (Read More).
- rCPU, rMemory (recursive-CPU,recursive-Memery) columns. (Read More).
Theme Settings
By Default sysmontask will use the system-wide setting for themes. If you use any of dark theme(dark mode), that dark theme(dark mode) will be applied to sysmontask. If you use any of light theme(default/light mode), that light theme(default/light mode) will be used by sysmontask.
To Force apply a particular available theme(light or dark) regardless of system-wide theme, use the below commands:
$ sudo sysmontask.set_light
  0 : Raleigh
  1 : HighContrast
  2 : Pop
  3 : Default
  4 : Adwaita
  5 : Emacs
  Index for Corresponding Theme that you want to apply?:2
  Setting of Light Theme Done:)
$ sudo sysmontask.set_dark
  0 : Pop-dark
  1 : Adwaita-dark
  Index for Corresponding Theme that you want to apply?:0
  Setting of Dark Theme Done:)
This setting will be permanent. If you want to revert back to system-wide theme settings for sysmontask, run:
$ sudo sysmontask.set_default
  Setting done:)
Highlights
