Awesome
Emacs for You (Emfy)
This project provides a tiny init.el file to set up Emacs quickly.
This document provides a detailed description of how to set it up and
get started with Emacs.
Further this project also provides a tiny convenience command named
em to start Emacs server and edit files using Emacs server. This
helps in using Emacs efficiently. This script and its usage is
explained in detail later in the Emacs Server and
Emacs Launcher sections. Here is how the Emacs
environment is going to look after setting up this project:
If you are already comfortable with Emacs and only want to understand
the content of init.el or em, you can skip ahead directly to
the Line-by-Line Explanation section that
describes every line of these files in detail.
Contents
- Who Is This For?
- Features
- Get Started
- Step-by-Step Usage
- Useful Terms
- Line-by-Line Explanation
- Tweak UI
- Dark Theme
- Highlight Parentheses
- Minibuffer Completion
- Show Stray Whitespace
- Require Final Newline
- Single Space for Sentence Spacing
- Indentation
- Keep Working Directory Tidy
- Custom Command and Key Sequences
- Emacs Server
- Install Packages
- Configure Paredit
- Configure Rainbow Delimiters
- End of File
- Emacs Launcher
- Opinion References
- Channels
- License
- See Also
Who Is This For?
Are you an absolute beginner to Emacs? Are you so new to Emacs that
you do not even have the ~/.emacs.d/ directory on your file system?
Have you come across recommendations to use starter kits like Doom
Emacs, Spacemacs, etc. but then you wondered if you could use vanilla
Emacs and customise it slowly to suit your needs without having to
sacrifice your productivity in the initial days of using Emacs? Do
you also want your Emacs to look sleek from day zero? If you answered
"yes" to most of these questions, then this project is for you.
The init.el file in this project provides a quick way to get
started with setting up your Emacs environment. This document
explains how to do so in a step-by-step manner. This document also
explains the content of init.el and em in a line-by-line
manner.
Note that many customisations in the Emacs initialisation file available in this project are a result of the author's preferences. They may or may not match others' preferences. They may or may not suit your taste and requirements. Wherever applicable, the pros and cons of each customisation and possible alternatives are discussed in this document. You are encouraged to read the line-by-line explanation that comes later in this document, understand each customisation, and modify the initialisation file to suit your needs.
Features
This project provides a file named init.el that offers the
following features:
- Disable a few UI elements to provide a clean and minimal look-and-feel.
- Show current column number in the mode line.
- Load a dark colour theme named Wombat.
- Customise the colour theme to accentuate the cursor, comments, and search matches.
- Highlight matching parentheses.
- Enable Fido mode for automatic completion of minibuffer input.
- Show trailing whitespace at the end of lines clearly.
- Show trailing newlines at the end of buffer clearly.
- Show missing newlines at the end of buffer clearly.
- Always add a newline automatically at the end of a file while saving.
- Use single spacing convention to end sentences.
- Use spaces, not tabs, for indentation.
- Configure indentation settings according to popular coding conventions.
- Move auto-save files and backup files to a separate directory to keep our working directories tidy.
- Do not move original files while creating backups.
- Provide examples of user-defined custom commands and a few custom key sequences.
- Start Emacs server automatically, so that terminal users can use Emacs client to edit files with an existing instance of Emacs.
- Custom command to install configured packages conveniently.
- Install Markdown mode for convenient editing of Markdown files.
- Install and configure Paredit for editing S-expressions efficiently.
- Install and configure Rainbow Delimiters to colour parentheses by their nesting depth level.
Additionally, this project also provides a convenience command named
em that is a thin wrapper around the emacs and emacsclient
commands. It offers the following features:
- Start a new instance of Emacs when requested.
- Open files in an existing Emacs server if a server is running already.
- Automatically start a new Emacs server if a server is not running already.
All of these features along with every line of code that enables these features are explained in the sections below.
Get Started
This section helps you to set up Emfy quickly and see what the end result looks like. Perform the following steps to get started:
-
Install Emacs 28.1 or later.
On macOS, enter the following command if you have Homebrew:
brew install --cask emacsOn Debian, Ubuntu, or another Debian-based Linux system, enter the following command:
sudo apt-get install emacsFor other environments, visit https://www.gnu.org/software/emacs/ to see how to install Emacs.
-
Copy the Emacs initialisation file
init.elprovided here to your home directory. Here is an examplecurlcommand that does this:mkdir ~/.emacs.d curl -L https://github.com/susam/emfy/raw/main/init.el >> ~/.emacs.d/init.elHere is another alternative that copies the initialisation file to an XDG-compatible location as follows:
mkdir -p ~/.config/emacs
curl -L https://github.com/susam/emfy/raw/main/init.el >> ~/.config/emacs/init.el
Some Emacs users who have been using Emacs for a long time like to keep the initialisation file at its traditional location illustrated below:
curl -L https://github.com/susam/emfy/raw/main/init.el >> ~/.emacsEmacs can automatically load the Emacs initialisation file from any of the paths used above. See section The Emacs Initialisation File of the Emacs manual for more details about this.
-
Copy the Emacs launcher script
emprovided here to some directory that belongs to yourPATHvariable. For example, here are a few commands that download this script and place it in the/usr/local/bin/directory:curl -L https://github.com/susam/emfy/raw/main/em > /tmp/em sudo mv /tmp/em /usr/local/bin/em chmod +x /usr/local/bin/emThe usefulness of this launcher script will be explained in the section Emacs Launcher later.
-
Install packages configured in Emfy:
emacs --eval '(progn (install-packages) (kill-emacs))'We will see how this command works later in the section Install Packages.
On macOS, you may receive the following error message in a dialog box: '“Emacs.app” can’t be opened because Apple cannot check it for malicious software.' To resolve this issue, go to Apple menu > System Preferences > Security & Privacy > General and click "Open Anyway".
-
Start Emacs:
emacs
Now that your environment is setup, read the next section to learn how to use this environment in more detail.
Step-by-Step Usage
Use Emacs
Emacs is a very powerful and extensible editor. It comes with over 10,000 built-in commands. A small section like this can barely scratch the surface of Emacs. Yet, this section makes a modest attempt at getting you started with Emacs and then provides more resources to learn further. Perform the following steps to get started:
-
Start Emacs:
emacs -
Within Emacs, enter the following command to open a file, say,
hello.txt:C-x C-f hello.txt RETA new buffer to edit
hello.txtis created. If a file with that name already exists on your file system, then it loads the content of the file into the buffer.Note that in the Emacs world (and elsewhere too), the notation
C-denotes the <kbd>ctrl</kbd> modifier key. ThusC-xdenotes <kbd>ctrl</kbd>+<kbd>x</kbd>.The notation
RETdenotes the <kbd>enter</kbd> or <kbd>return</kbd> key.Typing consecutive
C-key sequences can be optimised by pressing and holding down the <kbd>ctrl</kbd> key, then typing the other keys, and then releasing the <kbd>ctrl</kbd> key. For example, to typeC-x C-f, first press and hold down <kbd>ctrl</kbd>, then type <kbd>x</kbd>, then type <kbd>f</kbd>, and then release <kbd>ctrl</kbd>. In other words, think ofC-x C-fasC-(x f). This shortcut works for other modifier keys too. -
Now type some text into the buffer. Type out at least 3-4 words. We will need it for the next two steps.
-
Move backward by one word with the following key sequence:
M-bThe notation
M-denotes the meta modifier key. The above command can be typed with <kbd>alt</kbd>+<kbd>b</kbd> or <kbd>option</kbd>+<kbd>b</kbd> or <kbd>esc</kbd> <kbd>b</kbd>.If you face any issue with the <kbd>alt</kbd> key or the <kbd>option</kbd> key, read Emacs Wiki: Meta Key Problems.
-
Now move forward by one word with the following key sequence:
M-f -
The
C-gkey sequence cancels the current command. This can be used when you mistype a command and want to start over or if you type a command partially, then change your mind and then you want to cancel the partially typed command. Try out these examples:C-x C-f C-gC-x C-g -
Save the buffer to a file on the file system with this command:
C-x C-s -
Quit Emacs:
C-x C-c
Now you know how to start Emacs, open a file, save it, and quit.
Improve your Emacs knowledge further by taking the Emacs tutorial that
comes along with Emacs. In Emacs, type C-h t to start the tutorial.
The key bindings to perform various operations like creating file, saving file, quitting the editor, etc. may look arcane at first, but repeated usage of the key bindings develops muscle memory soon and after having used them for a few days, one does not even have to think about them. The fingers do what the mind wants effortlessly due to muscle memory.
While you are getting used to the Emacs key bindings, keep this GNU Emacs Reference Card handy. Also, if you are using it in GUI mode, then the menu options can be quite helpful.
Use Paredit
Paredit helps in keeping parentheses balanced and also in performing structured editing of S-expressions in Lisp code. It provides a powerful set of commands to manipulate S-expressions in various ways. Perform the following steps to get started with Paredit:
-
Run Emacs:
emacs -
Open an Emacs Lisp source file:
C-x C-f foo.el -
Type the following code only:
(defun square (xAt this point, Paredit should have inserted the two closing parentheses automatically. The code should look like this:
(defun square (x))
                -
The cursor should be situated just after the parameter
x. The underbar shows where the cursor should be. -
Type the closing parentheses now. Yes, type it even if the closing parenthesis is already present. The cursor should now skip over the first closing parenthesis like this:
(defun square (x))
                 -
Of course, there was no need to type the closing parenthesis because it was already present but typing it out to skip over it is more efficient than moving over it with movement commands. This is, in fact, a very nifty feature of Paredit. We can enter code with the same keystrokes as we would without Paredit.
-
Now type <kbd>enter</kbd> to insert a newline just before the last parenthesis. A newline is inserted like this:
(defun square (x) ) - -
Now type only this:
(* x xAgain, Paredit would insert the closing parenthesis automatically. The code should look like this now:
(defun square (x)
  (* x x))
        -
There is a lot more to Paredit than this. To learn more, see The Animated Guide to Paredit.
Note: While many Lisp programmers find Paredit very convenient and powerful while manipulating S-expressions in Lisp code, there are a few people who do not like Paredit because they find the Paredit behaviour intrusive. See the Opinion References section for more discussion on this topic.
Evaluate Emacs Lisp Code
The previous section shows how to write some Emacs Lisp code and how Paredit helps in keeping the parentheses balanced. In this section, we will see how to execute some Emacs Lisp code.
-
Run Emacs:
emacs -
Open an Emacs Lisp source file:
C-x C-f foo.el -
Enter the following code:
(defun square (x) (* x x)) -
With the cursor placed right after the last closing parenthesis, type
C-x C-e. The name of the function defined should appear in the echo area at the bottom. This confirms that the function has been defined. -
Now add the following code to the Emacs Lisp source file:
(square 5) -
Once again, with the cursor placed right after the last closing parenthesis, type
C-x C-e. The result should appear in the echo area at the bottom.
Use Rainbow Delimiters
There is not much to learn about using Rainbow Delimiters. In the previous sections, you must have seen that as you type nested parentheses, each parenthesis is highlighted with a different colour. That is done by Rainbow Delimiters. It colours each parenthesis according to its nesting depth level.
Note: Not everyone likes Rainbow Delimiters. Some people find parentheses in multiple colours distracting. See the Opinion References section for more discussion on this topic.
Useful Terms
In this section, we clearly describe a few terms that we use later in this document.
-
Frame: The Emacs manual uses the term frame to mean a GUI window, or a region of the desktop, or the terminal where Emacs is displayed. We do not call it window in Emacs parlance because the term "window" is reserved for another element discussed further below in this list.
-
Menu bar: An Emacs frame displays a menu bar at the very top. It allows access to commands via a series of menus.
-
Echo area: An Emacs frame displays an echo area at the very bottom. The echo area displays informative messages.
-
Minibuffer: The echo area is also used to display the minibuffer, a special buffer where we can type and enter arguments to commands, such as the name of a file to be edited after typing the key sequence
C-x C-f. -
Tool bar: On a graphical display, a tool bar is displayed directly below the menu bar. The tool bar contains a row of icons that provides quick access to several editing commands.
-
Window: The main area of the frame between the menu bar or the tool bar (if it exists) and the echo area contains one or more windows. This is where we view or edit files. Each window displays a buffer, i.e., the text or graphics we are editing or viewing. By default, only one window is displayed when we start Emacs. We can split this main area into multiple windows using key sequences like
C-x 2,C-x 3, etc. and then open different files or buffers in different windows. -
Mode line: The last line of each window is a mode line. It displays information about the buffer. For example, it shows the name of the buffer, the line number at which the cursor is currently present, etc.
-
Scroll bar: On a graphicaly display, a scroll bar is displayed on one side which can be used to scroll through the buffer.
There are many other peculiar terms found in the world of Emacs such as the term point to refer to the current location of the cursor, the term kill to cut text, the term yank to paste text, etc. but we will not discuss them here for the sake of brevity. The meanings of most such terms become obvious from the context when you encounter them. The terms described above should be sufficient to understand the line-by-line explanation presented in the next section.
Line-by-Line Explanation
This section explains the init.el file provided here line-by-line.
Tweak UI
The first few lines in our init.el merely tweak the Emacs user
interface. These are of course not essential for using Emacs.
However, many new Emacs users often ask how to customise the user
interface to add a good colour scheme and make it look minimal, so
this section indulges a little in customising the user interface.
Here is a line-by-line explanation of the UI tweaks in init.el:
-
When Emacs runs in a GUI window, by default, it starts with a menu bar, tool bar, and scroll bar. Some users like to hide them in order to make the Emacs frame look clean and minimal. The following lines disable the tool bar and scroll bar. The menu bar is left enabled.
(when (display-graphic-p)
  (tool-bar-mode 0)
  (scroll-bar-mode 0))
The
whenexpression checks if Emacs is running with graphic display before disabling the tool bar and scroll bar. Without thewhenexpression, we get the following error on Emacs without graphic display support:Symbol's function definition is void: tool-bar-mode. An example of Emacs without graphics support isemacs-noxon Debian 10. Note that this is only an author's preference. You may comment out one or more of these lines if you want to retain the tool bar or scroll bar.Some users like to hide the menu bar as well. To disable the menu bar, include
(menu-bar-mode 0)as top-level-expression (i.e., outside thewhenexpression) in the initialisation file. Even with the menu bar disabled, the menu can be accessed anytime by typing<f10>. For beginners to Emacs, it is advisable to keep the menu bar enabled because it helps in discovering new features. -
Inhibit the startup screen with the
Welcome to GNU Emacsmessage from appearing:(setq inhibit-startup-screen t)If you are a beginner to Emacs, you might find the startup screen helpful. It contains links to tutorial, manuals, common tasks, etc. If you want to retain the startup screen, comment this line out.
-
Show column number in the mode line:
(column-number-mode)By default, Emacs shows only the current line number in the mode line. For example, by default, Emacs may display something like
L4in the mode line to indicate that the cursor is on the fourth line of the buffer. The above Emacs Lisp code enables column number display in the mode line. With column number enabled, Emacs may display something like(4,0)to indicate the cursor is at the beginning of the fourth line.
Dark Theme
In this section, we will choose a dark theme for Emacs. If you do not like dark themes, you might want to stick with the default theme, choose another theme, or skip this section.
-
Load a beautiful dark colour theme known as
wombat:(load-theme 'wombat)If you want to check the other built-in themes, type
M-x customize-themes RET. A new window with a buffer named*Custom Themes*appear. In this buffer, select any theme you want to test. After you are done testing, you can close this new window withC-x 0.By default the Wombat theme looks like this:
<!-- wombat-default --><a href="https://susam.github.io/blob/img/emfy/emfy-0.4.0-wombat1.png"><img src="https://susam.github.io/blob/img/emfy/emfy-0.4.0-wombat1.png" alt="Screenshot of Wombat default theme" width="580"></a>
In this theme, the cursor, search matches, and comments can often be difficult to spot because they are all coloured with different shades of grey while the background is also grey. In the next few points, we will customise this theme a little to make these elements easier to spot. We colour them differently to add more contrast between the background and foreground colours of these elements. In the end, our customised Wombat theme would look like this:
<!-- wombat-custom --><a href="https://susam.github.io/blob/img/emfy/emfy-0.4.0-wombat2.png"><img src="https://susam.github.io/blob/img/emfy/emfy-0.4.0-wombat2.png" alt="Screenshot of Wombat custom theme" width="580"></a>
-
Choose a darker shade of grey for the background colour to improve the contrast of the theme:
(with-eval-after-load 'wombat-theme
  (set-face-background 'default "#111")
The above
with-eval-after-loadexpression ensures that the code within its body is executed afterwombat-themegets loaded. Sincewombat-themeis already loaded here (due to theload-themeexpression discussed earlier), the body is evaluated immediately. However, ifwombat-themewere not yet loaded, the body would be evaluated as soon aswombat-themegets loaded.The first expression in the the body sets the background colour to
#111, i.e., a very dark shade of grey.The name
wombat-themerefers to the feature provided by the Wombat theme. Emacs packages (including the ones for themes) can declare the feature they provide. If we ever remove or comment out theload-themeexpression mentioned earlier, then thewombat-themefeature will not be loaded and the body of thewith-eval-after-loadexpression will not be executed. Therefore, removing or commenting out theload-themecall is a convenient way to disable the theme along with all the additional color customizations made here. -
Choose a pale shade of orange for the cursor, so that it stands out clearly against the dark grey background:
(set-face-background 'cursor "#c96") -
Use tangerine yellow to colour the comments:
(set-face-foreground 'font-lock-comment-face "#fc0") -
Highlight the current search match with bright yellow background and dark foreground:
(set-face-background 'isearch "#ff0") (set-face-foreground 'isearch "#000") -
Highlight search matches other than the current one with a darker shade of yellow as the background and dark foreground:
  (set-face-background 'lazy-highlight "#990")
  (set-face-foreground 'lazy-highlight "#000"))
Personal note: I see that many recent colour themes choose a dim colour for comments in code. Such colour themes intend to underemphasise the comments. I think comments play an important role in code meant to be read by humans and should be emphasised appropriately. That's why I have chosen tangerine yellow for comments. This makes the comments are easily readable.
Line Numbers
Enable line numbers in modes for configuration, programming, and text with the following loop:
(dolist (hook '(prog-mode-hook conf-mode-hook text-mode-hook))
  (add-hook hook 'display-line-numbers-mode))
Every buffer has a major mode which determines the editing
behaviour, syntax highlighting, etc. of the buffer. To see the
current major mode, type M-: major-mode RET. The name of the
current major mode is also always displayed in the mode line at the
bottom.
The add-hook calls in the loop above ensure that
display-line-numbers-mode is enabled automatically when certain
major modes become active. In particular, this ensures that line
numbers are enabled while editing configuration files, program files,
or text files. For instance, when editing a C program (say with C-x C-f foo.c RET), the above hook enables line numbers for the buffer
for the C program file. This happens because while editing C program
files, the major mode named c-mode is activated and c-mode is
derived from prog-mode.
The above loop also ensures that this feature does not get enabled
while working with other types of buffers. For example, if we start a
terminal emulator with M-x ansi-term RET, this feature does not get
enabled because the terminal emulator buffer has the major mode named
term-mode which is not derived from any of the three modes mentioned
above. Displaying line numbers in such a mode can be distracting, so
we keep line numbers disabled in such modes.
Highlight Parentheses
The following points describe how we enable highlighting of parentheses:
-
The next point shows how to enable highlighting of matching pair of parentheses. By default, there is a small delay between the movement of a cursor and the highlighting of the matching pair of parentheses. The following line of code gets rid of this delay:
(setq show-paren-delay 0)This line of code must come before the one in the next point for it to be effective.
-
Highlight matching parentheses:
(show-paren-mode)A pair of parentheses is highlighted when the cursor is on the opening parenthesis of the pair or just after the closing parenthesis of the pair.
Minibuffer Completion
Enable automatic minibuffer completion:
(fido-vertical-mode)
To test this out, perform the following exercises:
-
Type
C-x C-f /etc/hstand watch Fido mode automatically presenting/etc/hostsas one of the completion options. TypeRETto select it. Alternatively, typeC-nand/orC-pto pick a different option and typeRET. -
Type
C-x b msg RETand watch Fido presenting the buffer named*Messages*as one of the options and selecting it. By the way, the key sequenceC-x bis used to switch buffers. -
Type
M-x wspmod RETand watch Fido presenting the command namedwhitespace-modeas one of the options and selecting it. The key sequenceM-xis used to execute Emacs commands. We will see later how to make our own commands.
In the steps above, note how it is not necessary to type out the filename or buffer name or command accurately. We can enter our input partially and Fido will automatically find matches for it.
Show Stray Whitespace
While writing text files, it can often be useful to quickly spot any trailing whitespace at the end of lines or unnecessary trailing new lines at the end of the file. The next few points describe how we highlight stray whitespace and newlines.
-
Highlight trailing whitespace at the end of lines in modes for configuration, programming, and text with the following loop:
(dolist (hook '(conf-mode-hook prog-mode-hook text-mode-hook))
  (add-hook hook (lambda () (setq show-trailing-whitespace t))))
When the variable
<!-- lorem1 -->show-trailing-whitespaceis set tot, any stray trailing whitespace at the end of lines is highlighted (usually with a red background) as shown in the screenshot below:<a href="https://susam.github.io/blob/img/emfy/emfy-0.4.0-lorem1.png"><img src="https://susam.github.io/blob/img/emfy/emfy-0.4.0-lorem1.png" alt="Screenshot of whitespace highlighted in Emacs" width="580"></a>
The screenshot above shows one stray trailing space in the second line and two trailing spaces in the third line. These trailing spaces can be removed with the key sequence
M-x delete-trailing-whitespace RET.Note that we enable this feature only for modes pertaining to configuration, programming, and text. It can be distracting to see stray whitespace highlighted in other modes like
term-mode,erc-mode, etc. -
Show the end of buffer with a special glyph in the left fringe:
(setq-default indicate-empty-lines t)Showing the end of the buffer conspicuously can be helpful to spot any unnecessary blank lines at the end of a buffer. A blank line is one that does not contain any character except the terminating newline itself. Here is a screenshot that demonstrates this feature:
<!-- lorem2 --><a href="https://susam.github.io/blob/img/emfy/emfy-0.4.0-lorem2.png"><img src="https://susam.github.io/blob/img/emfy/emfy-0.4.0-lorem2.png" alt="Screenshot of non-existent line indicators" width="580"></a>
The screenshot shows that there are two blank lines just before the end of the buffer. The tiny horizontal dashes on the left fringe mark the end of the buffer. Note: This is similar to how Vim displays the tilde symbol (
~) to show the end of the buffer. The trailing blank lines at the end of a buffer can be removed with the key sequenceM-x delete-trailing-whitespace RET. -
Show buffer boundaries in the left fringe:
(setq-default indicate-buffer-boundaries 'left)The buffer boundaries can be useful to check if the last line of the buffer has a terminating newline or not. If the buffer does not contain a terminating newline, then a top-right corner shape (
<!-- lorem3 -->⌝) appears in the fringe. For example, see this screenshot of a file that does not contain a terminating newline:<a href="https://susam.github.io/blob/img/emfy/emfy-0.4.0-lorem3.png"><img src="https://susam.github.io/blob/img/emfy/emfy-0.4.0-lorem3.png" alt="Screenshot of a file without terminating newline" width="580"></a>
If there is only one line in the buffer and that line is terminated with a newline then a left-bracket (
<!-- lorem4 -->[) appears in the fringe. If there are multiple lines in the buffer and the last line is terminated with a newline then a bottom-left corner shape (⌞) appears in the fringe. Here is a screenshot of a file that contains a terminating newline:<a href="https://susam.github.io/blob/img/emfy/emfy-0.4.0-lorem4.png"><img src="https://susam.github.io/blob/img/emfy/emfy-0.4.0-lorem4.png" alt="Screenshot of a file with terminating newline" width="580"></a>
To summarise, these shapes (
[,⌞, or⌝) show where the last newline of the buffer exists. The last newline of the buffer exists above the lower horizontal bar of these shapes. No newlines exist below the lower horizontal bar.
Require Final Newline
It is good practice to terminate text files with a newline. For many
types of files, such as files with extensions .c, .el, .json,
.lisp, .org, .py, .txt, etc., Emacs inserts a terminating
newline automatically when we save the file with C-x C-s. Emacs
achieves this by ensuring that the major modes for these files set the
variable require-final-newline to t by default. However, there
are many other types of files, such as files with extensions .ini,
.yaml, etc. for which Emacs does not insert a terminating newline
automatically. We now ensure that Emacs always inserts a
terminating newline for all types of files with the following call:
(setq require-final-newline t)
Many tools on Unix and Linux systems expect text files to be
terminated with a newline. For example, in a crontab entry, if the
final line is not followed by a terminating newline, it is ignored.
Similarly, wc -l does not count the final line if it is not followed
by a terminating newline. That is why, in the above step we configure
Emacs to ensure that it always inserts a terminating newline before
saving a file.
Single Space for Sentence Spacing
Emacs uses the convention of treating a full stop followed by two spaces as end of sentence. However, many people these days seem to prefer ending sentences with a full stop followed by a single space. This section explains how to configure Emacs to treat a full stop followed by a single space as end of sentence.
If you like the convention of having two spaces after full stop, you should remove the code discussed below from your Emacs initialisation file and then skip this section. If you are unable to make up your mind about whether you should end sentences with one space or two spaces, read the final paragraph of this section for some discussion about it.
We can configure Emacs to treat a sentence-terminating character (like a full stop, question mark, etc.) followed by a single space as end of sentence with the following code:
(setq sentence-end-double-space nil)
This little setting has significant consequences while editing and moving around text files. We will discuss two such consequences now with two tiny experiments:
Experiment A: Moving By Sentences: To check the default behaviour, first comment out the above line of Emacs Lisp code in the Emacs initialisation file, save the file, and restart Emacs. Now copy the following text:
Lorem ipsum dolor sit amet, consectetur adipiscing elit
donec. Porttitor id lacus non consequat.
Then open a new text buffer in Emacs with C-x C-f foo.txt RET and
paste the copied text with C-y. Then type C-a to go to the
beginning of the line. Finally, type M-e to move to the end of the
sentence. Without sentence-end-double-space set to nil, typing
M-e moves the cursor all the way to the end of the line (i.e., after
the second full stop). It ignores the first full stop as end of
sentence because it is followed by one space whereas Emacs expects two
spaces at the end of a sentence.
Now to verify that the above line of Emacs Lisp code works as
expected, uncomment it again to enable it, save the file, restart
Emacs, and then perform the above experiment again. With
sentence-end-double-space set to nil, typing M-e moves the
cursor to the end of the of first sentence (i.e., after the first full
stop). This is what we normally expect these days.
Experiment B: Filling Paragraphs: While writing text files, it is
customary to limit the length of each line to a certain maximum
length. In Emacs, the key sequence M-q invokes the fill-paragraph
command that works on the current paragraph and reformats it such that
each line is as long as possible without exceeding 70 characters in
length.
To check the default behaviour, first comment out the above line of
Emacs Lisp code in the Emacs initialisation file, save the file, and
restart Emacs. Then create the same text buffer as the one in the
previous experiment. Now place the cursor anywhere on text and type
M-q to reformat it as a paragraph. Without
sentence-end-double-space set to nil, typing M-q reformats the
paragraph as follows:
Lorem ipsum dolor sit amet, consectetur adipiscing elit donec.
Porttitor id lacus non consequat.
Now to verify that the above line of Emacs Lisp code works as
expected, uncomment it again to enable it, save the file, then restart
Emacs, and then perform the above experiment again. With
sentence-end-double-space set to nil, typing M-q reformats the
paragraphs as follows:
Lorem ipsum dolor sit amet, consectetur adipiscing elit donec.
Porttitor id lacus non consequat.
We see that without sentence-end-double-space set to nil, Emacs
refuses to insert a hard linebreak after the string donec., so it
moves the entire word to the next line. This is a result of following
the convention of double spaces at the end of a sentence. This
convention prevents inadvertently placing a hard linebreak within an
abbreviation. Since many people prefer ending a sentence with a
single space, we would like the text above to be reformatted as shown
in the last example above. Setting sentence-end-double-space to
nil achieves this.
While the step above explains how to configure Emacs to treat a full stop followed by a single space as the end of sentence, it is worth mentioning here that the number of spaces that must follow the end of a sentence is a very controversial matter. Many people prefer two spaces between sentences while many others prefer a single space instead. Section Sentences of the Emacs manual recommends putting two spaces at the end of a sentence because it helps the Emacs commands that operate on sentences distinguish between dots that end a sentence and those that do not. The author of this project uses two spaces to end sentences. Also, see the Opinion References section for more discussion on this topic. In case, you want to follow the convention of two spaces at the end of a sentence, omit the above line of Emacs Lisp from your Emacs initialisation file.
Indentation
The following point shows how to configure Emacs to insert spaces, not tabs, for indenting code.
-
Use spaces, not tabs, for indentation:
(setq-default indent-tabs-mode nil)Emacs uses a mix of tabs and spaces by default for indentation and alignment. To verify the default behaviour, first comment out the above line of Emacs Lisp code, save it, then restart Emacs, then open a new Emacs Lisp source file, say,
C-x C-f foo.el RETand type the following three lines of Emacs Lisp code:(defun foo () (concat "foo" "bar"))While typing the above code, do not type <kbd>tab</kbd> or <kbd>space</kbd> to indent the second and third lines. When you type <kbd>enter</kbd> at the end of each line, Emacs automatically inserts the necessary tabs and spaces to indent the code. After entering this code, type
M-x whitespace-mode RETto visualise whitespace characters. This mode displays each space with a middle dot (·) and each tab with a right pointing guillemet (»). With whitespace mode enabled, you should find that the second line of code is indented with two spaces but the third line is indented with a single tab followed by two spaces. The buffer should look like this:(defun·foo·()$ ··(concat·"foo"$ » ··"bar"))Emacs has a
tab-widthvariable that is set to8by default. For everytab-widthcolumns of indentation, Emacs inserts a tab to indent the code. The third line requires 10 leading spaces for alignment, so Emacs inserts one tab character followed by two spaces to make the third line look aligned. However, this code would look misaligned with a differenttab-widthsetting. That's why we configure Emacs to use only spaces to indent and align code.Now to verify that the above line of Emacs Lisp code works as expected, uncomment the function call to set
indent-tabs-modetonil, save it, then restart Emacs, and then perform the above experiment involving the three lines of Emacs Lisp code again. This time, you should see that no tabs are used for indentation. Only spaces are used for indentation. TypingM-x whitespace-mode RETwould display this in the buffer:(defun·foo·()$ ··(concat·"foo"$ ··········"bar"))In some type of files, we must use literal tabs. For example, in
Makefile, the syntax of target rules require that the commands under a target are indented by literal tab characters. In such files, Emacs is smart enough to always use literal tabs for indentation regardless of the above variable setting.Mixing tabs and spaces for indenting source code can be problematic, especially, when the author of code or Emacs inadvertently uses tabs for alignment (as opposed to using tabs for indentation only which would be fine) and another programmer views the file with an editor with a different tab width setting. In fact, in the experiment above, Emacs did use a literal tab character to align code which would cause the code to look misaligned on another editor with a different tab width setting. See Tabs Are Evil for more details on this topic.
-
Display the distance between two tab stops as whitespace that is as wide as 4 characters:
(setq-default tab-width 4)Note that this primarily affects how a literal tab character is displayed. Further, along with the previous variable setting where we set
indent-tabs-modetonil, in some types of files, this variable setting decides how many spaces are inserted when we hit the <kbd>tab</kbd> key. For example, in text buffers, on hitting the <kbd>tab</kbd> key, as many spaces are inserted as are necessary to move the cursor to the next tab stop where the distance between two tab stops is assumed to betab-width.In some type of files, we must use literal tabs. For example, in
Makefile, the syntax of target rules require that the commands under a target are indented by a literal tab character. In such files, Emacs displays the distance between two tab stops as whitespace that is as wide as 8 characters by default. This default setting is often too large for many users. They feel that a tab width of 8 consumes too much horizontal space on the screen. The variable setting above reduces the tab width to 4. Of course, different users may have different preferences for the tab width. Therefore, users are encouraged to modify this variable setting to a value they prefer or omit the above line of Emacs Lisp code from their Emacs initialisation file to leave it to the default value of 8. -
Set indentation levels according to popular coding conventions for various languages:
(setq c-basic-offset 4)
(setq js-indent-level 2)
(setq css-indent-offset 2)
Emacs uses 2 spaces for indentation in C by default. We change this to 4 spaces.
Emacs uses 4 spaces for indentation in JavaScript and CSS by default. We change this to 2 spaces.
Keep Working Directory Tidy
Emacs creates a number of temporary files to ensure that we do not inadvertently lose our work while editing files. However, these files can clutter our working directories. This section shows some ways to keep the current working directory tidy by asking Emacs to manage these files at a different location.
-
Create a directory to keep auto-save files:
(make-directory "~/.tmp/emacs/auto-save/" t)In the next point, we discuss auto-save files in detail and ask Emacs to write auto-save files to a separate directory instead of writing them to our working directory. Before we do that, we need to create the directory we will write the auto-save files to, otherwise Emacs would fail to write the auto-save files and display the following error:
Error (auto-save): Auto-saving foo.txt: Opening output file: No such file or directory, /Users/susam/.tmp/emacs/auto-save/#!tmp!foo.txt#Note that this issue occurs only for auto-save files, not for backup files discussed in the third point of this list. If the parent directory for backup files is missing, Emacs creates it automatically. However, Emacs does not create the parent directory for auto-save files automatically, so we need the above line of Emacs Lisp code to create it ourselves.
-
Write auto-save files to a separate directory:
(setq auto-save-file-name-transforms '((".*" "~/.tmp/emacs/auto-save/" t)))If we open a new file or edit an existing file, say,
foo.txtand make some changes that have not been saved yet, Emacs automatically creates an auto-save file named#foo.txt#in the same directory asfoo.txtevery 300 keystrokes, or after 30 seconds of inactivity. Emacs does this to ensure that the unsaved changes are not lost inadvertently. For example, if the system crashes suddenly while we are editing a filefoo.txt, the auto-save file would keep a copy of our unsaved worked. The next time we try to editfoo.txt, Emacs would warn that auto-save data already exists and it would then suggest us to recover the auto-save data usingM-x recover-this-file RET. These auto-save files are removed automatically after we save our edits but until then they clutter our working directories. The above line of Emacs Lisp code ensures that all auto-save files are written to a separate directory, thus leaving our working directories tidy. -
Write backup files to a separate directory:
(setq backup-directory-alist '(("." . "~/.tmp/emacs/backup/")))If we create a new file or edit an existing file, say,
foo.txt, then make some changes to it, and save it, the previous copy of the file is saved as a backup filefoo.txt~. These backup files too clutter our working direcories. The above line of Emacs Lisp code ensures that all backup files are written to a separate directory, thus leaving our working directories tidy. -
Create backup files by copying our files, not moving our files:
(setq backup-by-copying t)Everytime Emacs has to create a backup file, it moves our file to the backup location, then creates a new file at the same location as that of the one we are editing, copies our content to this new file, and then resumes editing our file. This causes any hard link referring to the original file to be now referring to the backup file.
To experience this problem due to the default behaviour, first comment out the above line of Emacs Lisp code in the Emacs initialisation file, save the file, and restart Emacs. Then create a new file along with a hard link to it with these commands:
echo foo > foo.txt; ln foo.txt bar.txt; ls -li foo.txt bar.txt. The output should show thatfoo.txtandbar.txthave the same inode number and size because they both refer to the same file. Now runemacs foo.txtto edit the file, add a line or two to the file, and save the file withC-x C-s. Now runls -li foo.txt bar.txtagain. The output should show thatfoo.txtnow has a new inode number and size whilebar.txtstill has the original inode number and size. The filebar.txtnow refers to the backup file instead of referring to the newfoo.txtfile.To see the improved behaviour with the above line of Emacs Lisp code, uncomment it to enable it again in the Emacs initialisation file, save the file, restart Emacs and perform the same experiment again. After we save the file, we should see that both
foo.txtandbar.txthave the same inode number and size. -
Disable lockfiles:
(setq create-lockfiles nil)As soon as we make an edit to a file, say
foo.txt, Emacs creates a lockfile.#foo.txt. If we then launch another instance of Emacs and try to edit this file, Emacs would refuse to edit the file, then warn us that the file is locked by another Emacs session, and provide us a few options regarding whether we want to steal the lock, proceed with editing anyway, or quit editing it. These lockfiles are removed automatically as soon as we save our edits but until then they clutter our directories. Unlike auto-save files and backup files, there is no way to tell Emacs to write these files to a different directory. We can however disable lockfile creation with the above line of Emacs Lisp code.Caution: Note that disabling lockfiles could be risky if you are in the habit of launching multiple Emacs instances while editing files. With such a habit, it is easy to make the mistake of opening the same file in two different Emacs instances and inadvertently overwrite changes made via one instance with changes made via another instance. The lockfiles are hidden files anyway, so they should not bother you in directory listings. If they bother you in, say,
git statusoutput, consider ignoring the lockfiles in.gitignoreinstead of disabling them. Having said that, it may be okay to disable lockfiles if you are in the habit of launching only a single instance of Emacs for the entire lifetime of their desktop session and edit all files via that single instance. The Emacs Server and Emacs Launcher sections later discuss techniques about how to make this usage style more convenient. If you are willing to follow this style of using Emacs, then it may be okay to disable lockfiles. To summarise, if you are in doubt, comment out or remove the above line of Emacs Lisp code to keep lockfiles enabled. -
When we install packages using
package-install(coming up soon in a later section), a few customisations are written automatically into the Emacs initialisation file (e.g., in~/.emacs.d/init.el). This has the rather undesirable effect of our carefully handcraftedinit.elbeing meddled bypackage-install. To be precise, it is thecustompackage invoked bypackage-installthat intrudes into our Emacs initialisation file. To prevent that, we askcustomto write the customisations to a separate file with the following code:(setq custom-file (concat user-emacs-directory "custom.el")) -
Emacs does not load the custom-file automatically, so we add the following code to load it:
(load custom-file t)It is important to load the custom-file because it may contain customisations we have written to it directly or via the customise interface (say, using
M-x customize RET). If we don't load this file, then any customisations written to this file will not become available in our Emacs environment.The boolean argument
tensures that no error occurs when the custom-file is missing. Without it, when Emacs starts for the first time with our initialisation file and there is no custom-file yet, the following error occurs:File is missing: Cannot open load file, No such file or directory, ~/.emacs.d/custom.el. Setting the second argument totprevents this error when Emacs is run with our initialisation file for the first time.
Custom Command and Key Sequences
In this section we will see how to make our own custom command.
-
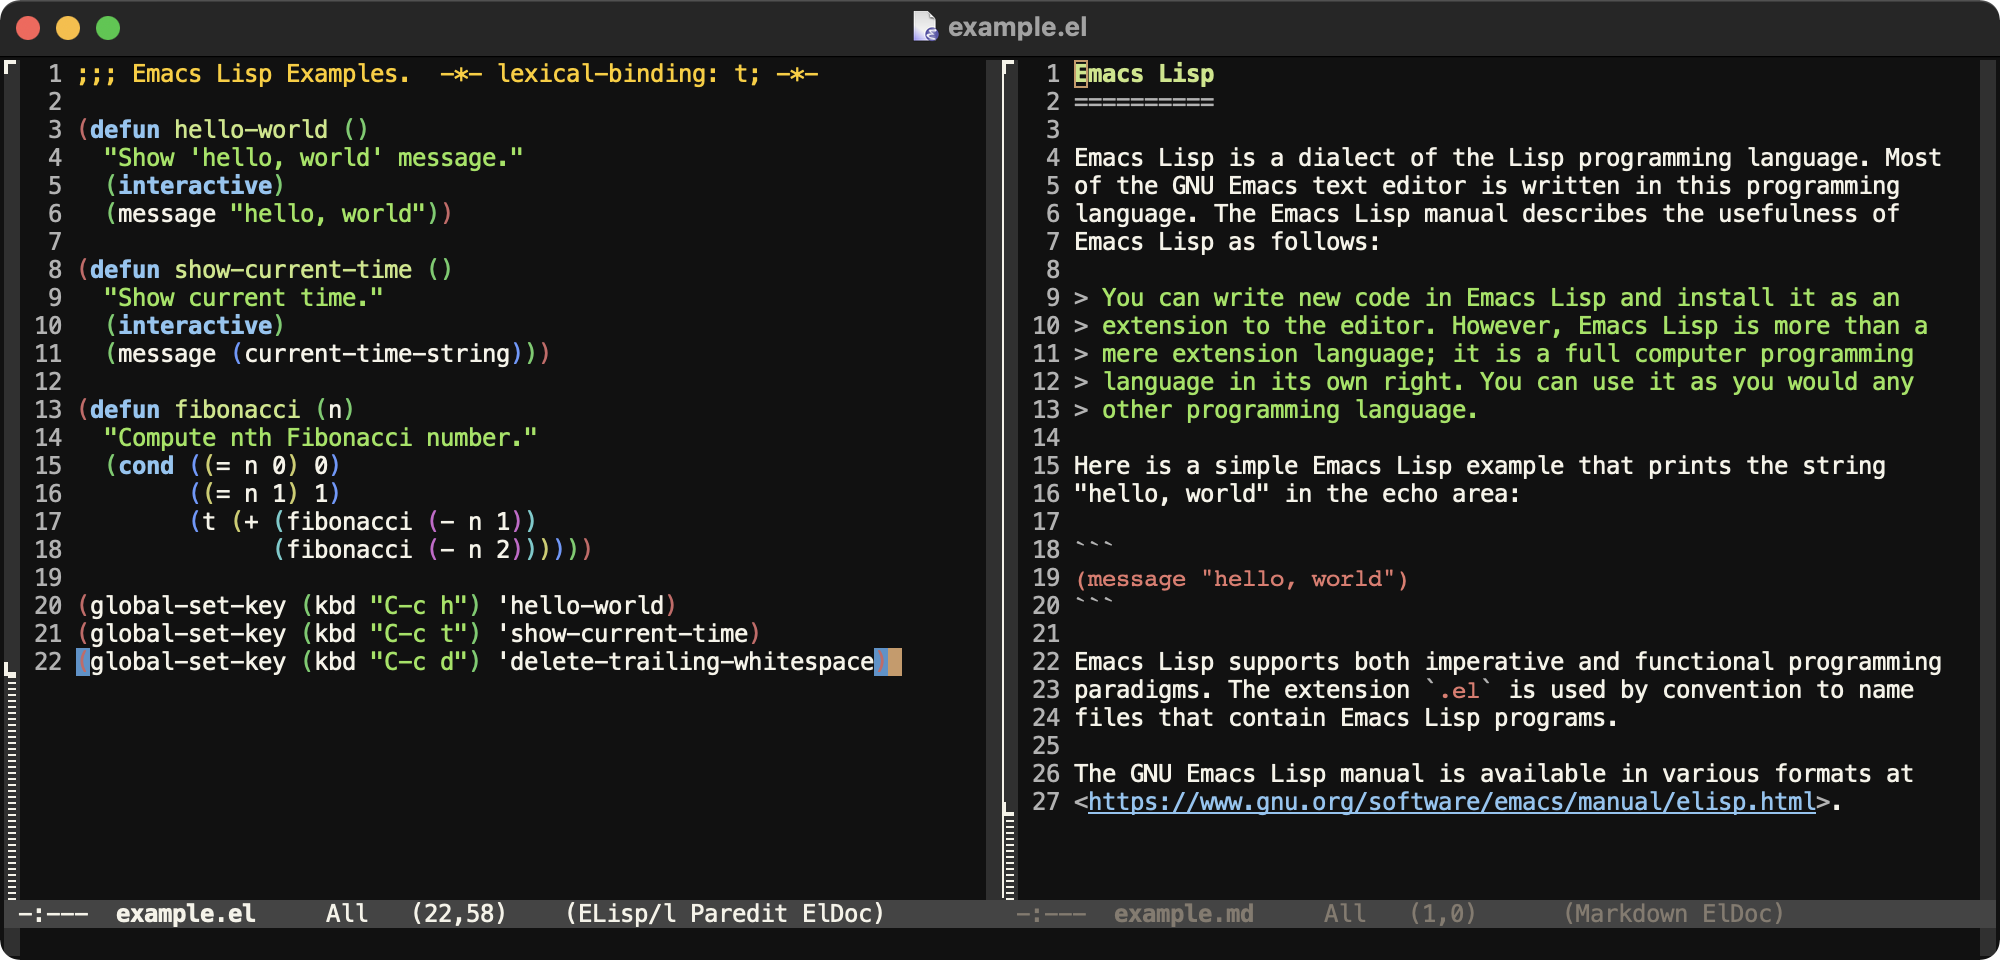
Create a very simple custom command to display the current time in the echo area at the bottom of the Emacs frame:
(defun show-current-time ()
  "Show current time."
  (interactive)
  (message (current-time-string)))
This creates an interactive function named
show-current-time. An interactive function is an Emacs command that can be invoked withM-x. For example, the above command can be invoked by typingM-x show-current-time RET. On running this command, the current time appears in the echo area. -
Create a custom key sequence to invoke the command defined in the previous point:
(global-set-key (kbd "C-c t") 'show-current-time)Now the same command can be invoked by typing
C-c t. -
Create another custom key sequence to delete trailing whitespace using the
delete-trailing-whitespaceintroduced in the Show Stray Whitespace section:(global-set-key (kbd "C-c d") 'delete-trailing-whitespace)Note that the custom key sequence in this point and the previous one only serve as examples. You should define key sequences based on your needs that you find more convenient.
Emacs Server
Many users prefer to run a single instance of Emacs and do all their editing activities via this single instance. It is possible to use Emacs alone for all file browsing needs and never use the terminal again. Despite the sophisticated terminal and file browsing capabilities of Emacs, some users still like to use a traditional terminal to move around a file system, find files, and edit them. This practice may become inconvenient quite soon because it would lead to the creation of too many Emacs frames (desktop-level windows) and processes. This section explains how to create a single Emacs server, a single Emacs frame, and edit all your files in this frame via the server even while you are browsing files in the terminal. You don't need this section if you use Emacs for all your file browsing needs but if you don't, this section may be useful. Let us now see how we start the Emacs server in our Emacs initialisation file.
-
This is necessary to use the function
server-running-pcoming up in the next point:(require 'server)If we omit the above line of Emacs Lisp code, we will encounter the following error when we try to use
server-running-pdiscussed in the next point:Symbol’s function definition is void: server-running-p. -
If there is no Emacs server running, start an Emacs server:
(unless (server-running-p)
  (server-start))
The
unlessexpression ensures that there is no Emacs server running before starting a new Emacs server. If we omit theunlessexpression, the following error would occur if an Emacs server is already running:Warning (server): Unable to start the Emacs server. There is an existing Emacs server, named "server". To start the server in this Emacs process, stop the existing server or call ‘M-x server-force-delete’ to forcibly disconnect it.Finally, the
server-startfunction call starts an Emacs server.
When Emacs starts for the first time with the above lines of Emacs Lisp code in its initialisation file, it starts an Emacs server. Now the following commands can be used on a terminal to edit files:
-
emacsoremacs foo.txt bar.txt: Starts another instance of Emacs. It does not start a new server due to theunlessexpression discussed above. Typically, we will not use this because we don't want to launch a second instance of Emacs. But it is good to know that this command still works as expected in case we ever need it. -
emacsclient foo.txt bar.txt: Opens files in the existing Emacs instance via the Emacs server. The command waits for us to finish editing all the files. It blocks the terminal until then. When we are done editing a file, we must typeC-x #to tell Emacs to switch to the next file. Once we are done editing all the files, theemacsclientcommand exits and the shell prompt returns on the terminal. -
emacsclient -n foo.txt bar.txt: Opens files in the existing Emacs instance but does not wait for us to finish editing. The command exits immediately and the shell prompt returns immediately on the terminal.
With this setup, the Emacs server quits automatically when we close
the first Emacs instance that started the Emacs server. Running the
emacs command or starting Emacs via another method after that would
start the Emacs server again.
It is worth noting here that there are other ways to start the Emacs
server and to use the emacsclient command. See section Using Emacs
as a Server and section emacsclient
Options of the Emacs manual for more details.
Install Packages
The following points describe how we automate the installation of Emacs packages we need:
-
We begin defining a new command that we use to install external packages automatically.
(defun install-packages ()
  "Install and set up packages for the first time."
  (interactive)
  (require 'package)
The
(require 'package)line is necessary for defining thepackage-archiveslist we will use in the next point. -
Add Milkypostman's Emacs Lisp Package Archive (MELPA) to the list of archives to fetch packages from:
(add-to-list 'package-archives '("melpa" . "https://melpa.org/packages/") t)By default GNU Emacs Lisp Package Archive (ELPA) and NonGNU Emacs Lisp Package Archive (NonGNU ELPA) are the only package archives configured for fetching packages. The above line adds MELPA too to the list of archives to fetch packages from. Although we are not going to install any package from MELPA in this project, it is common practice to include it as a package source. Adding MELPA now ensures you are prepared to explore a broader range of packages as your Emacs usage evolves.
-
Download package descriptions from package archives:
(package-refresh-contents)See the
~/.emacs.d/elpa/archivesor~/.config/emacs/elpa/archivesdirectory for archive contents in case you are curious. -
Install some packages:
  (dolist (package '(markdown-mode paredit rainbow-delimiters))
    (unless (package-installed-p package)
      (package-install package))))
This loop iterates over each package name in a list of packages. For each package, it checks whether the package is installed with the
package-installed-pfunction. If it is not installed, then it is installed with thepackage-installfunction.You can modify the list of packages in the first line to add other packages that you might need in future or remove packages that you do not need.
The code discussed above creates a new command named
install-packages that we can execute anytime with
M-x install-packages RET.
You can also add new packages to the list used in the dolist call,
type C-M-x to evaluate the install-packages function again, so
that this command is now updated according to your latest code, and
then run M-x install-packages RET to install the new packages.
Having understood this section, step 4 of the Get Started section should now make sense. The command we used there was:
emacs --eval '(progn (install-packages) (kill-emacs))'
This command simply runs Emacs (with your Emacs initialisation file)
and evaluates an Emacs Lisp expression that runs the
install-packages function followed by kill-emacs. As a result,
this command installs the packages configured in the code discussed
above and quits Emacs.
Alternative: If you know enough Emacs already, you might notice
that this project does not use the use-package package. The
use-package package allows us to install and configure packages
declaratively such that the configuration of each package is neatly
contained within one use-package expression. The author of this
project has been using Emacs long before use-package existed and
prefers a more traditional method of installing and configuring
packages using package.el and with-eval-after-load. However, if
you want to explore installing and configuring packages declaratively,
please take a look at the use-package User Manual.
Configure Paredit
This section describes how to enable Paredit. Paredit helps in keeping parentheses balanced and in performing structured editing of S-expressions. Some Emacs Lisp programmers find it useful while some do not.
In case you decide not to use Paredit, you may skip this section. In
that case, you might also want to remove this package from the
dolist loop discussed in the previous section.
We enable Paredit in various modes pertaining to Lisp programming with the following Emacs Lisp code:
(when (fboundp 'paredit-mode)
  (dolist (hook '(emacs-lisp-mode-hook
                  eval-expression-minibuffer-setup-hook
                  ielm-mode-hook
                  lisp-interaction-mode-hook
                  lisp-mode-hook))
    (add-hook hook 'enable-paredit-mode)))
Here is an explanation of the above code:
-
The
whenexpression checks ifparedit-modeis available before setting up hooks to enable it in various modes. If it is unavailable, then the hooks are not set up. -
The
dolistexpression iterates over hooks for various modes where we want Paredit to be enabled. In each iteration, theadd-hookexpression adds the functionenable-paredit-modeto each mode's hook. This ensures that whenever one of these modes gets activated,enable-paredit-modeis called thereby enabling Paredit in that mode. -
Adding
enable-paredit-modetoemacs-lisp-mode-hookenables Paredit while editing Emacs Lisp code.To test that Paredit is enabled while editing Emacs Lisp code, open a new Emacs Lisp file, say,
foo.el. Then type(. Paredit should automatically insert the corresponding). -
Adding
enable-paredit-modetoeval-expression-minibuffer-setup-hookenables Paredit in eval-expression minibuffer.To test this, enter
M-:to bring up the eval-expression minbuffer and type(. Paredit should automatically insert the corresponding). -
Adding
enable-paredit-modetoielm-mode-hookenables Paredit while interactively evaluating Emacs Lisp expressions ininferior-emacs-lisp-mode(IELM).To test this, enter
M-x ielm RET. When the*ielm*buffer appears, type(. Paredit should automatically insert the corresponding). -
Adding
enable-paredit-modetolisp-interaction-mode-hookenables Paredit in Lisp interaction mode.To test this, first open a non-Lisp file, say,
C-x C-f foo.txt RET. Now type(. Note that no corresponding)is inserted because we are not in Lisp interaction mode yet. Delete(. Then start Lisp interaction mode with the commandM-x lisp-interaction-mode RET. Type(again. Paredit should now automatically insert the corresponding). -
Adding
enable-paredit-modetolisp-mode-hookenables Paredit while editing Lisp code other than Emacs Lisp.To test this, open a new Common Lisp source file, say,
C-x C-f foo.lisp RET. Then type(. Paredit should automatically insert the corresponding).
By default, Paredit overrides the behaviour of the RET key such that
a newline is inserted whenever we press RET key. Unfortunately,
this behaviour is problematic in the eval-expression minibuffer and
IELM where we want to evaluate the expression we have entered when we
type RET. Therefore, we disable the overriding behaviour of Paredit
using the following code:
(with-eval-after-load 'paredit
  (define-key paredit-mode-map (kbd "RET") nil))
The above code ensures that whenever Paredit is loaded, the RET
key binding in its keymap is set to nil, so that Paredit does
not override the default behaviour of the RET key.
Configure Rainbow Delimiters
This section describes how to enable rainbow delimiters and configure it. Rainbow Delimiters colour nested parentheses with different colours according to the depth level of each parenthesis. Some people find it useful and some do not.
If you decide not to use Rainbow Delimiters, you may skip this
section. In that case, you might also want to remove this package
from the dolist loop discussed in the previous section.
We enable Paredit in various modes pertaining to Lisp programming with the following Emacs Lisp code:
(when (fboundp 'rainbow-delimiters-mode)
  (dolist (hook '(emacs-lisp-mode-hook
                  ielm-mode-hook
                  lisp-interaction-mode-hook
                  lisp-mode-hook))
    (add-hook hook 'rainbow-delimiters-mode)))
Here is an explanation of the above code:
-
Then
whenexpression checks ifrainbow-delimiters-modeis available before setting up hooks to enable it in various modes. If it is unavailable, then the hooks are not set up. -
The
dolistexpression iterates over hooks for various modes where we want Rainbow Delimiters to be enabled. In each iteration, theadd-hookexpression adds the functionrainbow-delimiters-modeto each mode's hook. This ensures that whenever one of these modes gets activated,rainbow-delimiters-modeis called thereby enabling Rainbow Delimiters in that mode. -
Adding
rainbow-delimiters-modetoemacs-lisp-mode-hookenables Rainbow Delimiters while editing Emacs Lisp code.To test this open a new Emacs Lisp file, say,
foo.el. Then type(((. Rainbow Delimiters should colour each parenthesis differently. -
Adding
rainbow-delimiters-modetoielm-mode-hookenables Rainbow Delimiters while interactively evaluating Emacs Lisp expressions in inferior-emacs-lisp-mode (IELM):To test this, enter
M-x ielm RET. When the*ielm*buffer comes up, type(((. Rainbow Delimiters should colour each parenthesis differently. -
Adding
rainbow-delimiters-modetolisp-interaction-mode-hookenables Rainbow Delimiters in Lisp interaction mode.To test this, first open a non-Lisp file, say,
foo.txt. Now type(((. Then start Lisp interaction mode with the commandM-x lisp-interaction-mode RET. Rainbow Delimiters should now colour each parenthesis differently. -
Adding
rainbow-delimiters-modetolisp-mode-hookenables Rainbow Delimiters while editing Lisp code other than Emacs Lisp:To test this, open a new Common Lisp source file, say,
foo.lisp. Then type(((. Rainbow Delimiters should colour each parenthesis differently.
In the discussion above, you may have noticed that we did not enable Rainbow Delimiters for eval-expression minibuffer. That is because eval-expression minibuffer does not support syntax highlightng. Therefore enabling Rainbow Delimiters in it has no effect. See https://github.com/Fanael/rainbow-delimiters/issues/57 for more details.
The default colours that Rainbow Delimiters chooses for the nested parentheses are too subtle to easily recognise the matching pair of parentheses. The following Emacs Lisp code makes the parentheses more colourful:
(with-eval-after-load 'rainbow-delimiters
  (set-face-foreground 'rainbow-delimiters-depth-1-face "#c66")  ; red
  (set-face-foreground 'rainbow-delimiters-depth-2-face "#6c6")  ; green
  (set-face-foreground 'rainbow-delimiters-depth-3-face "#69f")  ; blue
  (set-face-foreground 'rainbow-delimiters-depth-4-face "#cc6")  ; yellow
  (set-face-foreground 'rainbow-delimiters-depth-5-face "#6cc")  ; cyan
  (set-face-foreground 'rainbow-delimiters-depth-6-face "#c6c")  ; magenta
  (set-face-foreground 'rainbow-delimiters-depth-7-face "#ccc")  ; light gray
  (set-face-foreground 'rainbow-delimiters-depth-8-face "#999")  ; medium gray
  (set-face-foreground 'rainbow-delimiters-depth-9-face "#666")) ; dark gray
The colours chosen above make matching pairs of parentheses easier to recognise.
End of File
The final line of code in the file is:
(provide 'init)
The above line is not really necessary for the Emacs initialisation
file. The provide function call declares a feature that an Emacs
package provides, so provide calls like the one above are typically
found in Emacs packages. Here, we simply declare that this Emacs
initialisation file provides a feature named init, only for the sake
of completeness.
Other Emacs Lisp programs can test whether a feature is availabe using
the featurep function. For example, Paredit provides the feature
named paredit. To test if this feature is available, type M-: (featurep 'paredit) RET.
Similarly, to test if the init feature declared above is available,
type M-: (featurep 'init) RET
Emacs Launcher
In the Emacs Server section, we saw how our Emacs
initialisation file ensures that an Emacs server is started when we
run emacs for the first time. Once Emacs server has started, we can
edit new files from the terminal using the emacsclient command.
This section describes a script named em that can automatically
decide whether to run emacs or emacsclient depending on the
situation.
As mentioned in the previous section, you don't need this section if
you use Emacs for all your file browsing needs but if you don't, this
section may be useful. Further, it is worth mentioning that this
script solves a very specific problem of using a single command named
em to both launch a new Emacs server as well as to open existing
files in an existing Emacs frame via the existing Emacs server. If you
have this specific problem, you may find this script helpful. However,
if you do not have this problem or if you have a different problem to
solve, it would be useful to understand how emacsclient works and
read the related documentation mentioned in the previous section and
then modify this script or write your own shell script, shell alias,
or shell function that solves your problems.
The em script should be already present on the system if the steps
in the Get Started section were followed. The third
step there installs this script to /usr/local/bin/em. Now we discuss
every line of this script in detail.
-
When
emis run without any arguments, start a new Emacs process:#!/bin/sh if [ "$#" -eq 0 ] then echo "Starting new Emacs process ..." >&2 nohup emacs &This Emacs process launches a new Emacs frame. Further, if an Emacs server is not running, it starts a new Emacs server. The
nohupcommand ensures that this Emacs process is not terminated when we close the terminal or the shell where we ran theemcommand. -
When
emis run with one or more filenames as arguments and there is an Emacs server already running, edit the files using the existing Emacs server:elif emacsclient -n "$@" 2> /dev/null then echo "Opened $@ in Emacs server" >&2However, if there is no Emacs server already running, the above command in the
elifclause fails and the execution moves to theelseclause explained in the next point. -
When
emis run with one or more filenames as arguments and there is no Emacs server running, start a new Emacs process to edit the files:else echo "Opening $@ in a new Emacs process ..." >&2 nohup emacs "$@" & fiThe new Emacs process also starts a new Emacs server.
Now that we know what the em script does, let us see the various
ways of using this script as a command:
-
em: Start a new instance of Emacs. If there is no Emacs server running, this ends up starting an Emacs server too. Normally, this command should be run only once after logging into the desktop environment. -
em foo.txt bar.txt: Edit files in an existing instance of Emacs via Emacs server. If no Emacs server is running, this ends up starting an Emacs server automatically. This command is meant to be used multiple times as needed for editing files while browsing the file system in a terminal.
That's it! Only two things to remember from this section: start Emacs
with em and edit files with em foo.txt, em foo.txt bar.txt, etc.
Opinion References
- Give paredit mode a chance
- Never warmed up to paredit
- Coloring each paren differently only adds noise
- The drawbacks of using single space between sentences
- Why you should never, ever use two spaces after a period
Channels
The following channels are available for asking questions, seeking help and receiving updates regarding this project:
- GitHub: emfy/issues
- Mastodon: @susam@mastodon.social
- Matrix: #susam:matrix.org
- Libera: #susam
You are welcome to follow or subscribe to one or more of these channels to receive updates and ask questions about this project.
License
This is free and open source software. You can use, copy, modify, merge, publish, distribute, sublicense, and/or sell copies of it, under the terms of the MIT License. See LICENSE.md for details.
This software is provided "AS IS", WITHOUT WARRANTY OF ANY KIND, express or implied. See LICENSE.md for details.