Awesome


![]()

![]()


Concise API for Auto Layout. SnapLayout extends UIView and NSView to deliver a list of APIs to improve readability while also shortening constraint code. Internally uses AutoLayout to provide the best experience. With SnapLayout, developers can remove boilerplate code but not at the cost of readability.
Imagine applying any or all of the following constraints in one line of code to a view: top, leading, trailing, bottom, width, height, centerX, centerY. Not enough? Start chaining your snap calls to support adjacents snaps. This is all possible with SnapLayout.
Why Use It?
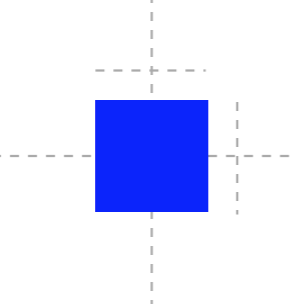
Lets use a real world example. Lets say the following view needs to be added. It has a centerX, centerY, width, and height constraint.
squareView.translatesAutoresizingMaskIntoConstraints = false
squareView.widthAnchor.constraint(equalToConstant: 50)
squareView.heightAnchor.constraint(equalToConstant: 50)
squareView.centerXAnchor.constraint(equalTo: squareSuperview.centerXAnchor, constant: 0)
squareView.centerYAnchor.constraint(equalTo: squareSuperview.centerYAnchor, constant: 0)
SnapLayout:
squareView.snap(width: 50, height: 50, centerX: 0, centerY: 0)
SnapLayout handles translatesAutoresizingMaskIntoConstraints and references the superview of squareView when applying constraints. Built to be flexible, yet readable.
Setup
Requirements
- Xcode
- Language Support: Swift (5.0)
- Fully Compatible With: Xcode 10.0 and higher
- iOS
- Fully Compatible With: iOS 9.0 and above
- macOS
- Fully Compatible With: macOS 10.11 and above
- tvOS
- Fully Compatible With: tvOS 9.0 and above
Installation with CocoaPods
pod "SnapLayout"
Installation with Carthage
github "sp71/SnapLayout"
Usage
Overview
- All methods are prefixed with
snapfor quick Xcode autocomplete. - Directly uses NSLayoutAnchor under the hood so the API is developer friendly
- Any view using
SnapLayoutwill not only have itstranslatesAutoresizingMaskIntoConstraintsset tofalse, but also have its constraint activated. - Snap offers many default parameters including the
viewargument. If a view parameter is not supplied, it is assumed your view will be snapping to its superview. - Powerful API supporting snapping of adjacent views
Methods
func snap(to view: View? = nil, top: CGFloat? = nil, leading: CGFloat? = nil, bottom: CGFloat? = nil, trailing: CGFloat? = nil, width: CGFloat? = nil, height: CGFloat? = nil, centerX: CGFloat? = nil, centerY: CGFloat? = nil, priority: LayoutPriority = LayoutPriorityRequired, isActive: Bool = true) -> SnapManager
func snap(to view: View? = nil, config: SnapConfig, priority: LayoutPriority = LayoutPriorityRequired, isActive: Bool = true) -> SnapManager
func snapWidth(to view: View, multiplier: CGFloat = 1, priority: LayoutPriority = LayoutPriorityRequired, isActive: Bool = true) -> SnapManager
func snapHeight(to view: View, multiplier: CGFloat = 1, priority: LayoutPriority = LayoutPriorityRequired, isActive: Bool = true) -> SnapManager
func snap(size: CGSize, priority: LayoutPriority = LayoutPriorityRequired, isActive: Bool = true) -> SnapManager
func snap(trailingView: View, constant: CGFloat = 0, priority: LayoutPriority = LayoutPriorityRequired, isActive: Bool = true) -> SnapManager
func snap(leadingView: View, constant: CGFloat = 0, priority: LayoutPriority = LayoutPriorityRequired, isActive: Bool = true) -> SnapManager
func snap(bottomView: View, constant: CGFloat = 0, priority: LayoutPriority = LayoutPriorityRequired, isActive: Bool = true) -> SnapManager
func snap(topView: View, constant: CGFloat = 0, priority: LayoutPriority = LayoutPriorityRequired, isActive: Bool = true) -> SnapManager
Sample Code
let buttonSnapManager = button.snap(top: 50, leading: 50, trailing: 50, width: 30)
buttonSnapManager.top?.constant = 100
Not only has this button applied 4 constraints to its superview, but each individual constraint is accessible through the returned SnapManager type. The beauty of SnapLayout is not only its powerful API interface, but how easy it is to adjust constraints. Other API's simply return an array, but not SnapLayout. Each constraint is neatly packaged into a SnapManager.
Snapping Adjacent Views
button1.snap(trailingView: button2, constant: 8)
These buttons are now side by side where button2 is now the trailingView. No longer will developers have to think which trailing constraint should apply to which leading constraint. This keeps the code lean and clean.
Chaining
let snapManager = view.snap(top: 8, leading: 8, width: 50)
                      .snapHeight(to: superview, multiplier: 0.5)
print(snapManager.top?.constant)    # 8.0
print(snapManager.height?.constant) # 0.5
Snap calls may also be chained and will continue to return a SnapManager.
Config
A SnapConfig struct is also available where a developer may list all of their constraint constants beforehand and provide this type to the snap method argument.
let config = SnapConfig(top: 50, leading: 50, trailing: 50, width: 30, centerX: 0)
button.snap(config: config)
Priority
SnapLayout assumes required priority (same default as Apple) unless otherwise specified for those created constraints.
button1.snap(trailingView: button2, constant: 8, priority: .low)
In the following example, the top, leading, bottom, and trailing constraint all have a priority of required; however, the height constraint has a UILayoutPriority.defaultHigh priority. That's it!
rectangleView.snap(top: 48, leading: 16, bottom: 16, trailing: 16)
             .snap(height: 40, priority: .defaultHigh)
To Activate or not to Activate
SnapLayout, by default, activates all constraints it creates; however, this can be disabled by passing false to isActive.
button1.snap(trailingView: button2, constant: 8, isActive: false)
Debugging
SnapLayout will also print out errors to log if a snap was not properly applied.
SnapLayout Error - No constraint was applied for view: <UIView: 0x7fcb8f4031d0; frame = (0 0; 0 0); layer = <CALayer: 0x608000036320>>
Safe Area Layout Guide Support
SnapLayout will apply constraints using safeAreaLayoutGuide if the app is running iOS 11; otherwise, it will apply the view's layout anchors directly.
Example Apps
To run the example project, run pod try SnapLayout.
This example project contains not only an Example-iOS target, but also an Example-MacOS target. This is a great introduction to become more familiar with the library.
Blogs
Author
Satinder Singh, satindersingh71@gmail.com
License
SnapLayout is available under the MIT license. See the LICENSE file for more info.