Awesome
Faster R-CNN
This is an experimental implementation of Faster R-CNN using Chainer based on Ross Girshick's py-faster-rcnn codes.
Requirement
Using anaconda is strongly recommended.
-
Python 2.7.6+, 3.4.3+, 3.5.1+
- Chainer 1.9.1+
- NumPy 1.9, 1.10, 1.11
- Cython 0.23+
- OpenCV 2.9+, 3.1+
Installation of dependencies
pip install numpy
pip install cython
pip install chainer
# for python3
conda install -c https://conda.binstar.org/menpo opencv3
# for python2
conda install opencv
For Windows users
There's a known problem in cpu_nms.pyx. But a workaround has been posted here (and see also the issue posted to the original py-faster-rcnn).
Setup
1. Build extensions
cd lib
python setup.py build_ext -i
cd ..
Inference
1. Download pre-trained model
if [ ! -d data ]; then mkdir data; fi; cd data
wget https://dl.dropboxusercontent.com/u/2498135/faster-rcnn/VGG16_faster_rcnn_final.model
cd ..
NOTE: The model definition in faster_rcnn.py has been changed, so if you already have the older pre-trained model file, please download it again to replace the older one with the new one.
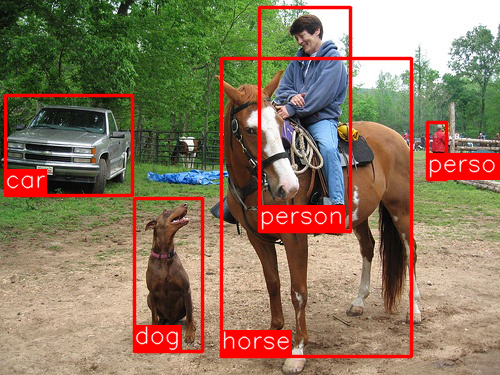
2. Use forward.py
wget http://vision.cs.utexas.edu/voc/VOC2007_test/JPEGImages/004545.jpg

python forward.py --img_fn 004545.jpg --gpu 0
--gpu 0 turns on GPU. When you turn off GPU, use --gpu -1 or remove --gpu option.
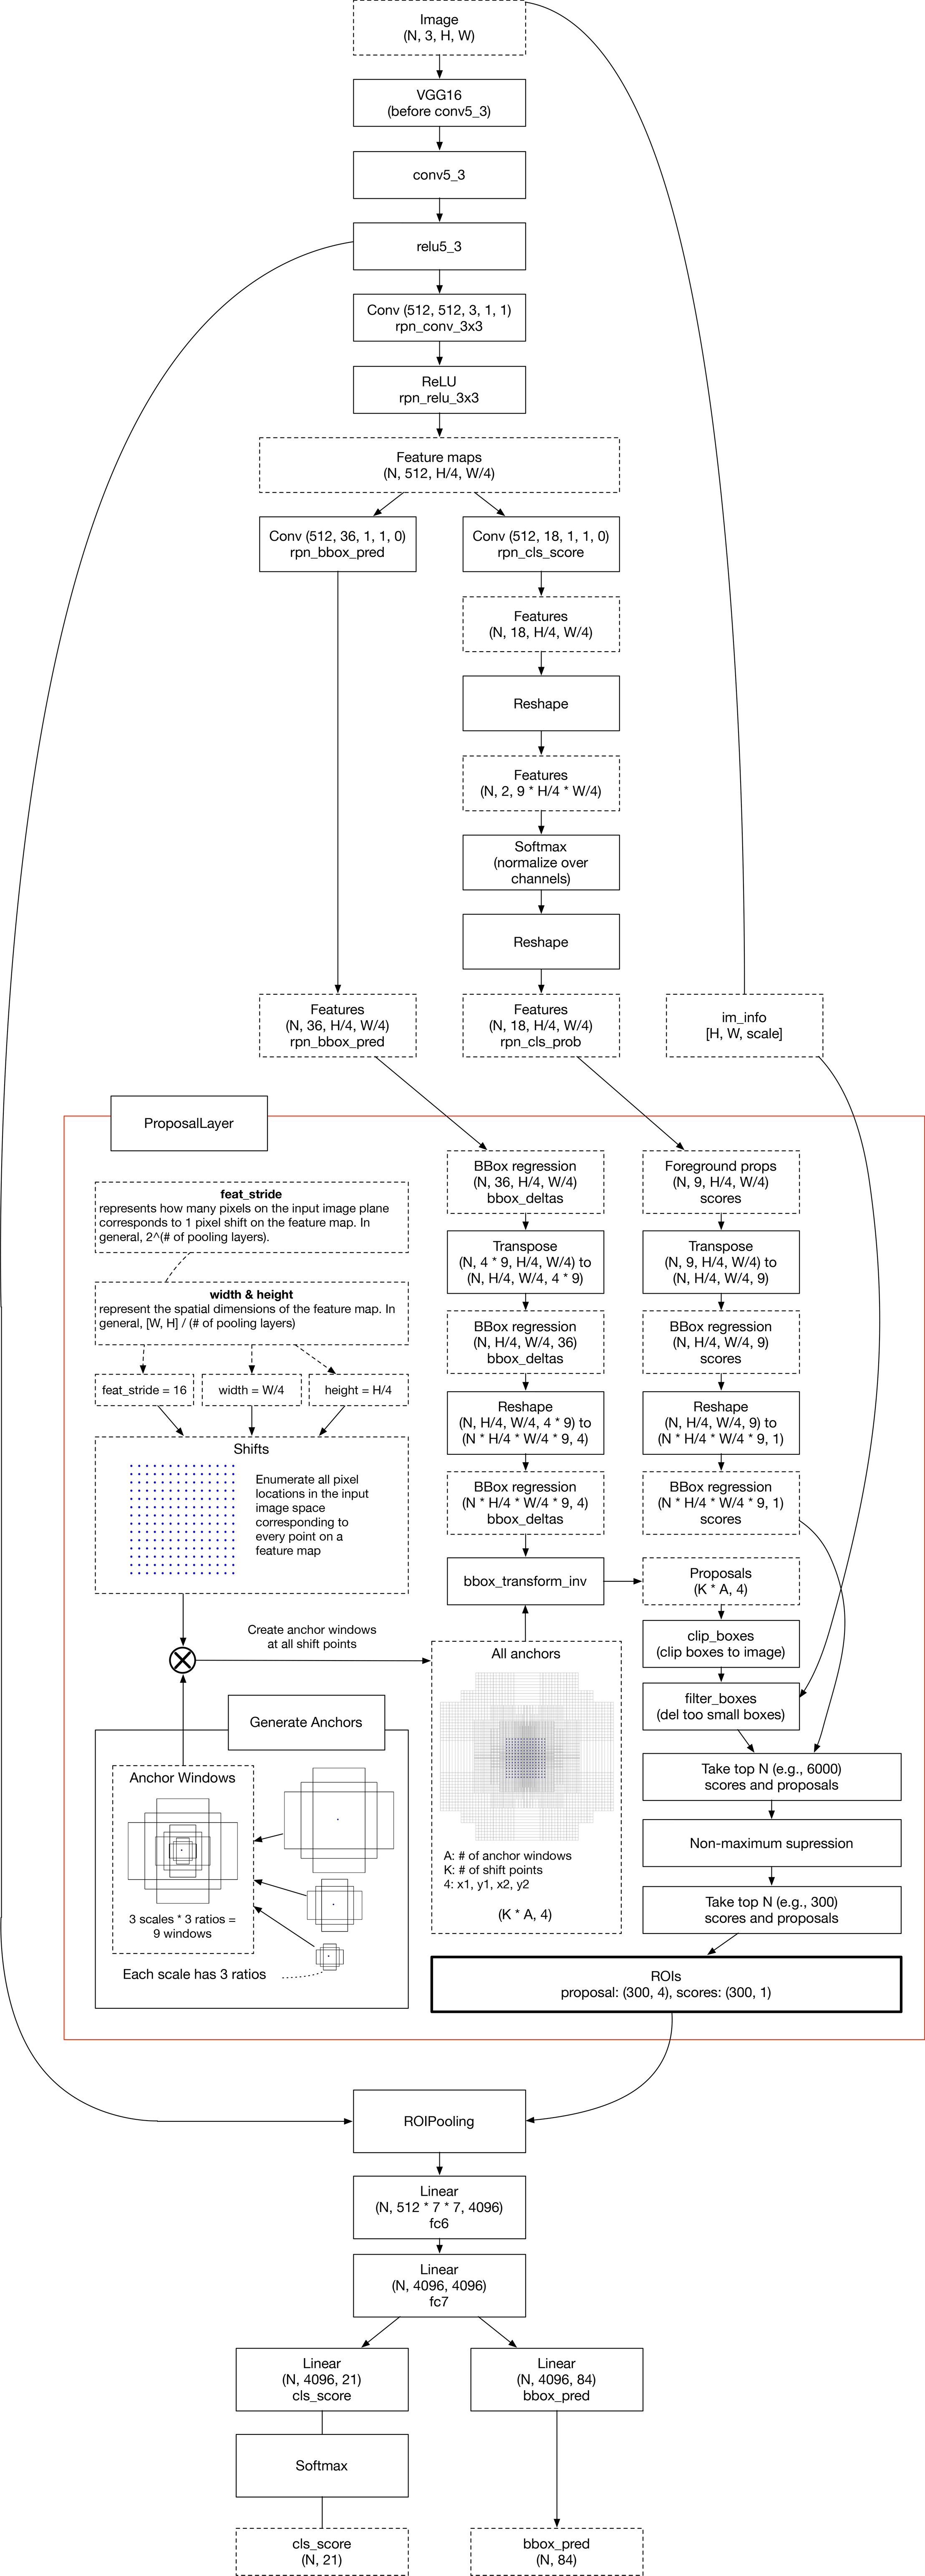
Layers
Summarization of Faster R-CNN layers used during inference
RPN
The region proposal layer (RPN) is consisted of AnchorTargetLayer and ProposalLayer. RPN takes feature maps from trunk network like VGG-16, and performs 3x3 convolution to it. Then, it applies two independent 1x1 convolutions to the output of the first 3x3 convolution. Resulting outputs are rpn_cls_score and rpn_bbox_pred.
- The shape of
rpn_cls_scoreis(N, 2 * n_anchors, 14, 14)because each pixel on the feature map hasn_anchorsbboxes and each bbox should have 2 values that mean object/background. - The shape of
rpn_bbox_predis(N, 4 * n_anchors, 14, 14)because each pixel on the feature map hasn_anchorsbboxes, and each bbox is represented with 4 values that mean left top x & y, width & height.
Training
1. Download dataset
if [ ! -d data ]; then mkdir data; fi; cd data
wget http://host.robots.ox.ac.uk/pascal/VOC/voc2007/VOCtrainval_06-Nov-2007.tar
wget http://host.robots.ox.ac.uk/pascal/VOC/voc2007/VOCtest_06-Nov-2007.tar
wget http://host.robots.ox.ac.uk/pascal/VOC/voc2007/VOCdevkit_08-Jun-2007.tar
tar xvf VOCtrainval_06-Nov-2007.tar
tar xvf VOCtest_06-Nov-2007.tar
tar xvf VOCdevkit_08-Jun-2007.tar
rm -rf *.tar; cd ../
2. Prepare ImageNet pre-trained model
Don't do this. Please see the issue #15 and follow the instruction instead: Can you make VGG16.model available? #15
First, if you don't have docker and nvidia-docker, install them:
sudo apt-get update
sudo apt-get install -y apt-transport-https ca-certificates
sudo apt-key adv --keyserver hkp://p80.pool.sks-keyservers.net:80 --recv-keys 58118E89F3A912897C070ADBF76221572C52609D
echo "deb https://apt.dockerproject.org/repo ubuntu-trusty main" | sudo tee /etc/apt/sources.list.d/docker.list
sudo apt-get install -y linux-image-extra-$(uname -r) linux-image-extra-virtual
sudo apt-get update
sudo apt-get install -y docker-engine
sudo service docker start
and then build caffe docker image and run the converter to make a chainer model from the pre-trained caffe model.
cd docker
bash install_caffe_docker.sh
bash create_image.sh
bash run_caffe_docker.sh
cd ..
It creates
data/VGG16.modelthat is converted from pre-trained model in Caffe format. The pre-trained model is the one distributed in the official Model Zoo of Caffe wiki.
3. Start training
python train.py
Workflow
Note that it is a visualization of the workflow DURING INFERENCE