Awesome
dotnet-repl

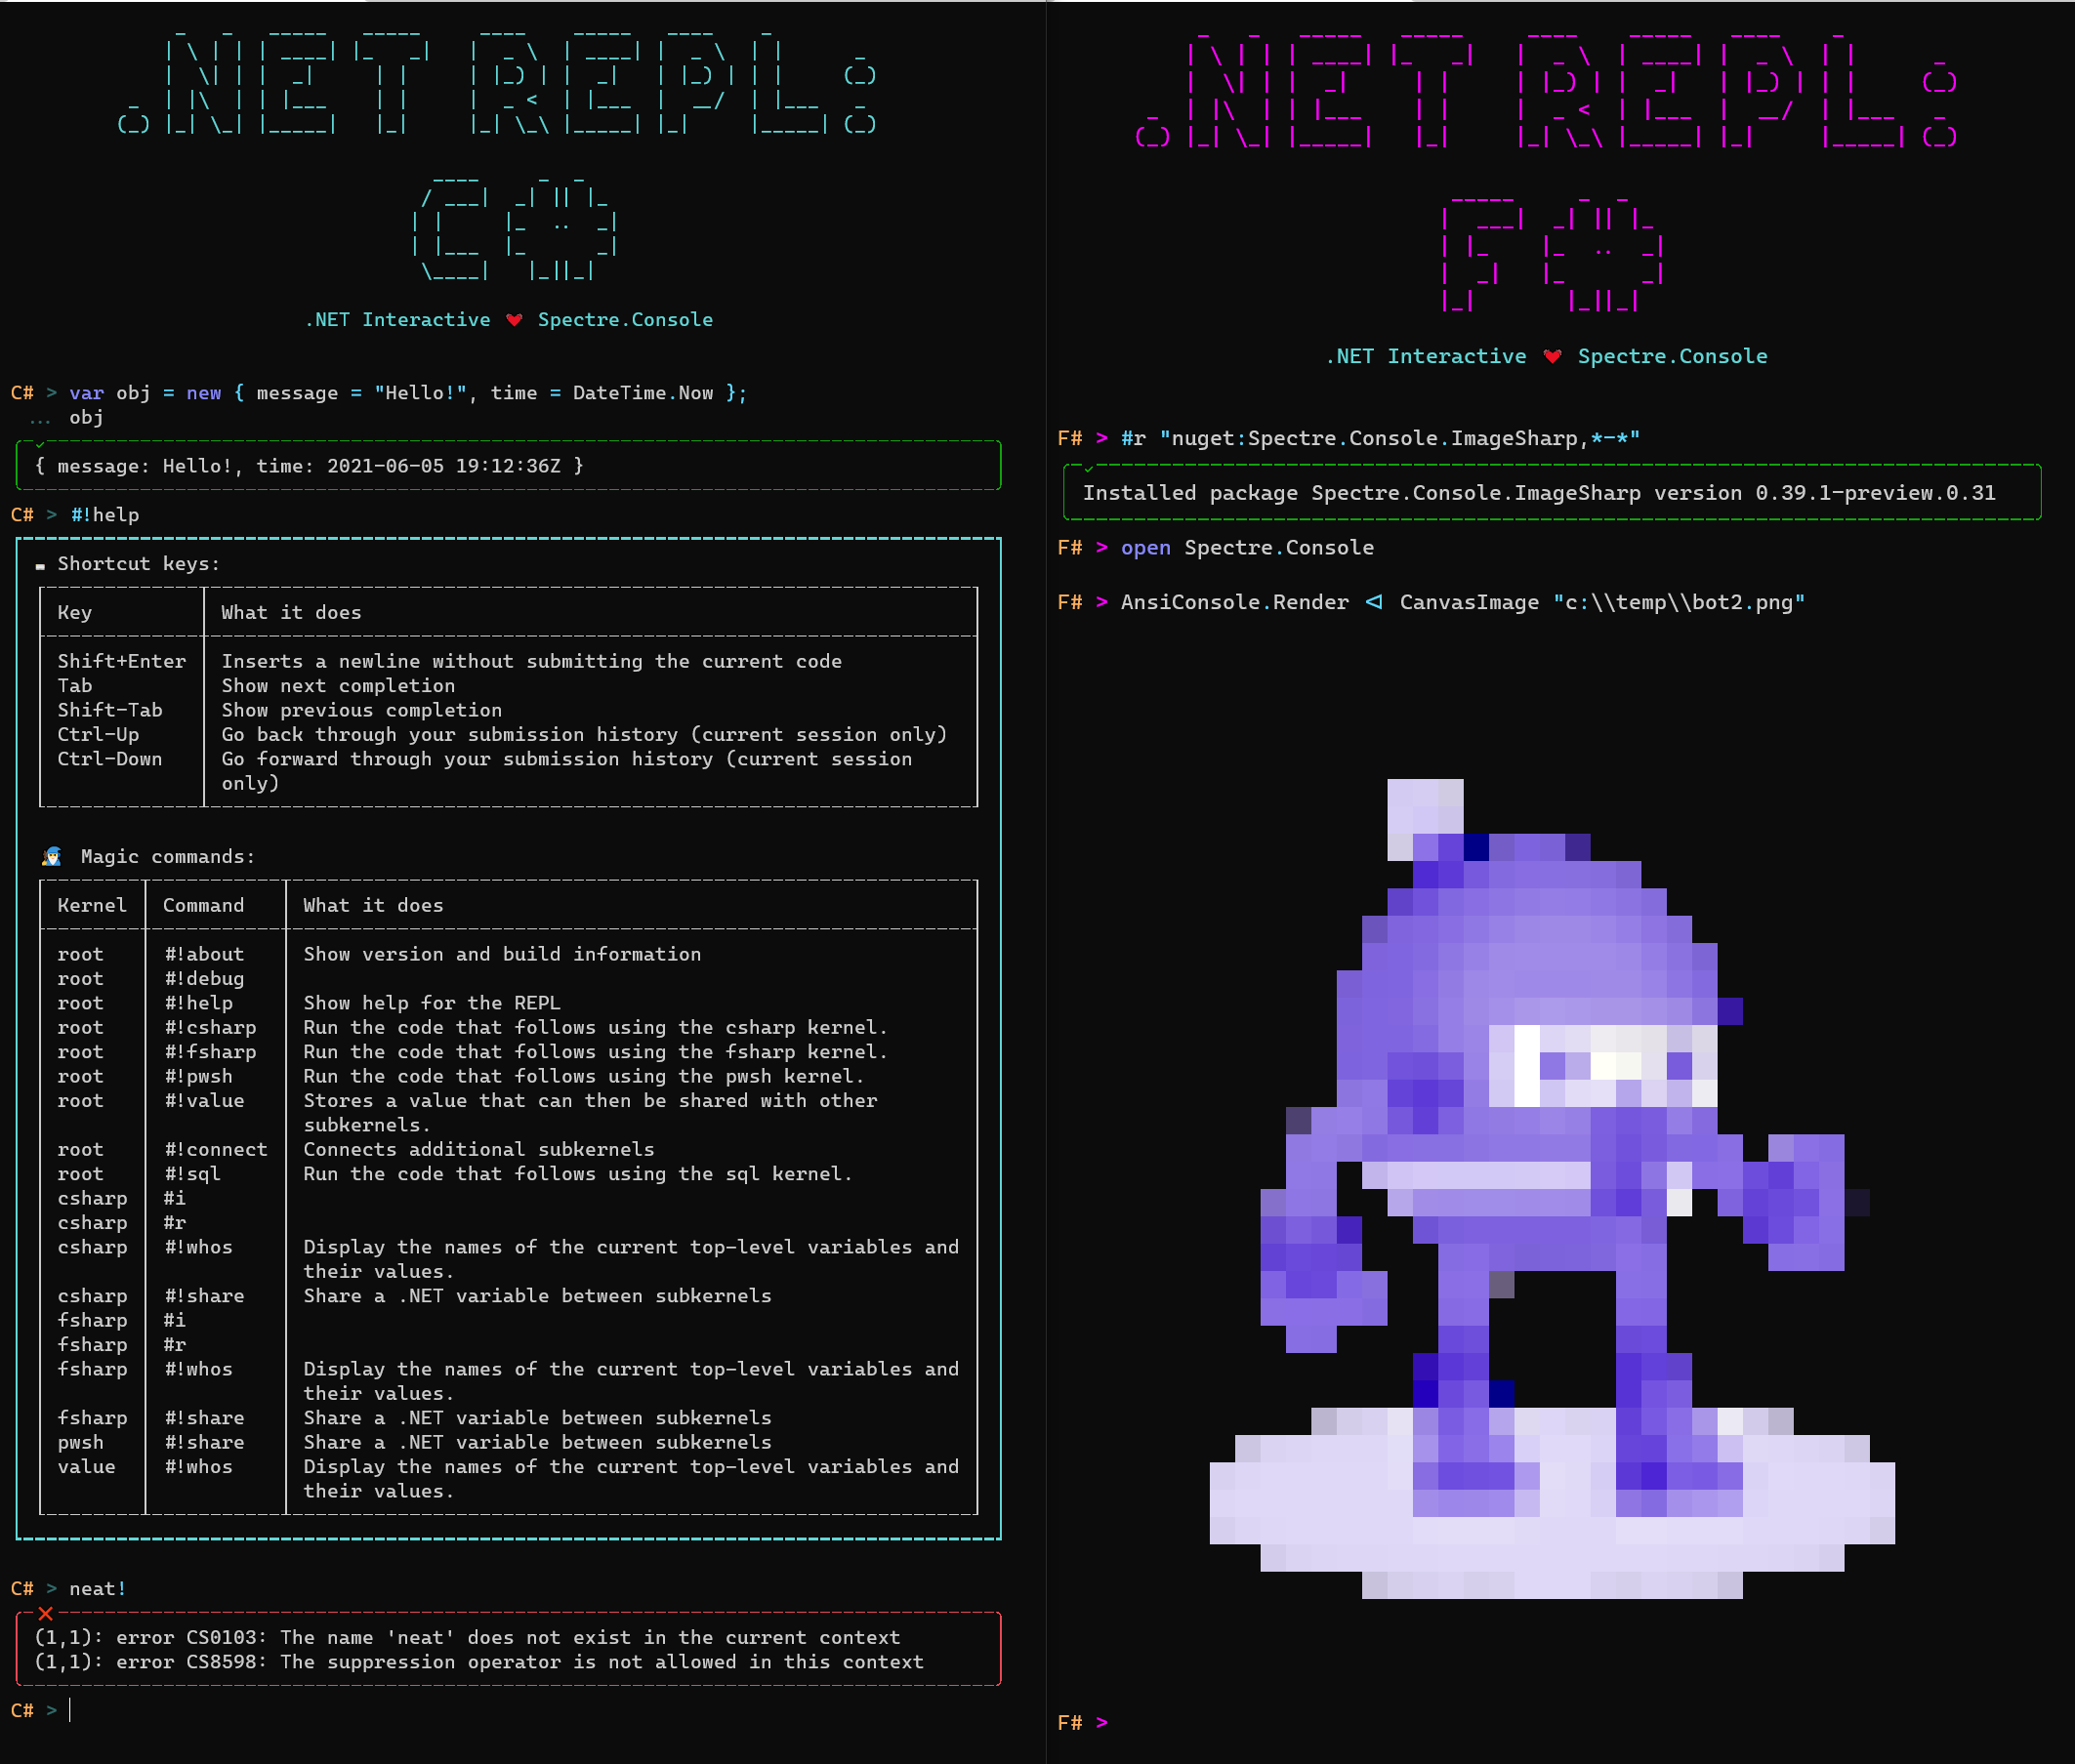
This project is an experiment using .NET Interactive / Polyglot Notebooks and Spectre.Console to create a polyglot .NET REPL for use on the command line.
This is a personal project. Hopefully you enjoy it and find it useful. Contributions are welcome.
Installation
To install dotnet-repl, run the following in your terminal:
> dotnet tool install -g dotnet-repl
Features
Here's what you can do with it:
Code in C#
You can start dotnet-repl in one of a number of different language modes. The default is C#, so the following two commands are equivalent:
> dotnet repl --default-kernel csharp
> dotnet repl
Once the REPL has started, you can type C# code at the prompt and run it by pressing Enter. (Note that this is the C# scripting dialect, which is also used in Visual Studio's C# Interactive Window and in .NET Interactive Notebooks.)
One notable feature of C# scripting is the ability to specify a return value for a code submission using a "trailing expression":
<img src="https://user-images.githubusercontent.com/547415/121977410-d0cfab00-cd3a-11eb-84a0-ab4f8889c9c7.png" width="60%" />Code in F#
You can also start up the REPL in F# mode with --default-kernel or set the environment variable DOTNET_REPL_DEFAULT_KERNEL to fsharp:
> dotnet repl --default-kernel fsharp
# DOTNET_REPL_DEFAULT_KERNEL=fsharp
> dotnet repl
📝 Submit multi-line entries
By pressing Shift-Enter, you can add multiple lines before running your code using Enter. This can be useful for creating multi-line code constructs, including declaring classes.
Another handy aspect of multi-line entries is that you no longer need to use the the F# Interactive convention of terminating a line with ;; to indicate that the accumulated submission should be run. Pressing Enter will submit the code, and if you need more than one line of code at a time, you can use Shift-Enter to add lines before submitting.
🚥 Switch languages within the same session
<img src="https://user-images.githubusercontent.com/547415/121456913-ab6a2800-c95b-11eb-9a47-0f0828b2ba3b.png" width="60%" />🎁 Add NuGet packages
You can use #r nuget to install a package for the duration of the current session.
🌱 Initialize your REPL session using a notebook, script, or code file
You can use a file containing code as an initialization script for the REPL.
> dotnet repl --run /path/to/notebook.ipynb
The following file types are supported
<img src="https://user-images.githubusercontent.com/547415/192895883-5e80e419-26dd-422c-b4bc-4d3533b861fb.gif" width="60%" />🏃🏽 Run a notebook, script, or code file and then exit
You might also want to just use a notebook or other file containing code as a non-interactive script. You can do this by adding the --exit-after-run flag. As long as the file extension indicates a language understood by .NET Interactive, it will try to run it.
> dotnet repl --run /path/to/notebook.ipynb --exit-after-run
File formats currently supported are:
.ipynb: A Jupyter notebook, which can contain code cells in multiple different languages understood by .NET Interactive..dib: A .NET Interactive script file..cs: A C# source code file. (Some language constructs, such as namespaces, are not supported, so this one is extra experimental.).csx: A C# script file..fs: An F# source code file..fsx: An F# script file..ps1: A PowerShell script..html: An HTML file. (This will render in an external browser window.).js: A JavaScript file. (This will render in an external browser window.)
If all of the notebook's cells execute successfully, a 0 exit code is returned. Otherwise, 2 is returned. This can be used as a
way to test notebooks.
If you also want to capture the notebook output when it runs, you can do so by specifying the --output-path and --output-format options. --output-path should be the file name you would like to write to. --output-format can be either ipynb or trx. ipynb is the default and will write a Jupyter notebook file with the outputs captured from the run. You can open this file using the .NET Interactive Notebooks extension in Visual Studio Code, or any number of other Jupyter readers, and it can be displayed in GitHub. The trx format is a .NET test result file and can be useful in CI pipelines such as Azure DevOps, or can be opened with Visual Studio, or read with the t-rex tool.
🛳️ Import a notebook or script and run it
If the REPL is already running, you can import a file into it and run it immediately using the #!import magic command. All of the same file types that --run supports are supported by #!import.
🏀 Pass parameters when running a notebook or script
If a notebook contains magic commands with @input tokens, running them in a notebook editor like .NET Interactive Notebooks will create a prompt for user input. Values for these inputs can provided on the command line using the --input option.
For example, let's say you have a notebook called notebook.ipynb containing the following magic commnand:
#!connect mssql --kernel-name mydatabase @input:connectionString
You can pass in the connection string from the command line like this:
> dotnet repl --run notebook.ipynb --input connectionString="Persist Security Info=False; Integrated Security=true; Initial Catalog=MyDatabase; Server=localhost"
💁♀️ Ask for help
You can see help for the REPL by running the #!help magic command. I won't print it all here because it's a work in progress. Just give it a try.
⌨ Keyboard shortcuts
dotnet-repl supports a number of keyboard shortcuts. These will evolve over time but for now, here they are:
| Keybinding | What it does |
|---|---|
Enter | Submit and run the current code |
Shift+Enter | Inserts a newline without submitting the current code |
Tab | Show next completion |
Shift+Tab | Show previous completion |
Ctrl+C | Exit the REPL |
Ctrl+Up | Go back through your submission history (current session only) |
Ctrl+Down | Go forward through your submission history (current session only) |
🧙♂️ Magic commands
Because dotnet-repl is built on .NET Interactive, it supports "magic commands". You can recognize a magic command by the #! at the start of a line.
You can see the list of supported magic commands by running the #!help magic command.
