Awesome
Tetra-NeRF
Official implementation of Tetra-NeRF paper
Project Page | Paper | Demo<br>
Tetra-NeRF: Representing Neural Radiance Fields Using Tetrahedra<br> Jonas Kulhanek<sup>1</sup>, Torsten Sattler<sup>1</sup><br> ICCV 2023<br> <sup>1</sup> Czech Technical University in Prague<br>
<br>
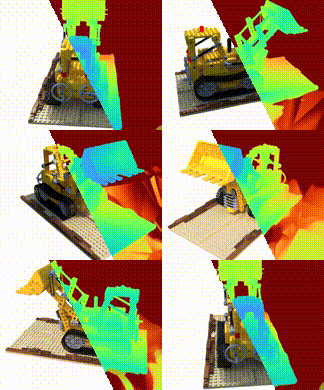
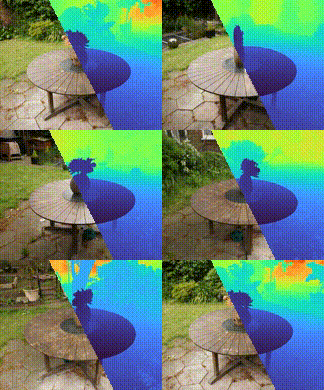
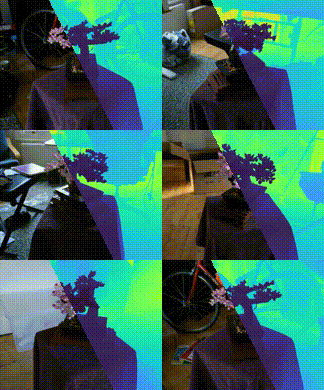
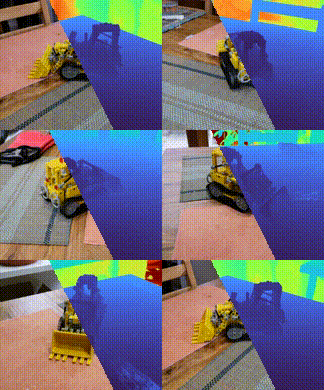
The input to Tetra-NeRF is a point cloud which is triangulated to get a set of tetrahedra used to represent the radiance field. Rays are sampled, and the field is queried. The barycentric interpolation is used to interpolate tetrahedra vertices, and the resulting features are passed to a shallow MLP to get the density and colours for volumetric rendering.<br>
UPDATE!
Tetra-NeRF is now faster and achieves better performance thanks to using biased sampling instead of sampling uniformly along the ray.
The configuration from the paper was renamed to tetra-nerf-original. And tetra-nerf now points to the new configuration.
Introduction
First, install Tetra-NeRF. The instructions are given in the installation section. If you want to reproduce the results from the paper, please follow the reproducing results section which will instruct you on how to download the data and run the training. We also publish the generated images.
If you want to use Tetra-NeRF with your own collected data, please follow the using custom data section.
Using custom data
When training on your own images, first you need the COLMAP model for camera poses and sparse point cloud.
You can run COLMAP yourself or use our script with default COLMAP parameters to build the model.
First prepare a folder with your data. In the folder, a subfolder called images and copy all your images
into that folder.
Without existing COLMAP model
Simply run the following:
python -m tetranerf.scripts.process_images --path <data folder>
This command will create a single sparse COLMAP model from all images to be later used
for both the camera poses and the input point cloud.
However, if you care about correct evaluation, you want the input point cloud to be constructed only from
the training images. In that case, you can use the --separate-training-pointcloud flag.
With this flag turned on, the script will create two sparse models:
first with all images to get the camera poses of all images and the second from only the training images.
Finally, start the training:
ns-train tetra-nerf colmap --data <data folder>
With existing COLMAP
In case you already have a sparse COLMAP model, move it to the data folder. The folder structure should look like this:
images
  ...
sparse
  0
    cameras.bin
    ...
Finally, start the training:
ns-train tetra-nerf colmap --data <data folder>
Reproducing results
We first give instructions on how to download and preprocess the data, and run the training. We also publish the generated images.
Getting the data
First, please download and extract the datasets.
- Download Blender dataset from here: https://drive.google.com/file/d/18JxhpWD-4ZmuFKLzKlAw-w5PpzZxXOcG/view?usp=share_link. In this tutorial, we assume the data was extracted and moved to folder
data/blender, which should now contain folders like:lego,drums, ... For the Blender dataset, we further provide the point clouds used by Point-NeRF. Please download and extract the following file: https://data.ciirc.cvut.cz/public/projects/2023TetraNeRF/assets/pointnerf-blender.zip to folderdata/pointnerf-blenderwhich should now contain:pointnerf-colmap-drums.ply, ... - Download the Tanks and Temples dataset from here: https://dl.fbaipublicfiles.com/nsvf/dataset/TanksAndTemple.zip. Extract it into
data/nsvf-tanks-and-temples. TheIgnatiusscene has corrupted intrinsics file, therefore, we provide our own reconstructed data here: https://data.ciirc.cvut.cz/public/projects/2023TetraNeRF/assets/tt-ignatius.zip. Please replace the pathdata/nsvf-tanks-and-temples/Ignatiuswith the downloaded and extracted fiel. You no longer need to run the processing steps on that scene. - Download the Mip-NeRF 360 dataset from here: http://storage.googleapis.com/gresearch/refraw360/360_v2.zip. Extract it into
data/mipnerf360.
Next the poses must be transformed in order to be able to load them in NerfStudio. Make sure to have COLMAP and FFmpeg installed.
You can follow the instructions here if COLMAP is not installed: https://colmap.github.io/install.html, or you can install it using conda.
Use the following commands to transform the data and to generate the input tetrahedra.
- For each scene from the Blender dataset, run the following:
python -m tetranerf.scripts.process_blender --transforms data/blender/<scene>/transforms_train.json --output data/blender/<scene>
python -m tetranerf.scripts.triangulate --pointcloud data/blender/<scene>/sparse.ply --output data/blender/<scene>/sparse-1.th --random-points-ratio 1
python -m tetranerf.scripts.triangulate --pointcloud data/pointnerf-blender/pointnerf-colmap-<scene>.ply --output data/blender/<scene>/pointnerf-0.5.th --random-points-ratio 0.5
- For each scene from the Tanks and Temples dataset, run the following:
python -m tetranerf.scripts.process_tanksandtemples --path data/nsvf-tanks-and-temples/<scene> --output data/nsvf-tanks-and-temples/<scene>
python -m tetranerf.scripts.triangulate --pointcloud data/nsvf-tanks-and-temples/<scene>/dense.ply --output data/nsvf-tanks-and-temples/<scene>/dense-1M.th
- For each scene from the Mip-NeRF 360 dataset, run the following:
python -m tetranerf.scripts.process_mipnerf360 --downscale-factor <2 for indoor, 4 for outdoor scenes> --run-dense --path data/mipnerf360/<scene>
python -m tetranerf.scripts.triangulate --pointcloud data/mipnerf360/<scene>/sparse.ply --output data/mipnerf360/<scene>/sparse-1.th --random-points-ratio 1
python -m tetranerf.scripts.triangulate --pointcloud data/mipnerf360/<scene>/dense.ply --output data/mipnerf360/<scene>/dense-1M.th
Running the training
To run the training, use the following commands:
- For Blender dataset, run the following:
ns-train tetra-nerf-original --pipeline.model.tetrahedra-path data/blender/<scene>/pointnerf-0.5.th blender-data --data data/blender/<scene>
- For Tanks and Temples dataset, run the following:
ns-train tetra-nerf-original --pipeline.model.tetrahedra-path data/nsvf-tanks-and-temples/<scene>/dense-1M.th minimal-parser --data data/nsvf-tanks-and-temples/<scene>
- For Mip-NeRF 360 dataset, run the following:
ns-train tetra-nerf-original --pipeline.model.tetrahedra-path data/mipnerf360/<scene>/dense-1M.th minimal-parser --data data/mipnerf360/<scene>
Installation
First, make sure to install the following:
CUDA (>=11.3)
PyTorch (>=1.12.1)
Nerfstudio (>=0.2.0)
OptiX (>=7.2,<=7.6, preferably 7.6)
CGAL
CMake (>=3.22.1)
We recommend using a conda environment, CMake, CGAL, torch can be easily installed using conda install.
Our code was tested with python 3.10, but any python>=3.7 should be also supported.
You can follow the getting started section in the nerfstudio repository https://github.com/nerfstudio-project/nerfstudio#readme.
Please make sure that Nerfstudio is installed and working well. If you run ns-train you shouldn't get any error messages. You can also test your torch installation by running:
python -c 'import torch; import torch.utils.cpp_extension;arch=(";".join(sorted(set(x.split("_")[-1] for x in torch.utils.cpp_extension._get_cuda_arch_flags()))));print(f"CUDA: {torch.version.cuda}, compute: {arch}")'
which will output your CUDA version and CUDA compute, which should be greater than 61 and ideally 86.
The OptiX library can be installed from here https://developer.nvidia.com/designworks/optix/downloads/legacy. If you install it to a non-standard path, set the environment variable OPTIX_PATH=/path/to/optix when building Tetra-NeRF.
Finally, you can install Tetra-NeRF by running:
git clone https://github.com/jkulhanek/tetra-nerf
cd tetra-nerf
cmake .
make
pip install -e .
Docker
Alternatively, you can also run Tetra-NeRF in a docker image:
docker pull kulhanek/tetra-nerf:latest
docker run --rm -it --gpus all -p 7007:7007 kulhanek/tetra-nerf:latest
Note, it is required that nvidia-container-toolkit is installed and configured properly.
You can also build your custom image. Follow the instructions in the attached Dockerfile.
Predictions
To enable easier comparisons with our method we further provide the predicted images for the test sets.
| Dataset | Predictions | Input tetrahedra |
|---|---|---|
| Mip-NeRF 360 (public scenes) | download | download |
| Blender | download | download |
| Tanks and Temples | download | download |
Thanks
This project is built on NerfStudio<br> <img alt="NerfStudio logo" src="https://data.ciirc.cvut.cz/public/projects/2023TetraNeRF/resources/nerfstudio-logo.png" width="300" /><br> Fast ray-tracing is enabled by NVIDIA OptiX
Citing
If you use our work or build on top of it, please use the following citation:
@article{kulhanek2023tetranerf,
  title={{T}etra-{NeRF}: Representing Neural Radiance Fields Using Tetrahedra},
  author={Kulhanek, Jonas and Sattler, Torsten},
  journal={arXiv preprint arXiv:2304.09987},
  year={2023},
}


