Awesome
Literate Visualization · 


A light-touch approach to designing, building and describing visualization. Here you will find
- Tutorials for working with litvis, Elm and elm-vega/vegalite.
- Examples of literate visualization.
- Documentation of the litvis markdown syntax.
- Narrative Schemas to help you write literate visualization documents.
- Packages for developers working with litvis and NPM.
Setting up litvis
(If you unfamiliar with the using npm or configuring editors, you can view these more detailed setup instructions that show you how to install and set up VSCode to work with litvis.)
Litvis documents can be viewed and created in the VS Code editor:
-
If you don't have it already, install Node.js. This will allow you to use npm, used for installing some of the other necessary software.
-
Install Elm from the official Elm install page (there's no need to follow the "after installation is complete..." tests).
-
Create a project folder to contain your litvis work. Open a terminal window and
cdto that project folder. Install Prettier and Prettier Elm plugin with the following commands:npm init --yes npm install prettier prettier-plugin-elm echo "{ \"plugins\": [\"prettier-plugin-elm\"] }" > .prettierrc.json -
If you don't have it already, install the VS Code editor.
-
Install the litvis extensions:
-
Select
View → Extensions -
Search for
markdown-preview-enhanced-with-litvisand then clickinstallnext to the returned result (main litvis functionality). -
Search for
prettier - Code formatterand install (auto-formats code). -
Search for
elm toolingand install (syntax highlighting of Elm code).
-
-
Configuring Your Editor
To make using litvis as smooth as possible, we recommend the following editor configuration options:
- Under
Preferences->Settings, change the following from their default settings:Text Editor -> Formatting: ensureFormat On Saveis tickedExtensions -> Markdown Preview Enhanced with litvis: ensureLive Updateis not ticked.
- Under
You should now be good to go! Get started by writing your first litvis document and looking at these tutorials.
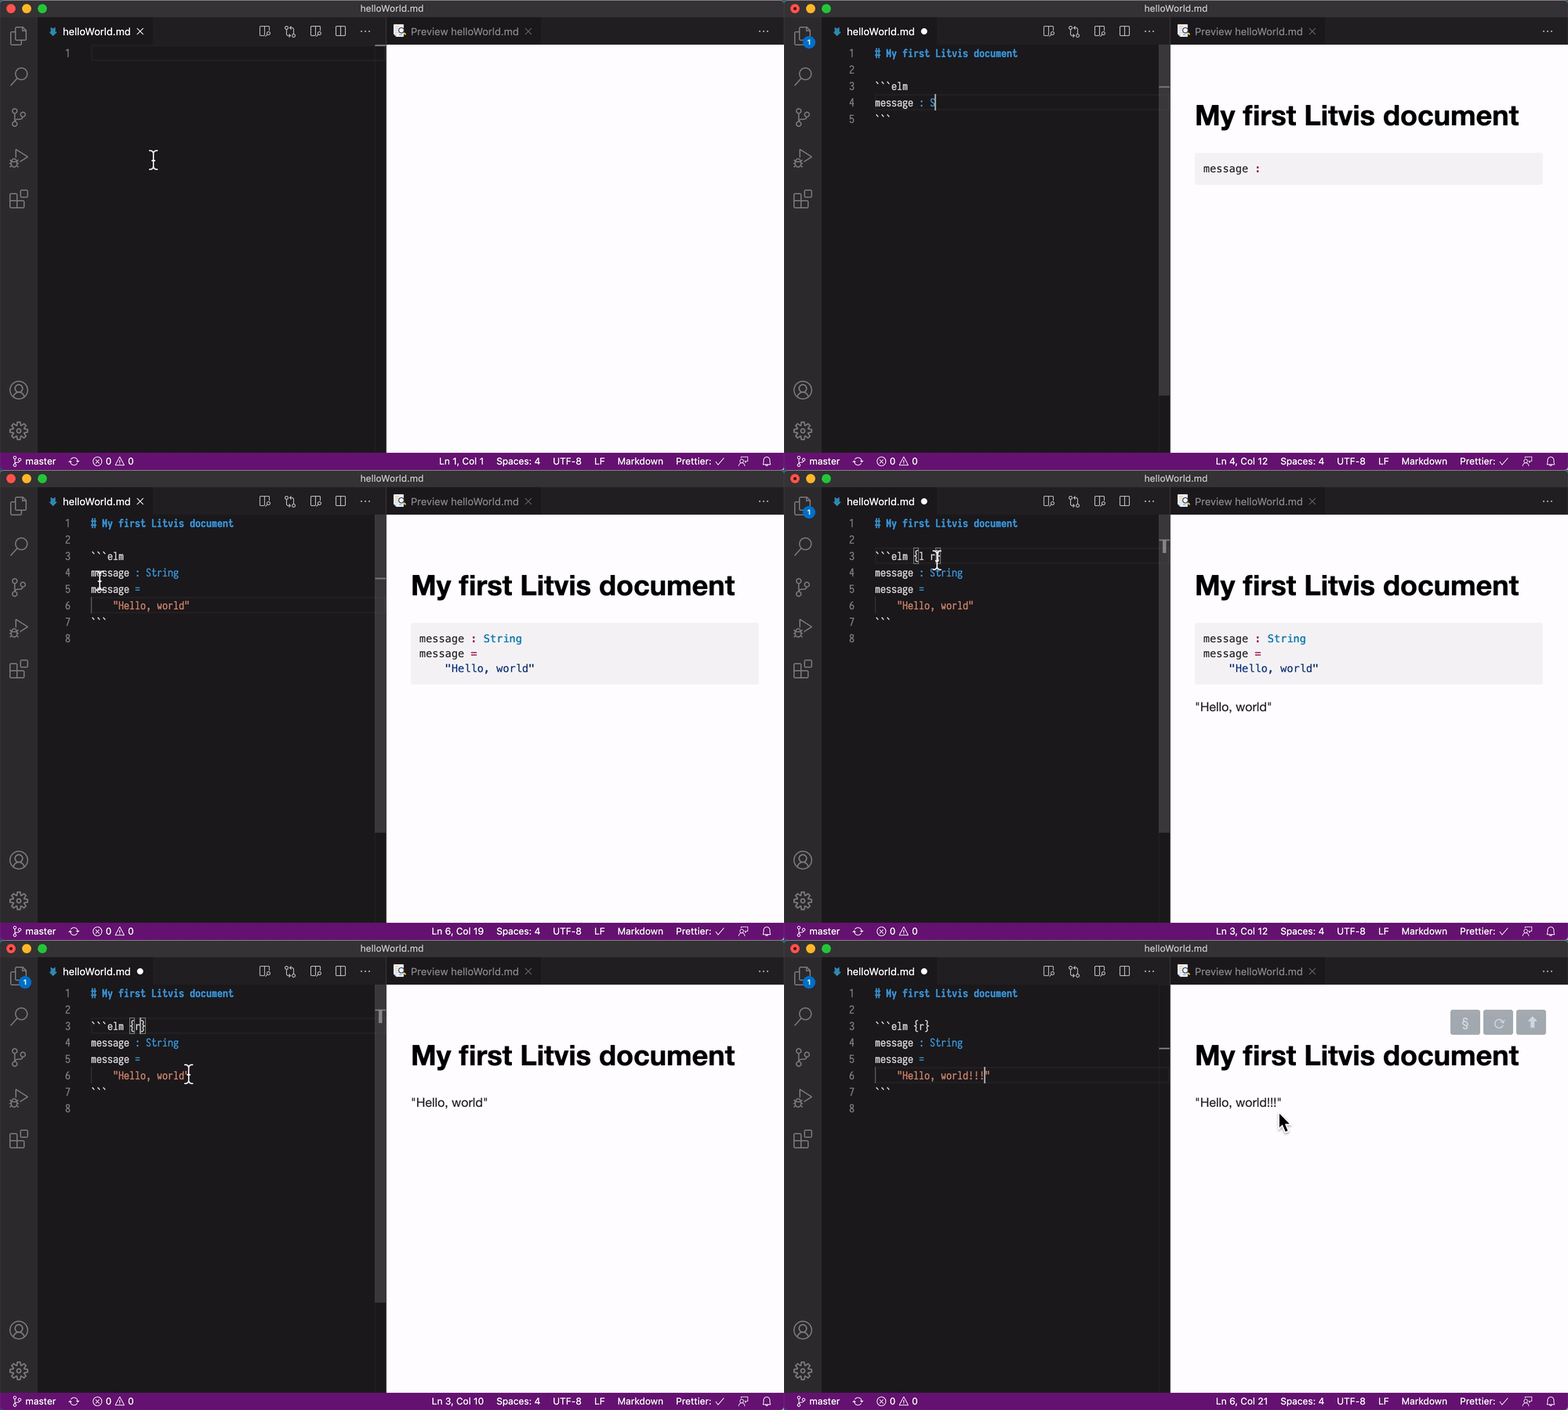
‘Hello world’ in literate Elm
Adding litvis attribute l (or literate) to elm blocks in markdown automatically compiles and executes the code in real time. Attribute r (or raw) is the simplest way to see the result.
Simple litvis chart
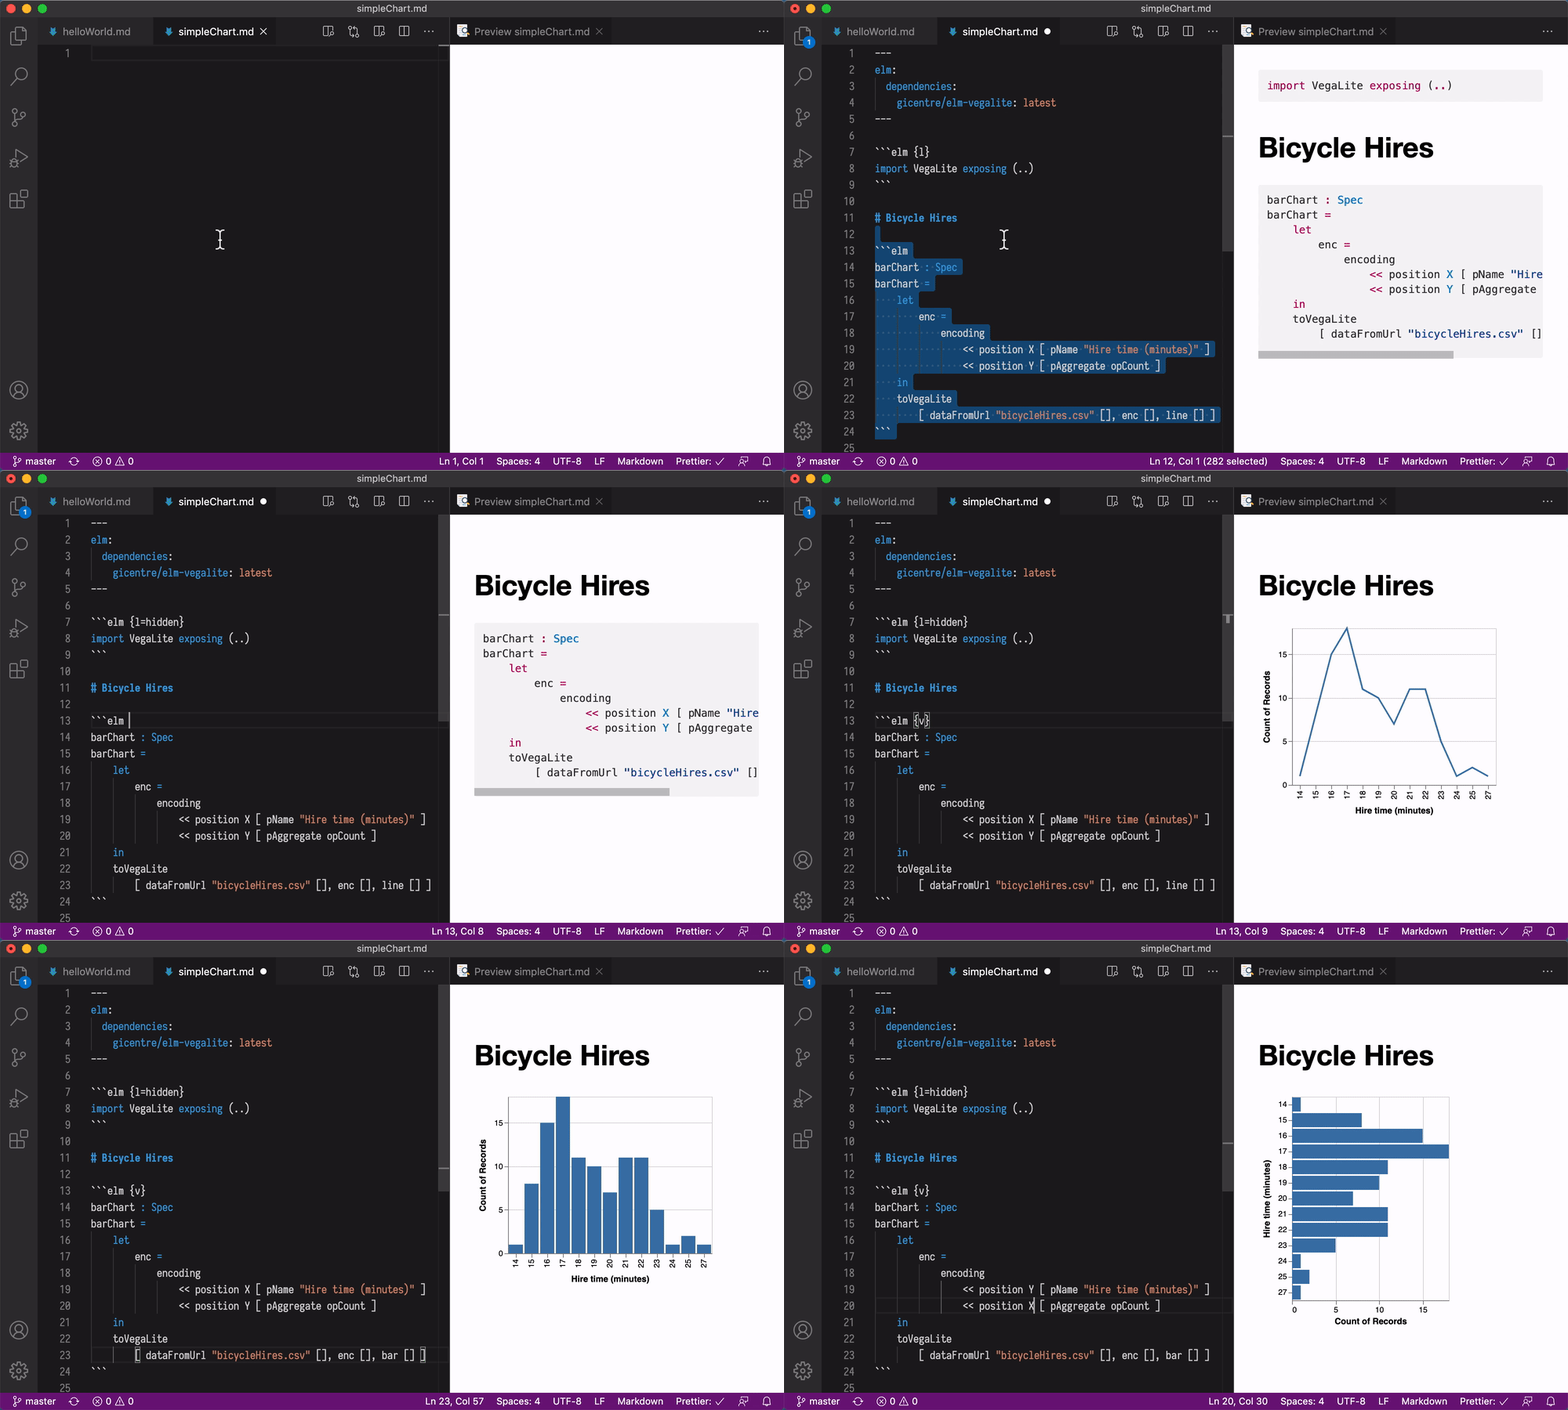
A litvis code block with attribute v (or visualize) automatically renders the declared symbol using elm-vegalite or elm-vega.
Code referencing across blocks
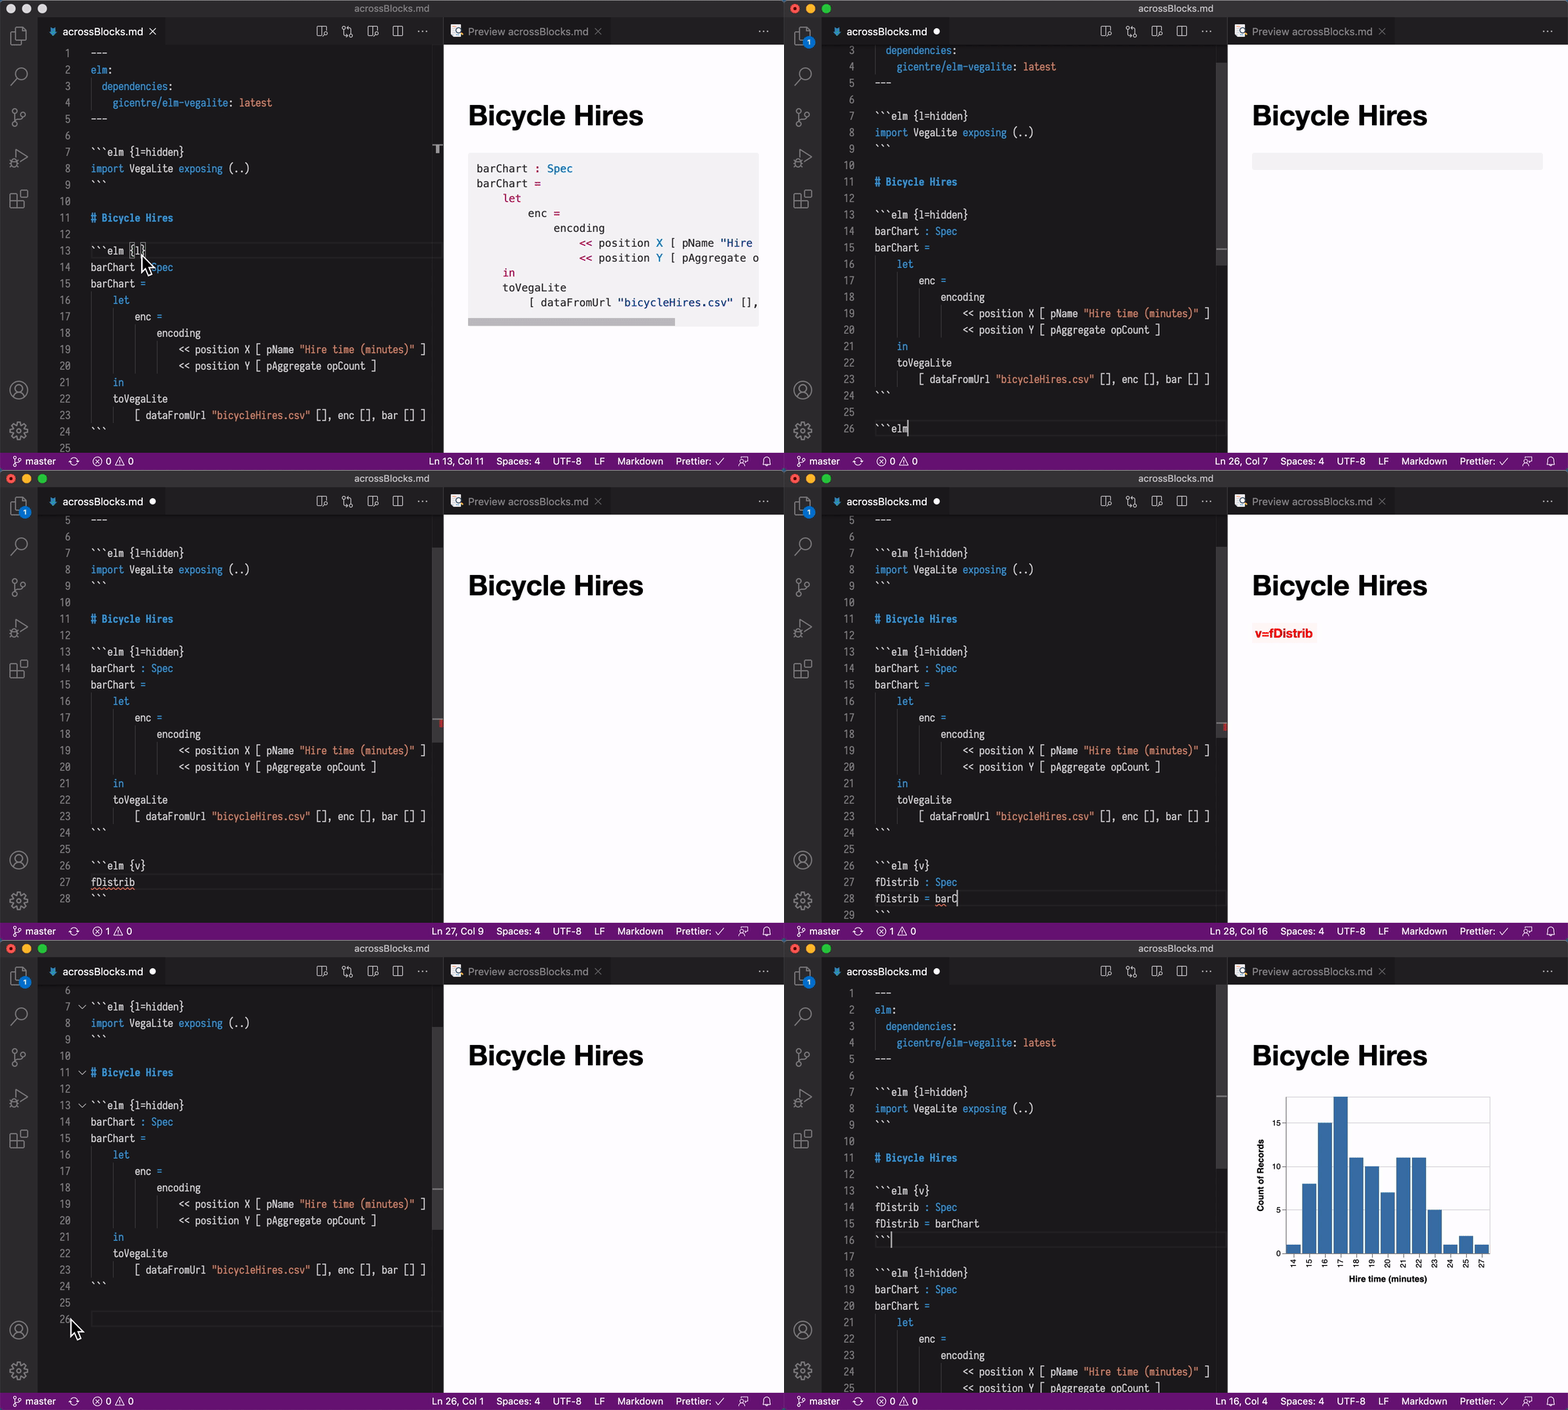
By default, litvis code blocks share the same execution context, which means that an Elm symbol defined in one block and can be referenced in another block. Blocks can be placed in any order.
Code referencing with triple hat notation
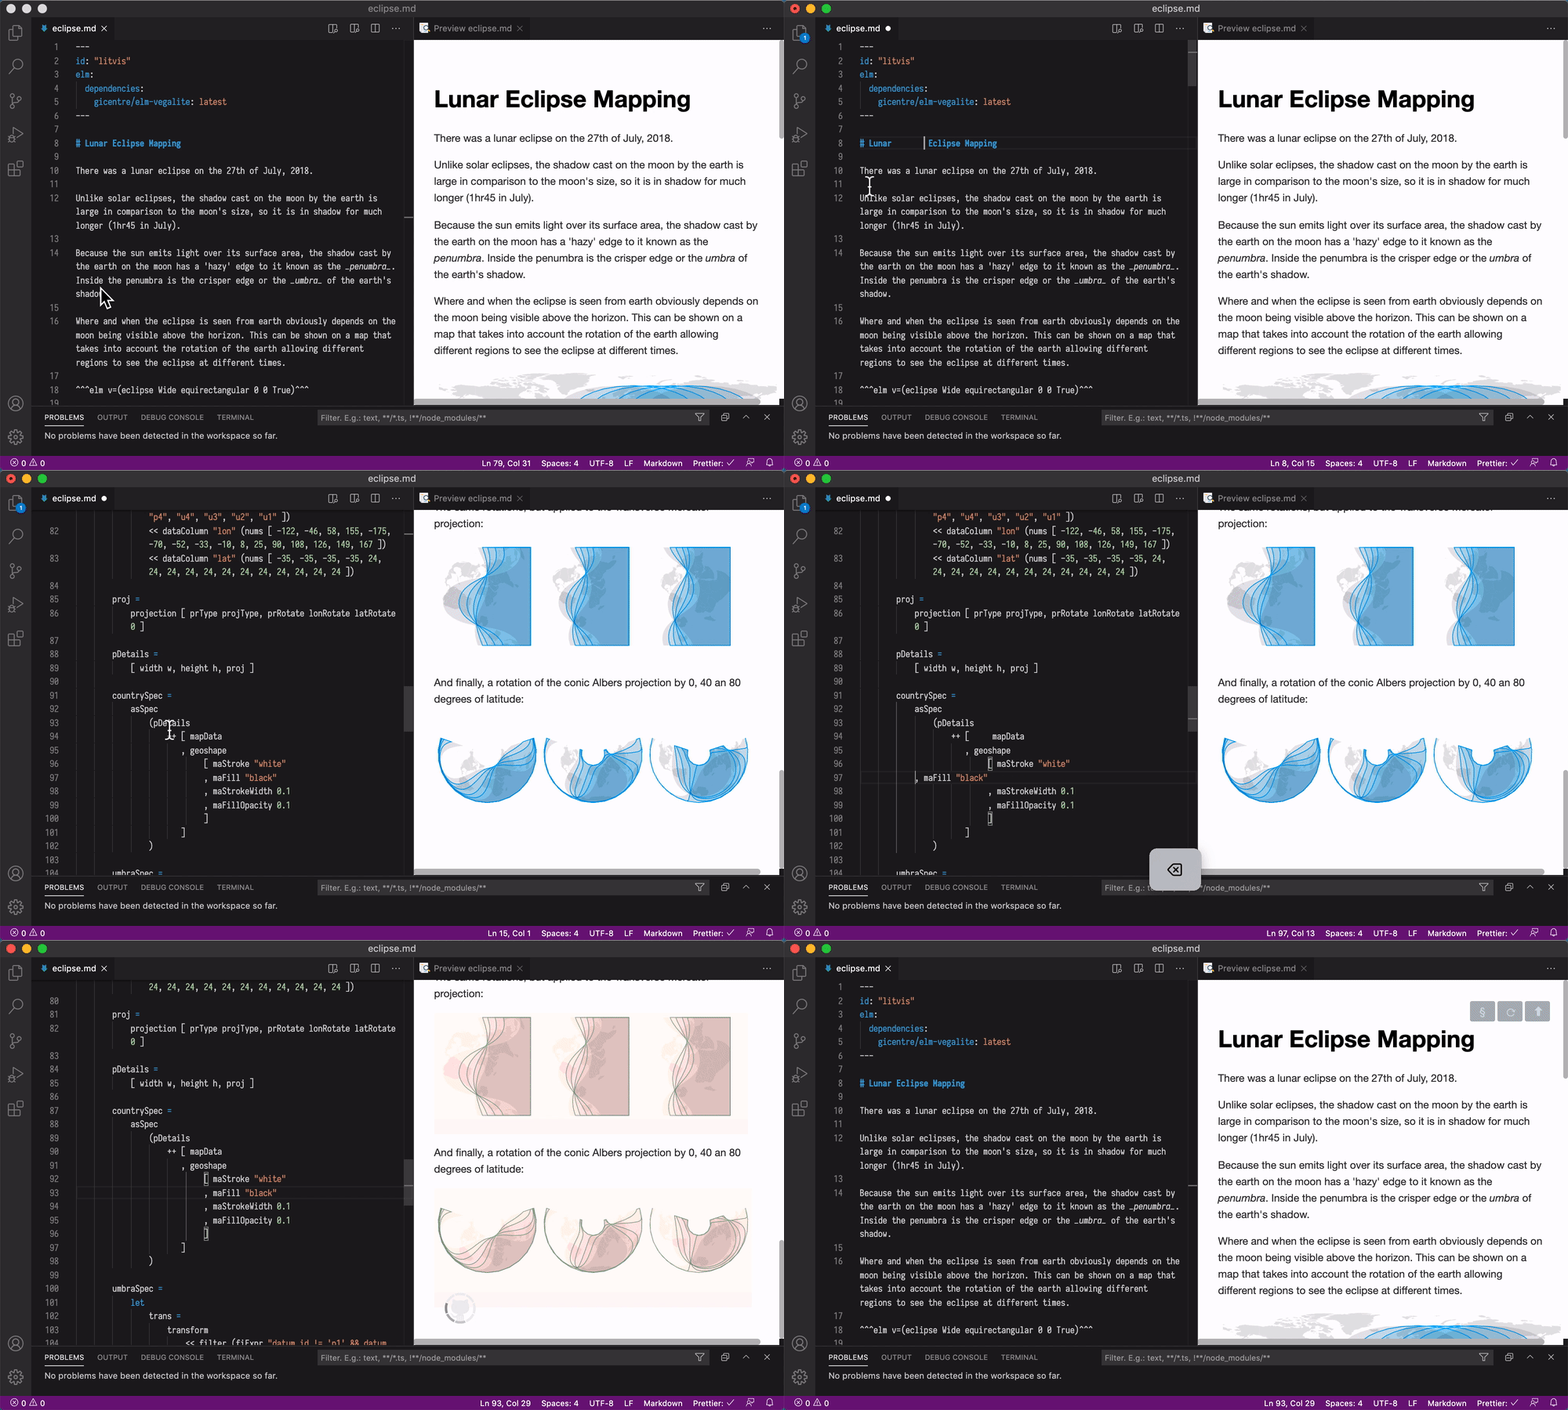
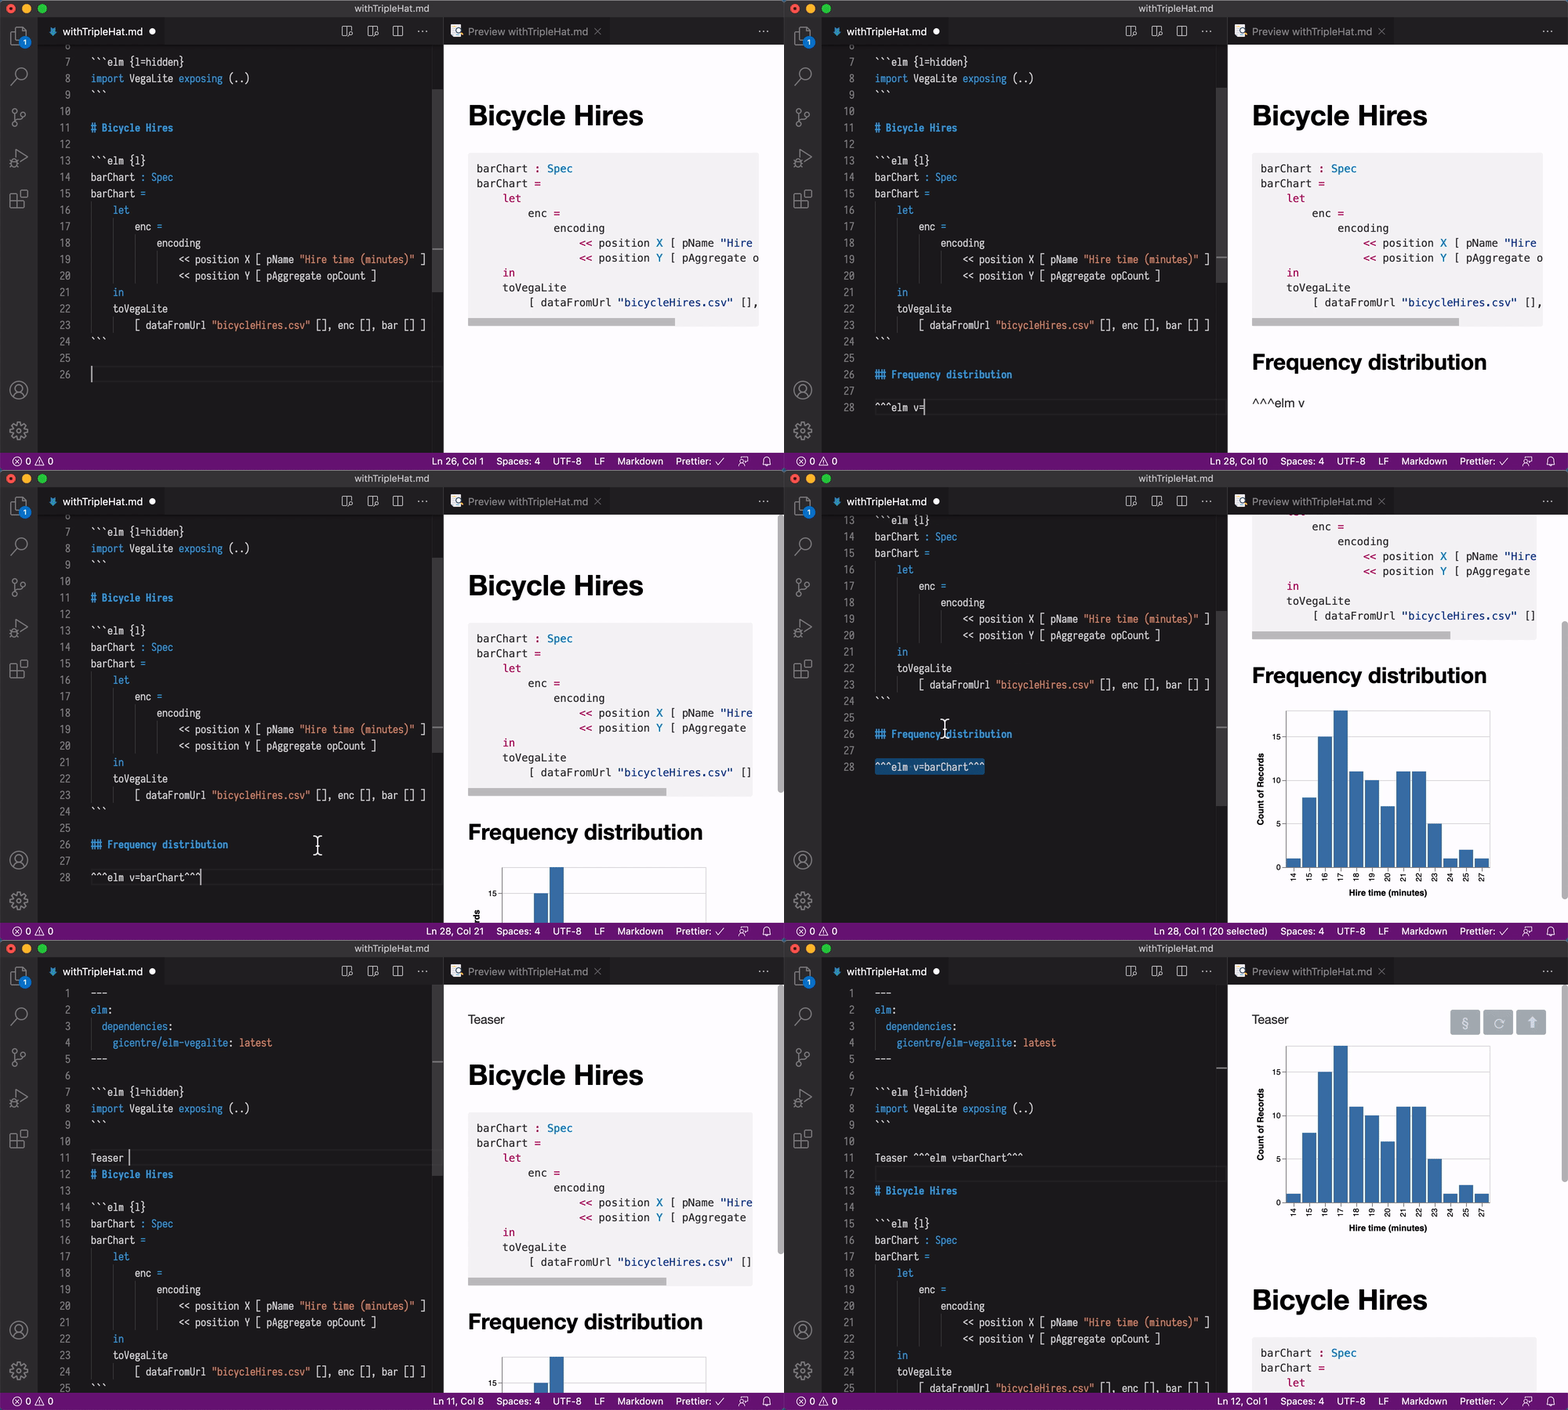
Symbols from Elm code blocks can be referenced in any part of the markdown using triple hat notation (^^^).
Code referencing with parameters
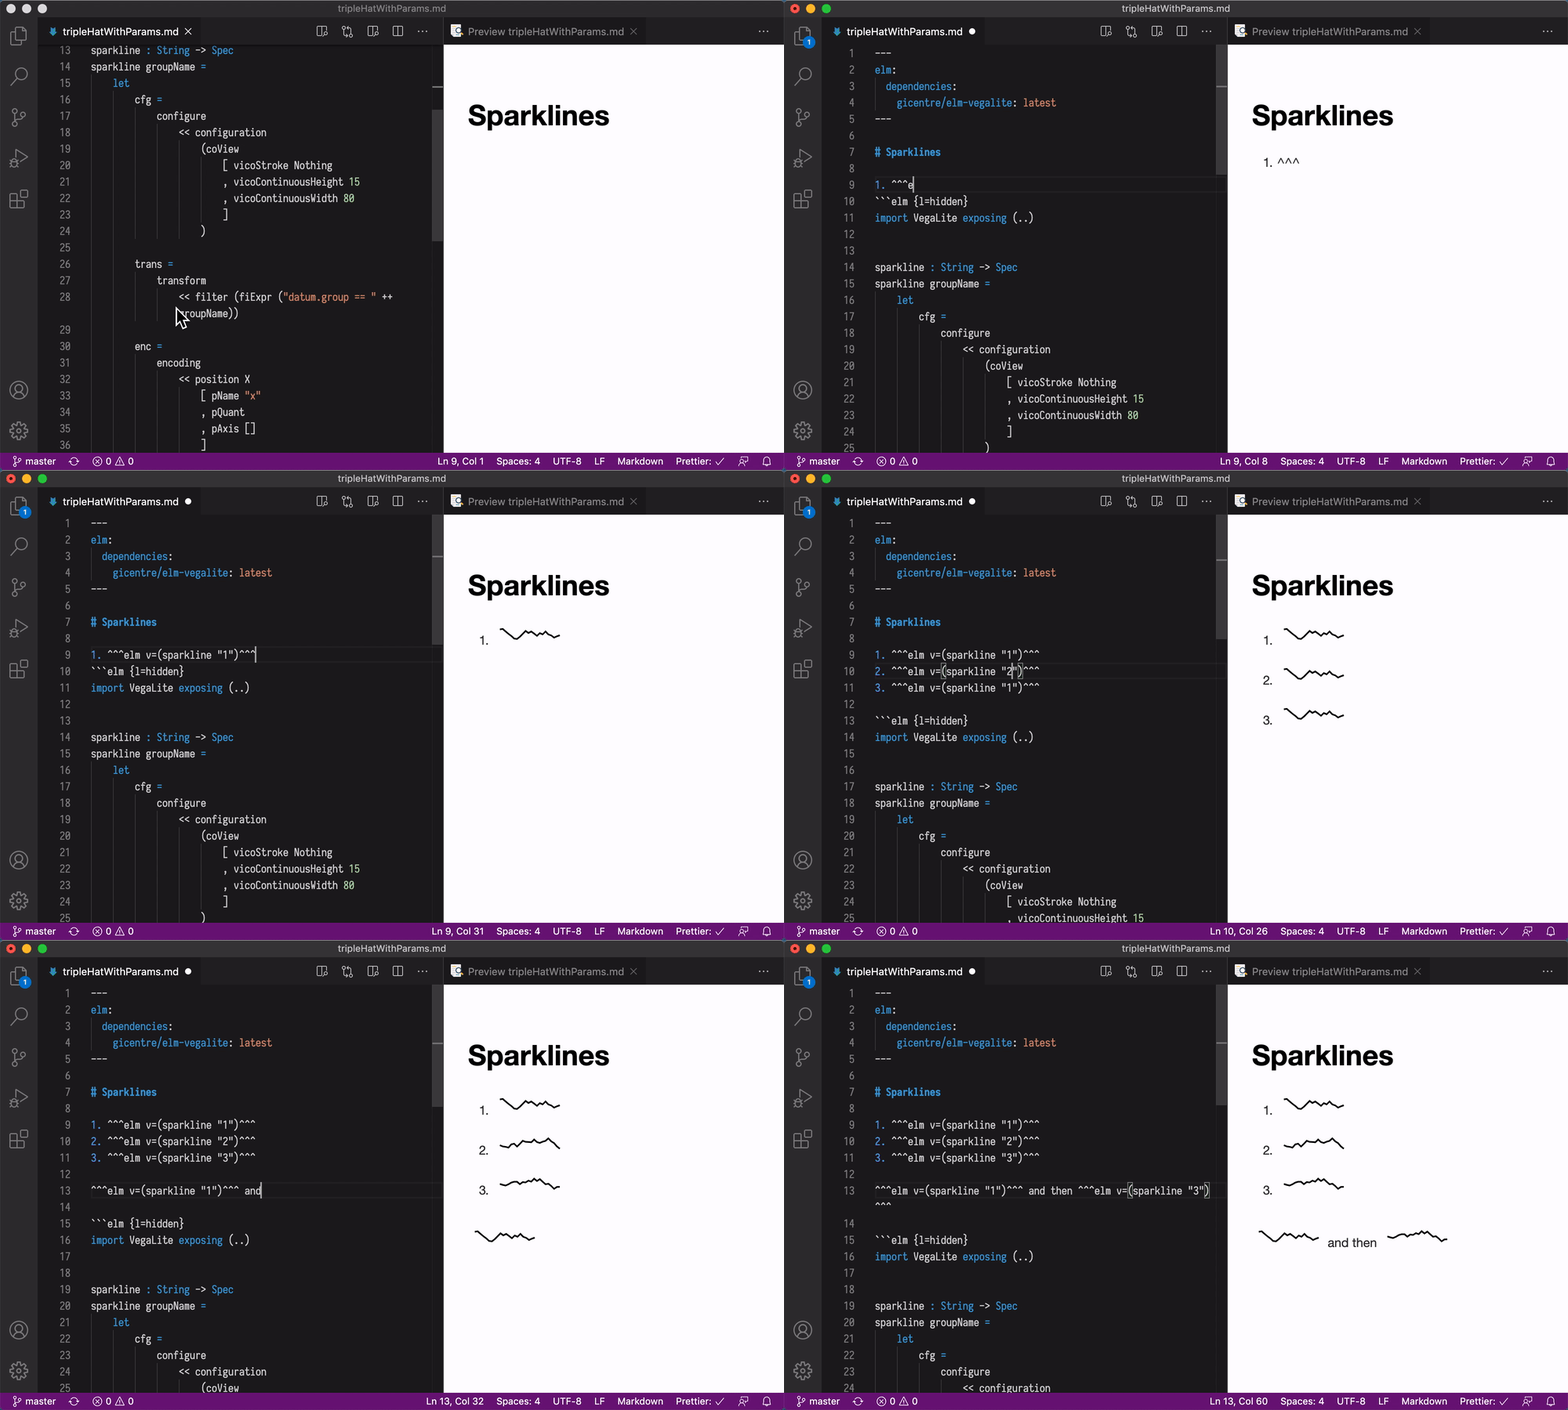
Triple hat references accept parametrized function calls, which makes it easy to combine text with graphics and produce families of related graphics. This means that small multiples and embedded graphics such as sparklines are straightforward.
Debugging Code
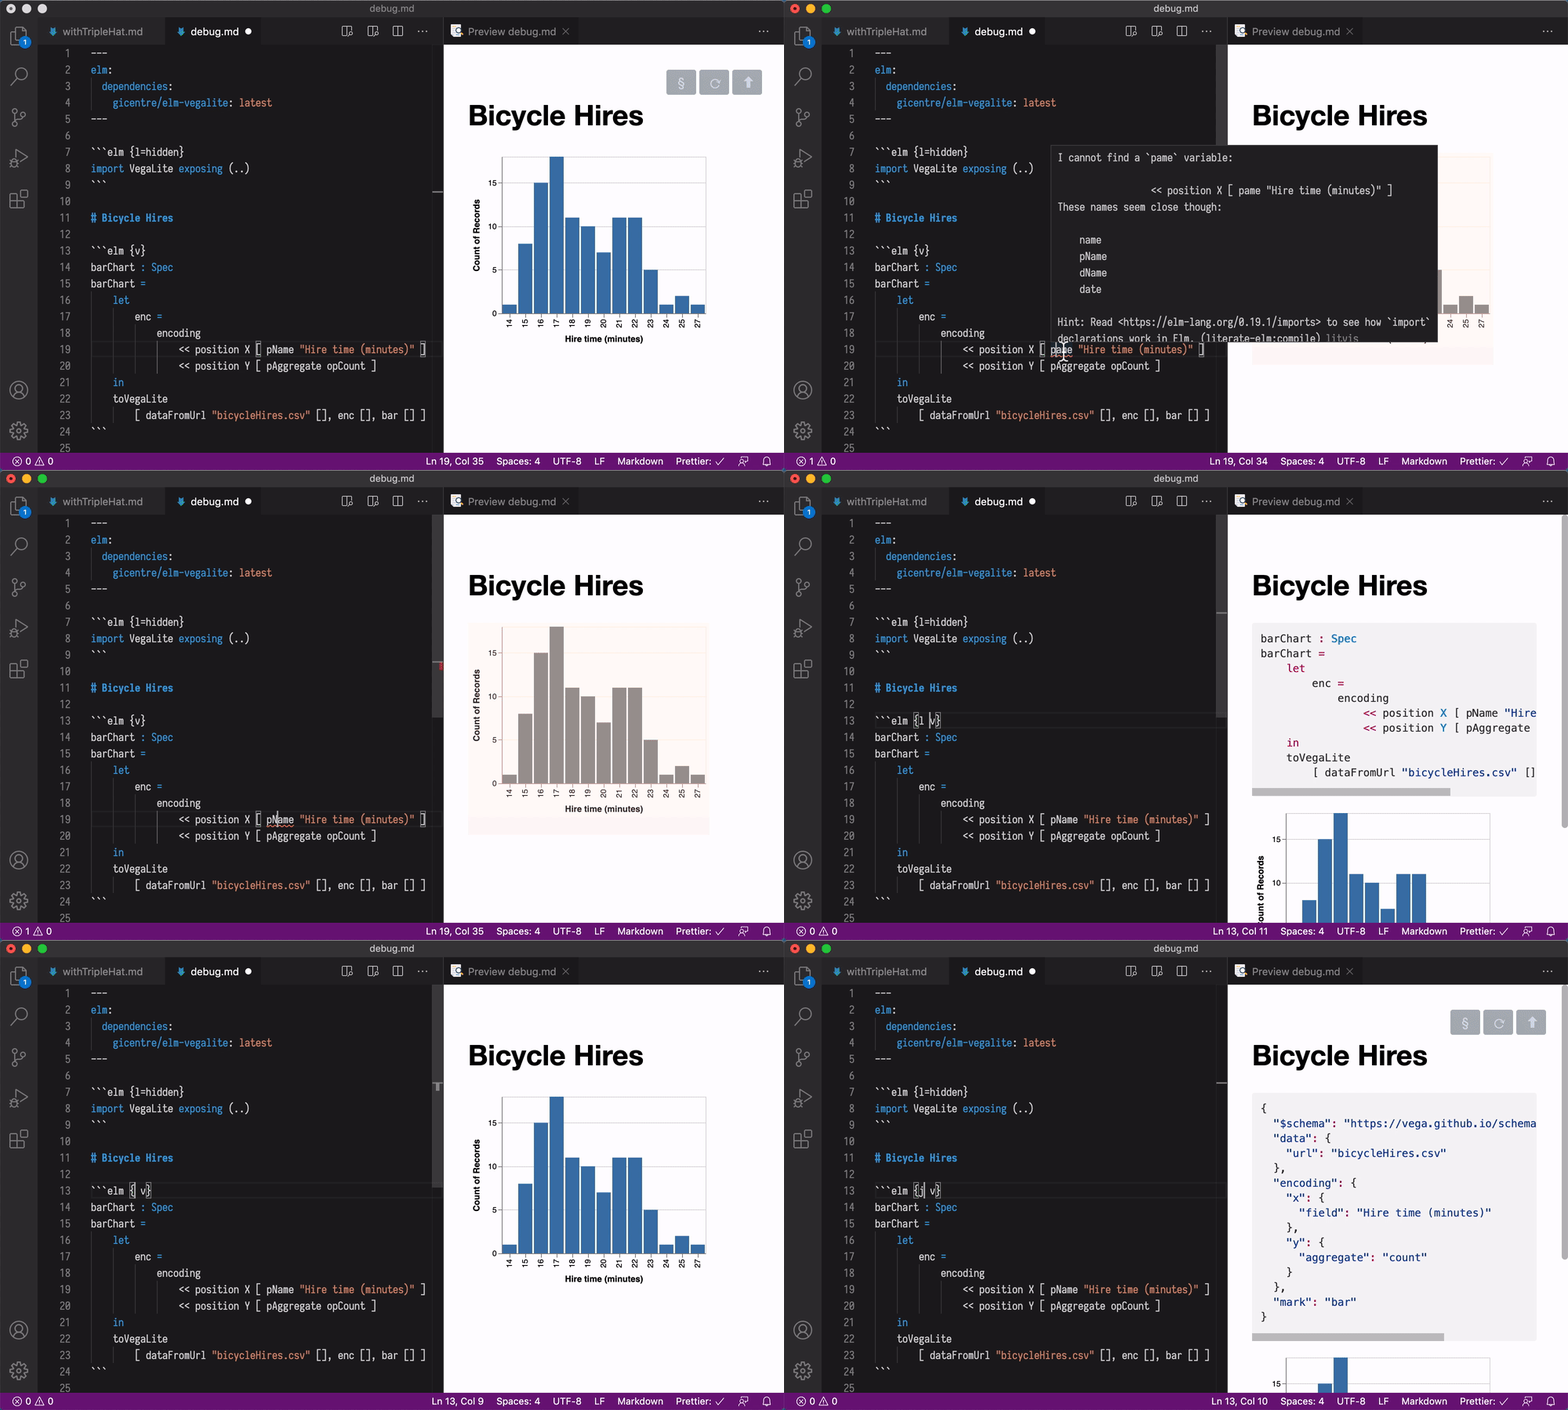
A litvis document that is being previewed is constantly checked for program validity. Any issues that are detected are displayed in the editing environment and help with debugging. If a visualization has been successfully rendered before the issue had occurred, its old preview is shown to avoid unwanted markup reflows.
Replacing v with r for raw or j for json makes it possible to look into generated vega-lite specs.
This can help debugging more deeply embedded problems or for generating standard JSON Vega/Vega-Lite specifications.
Interaction
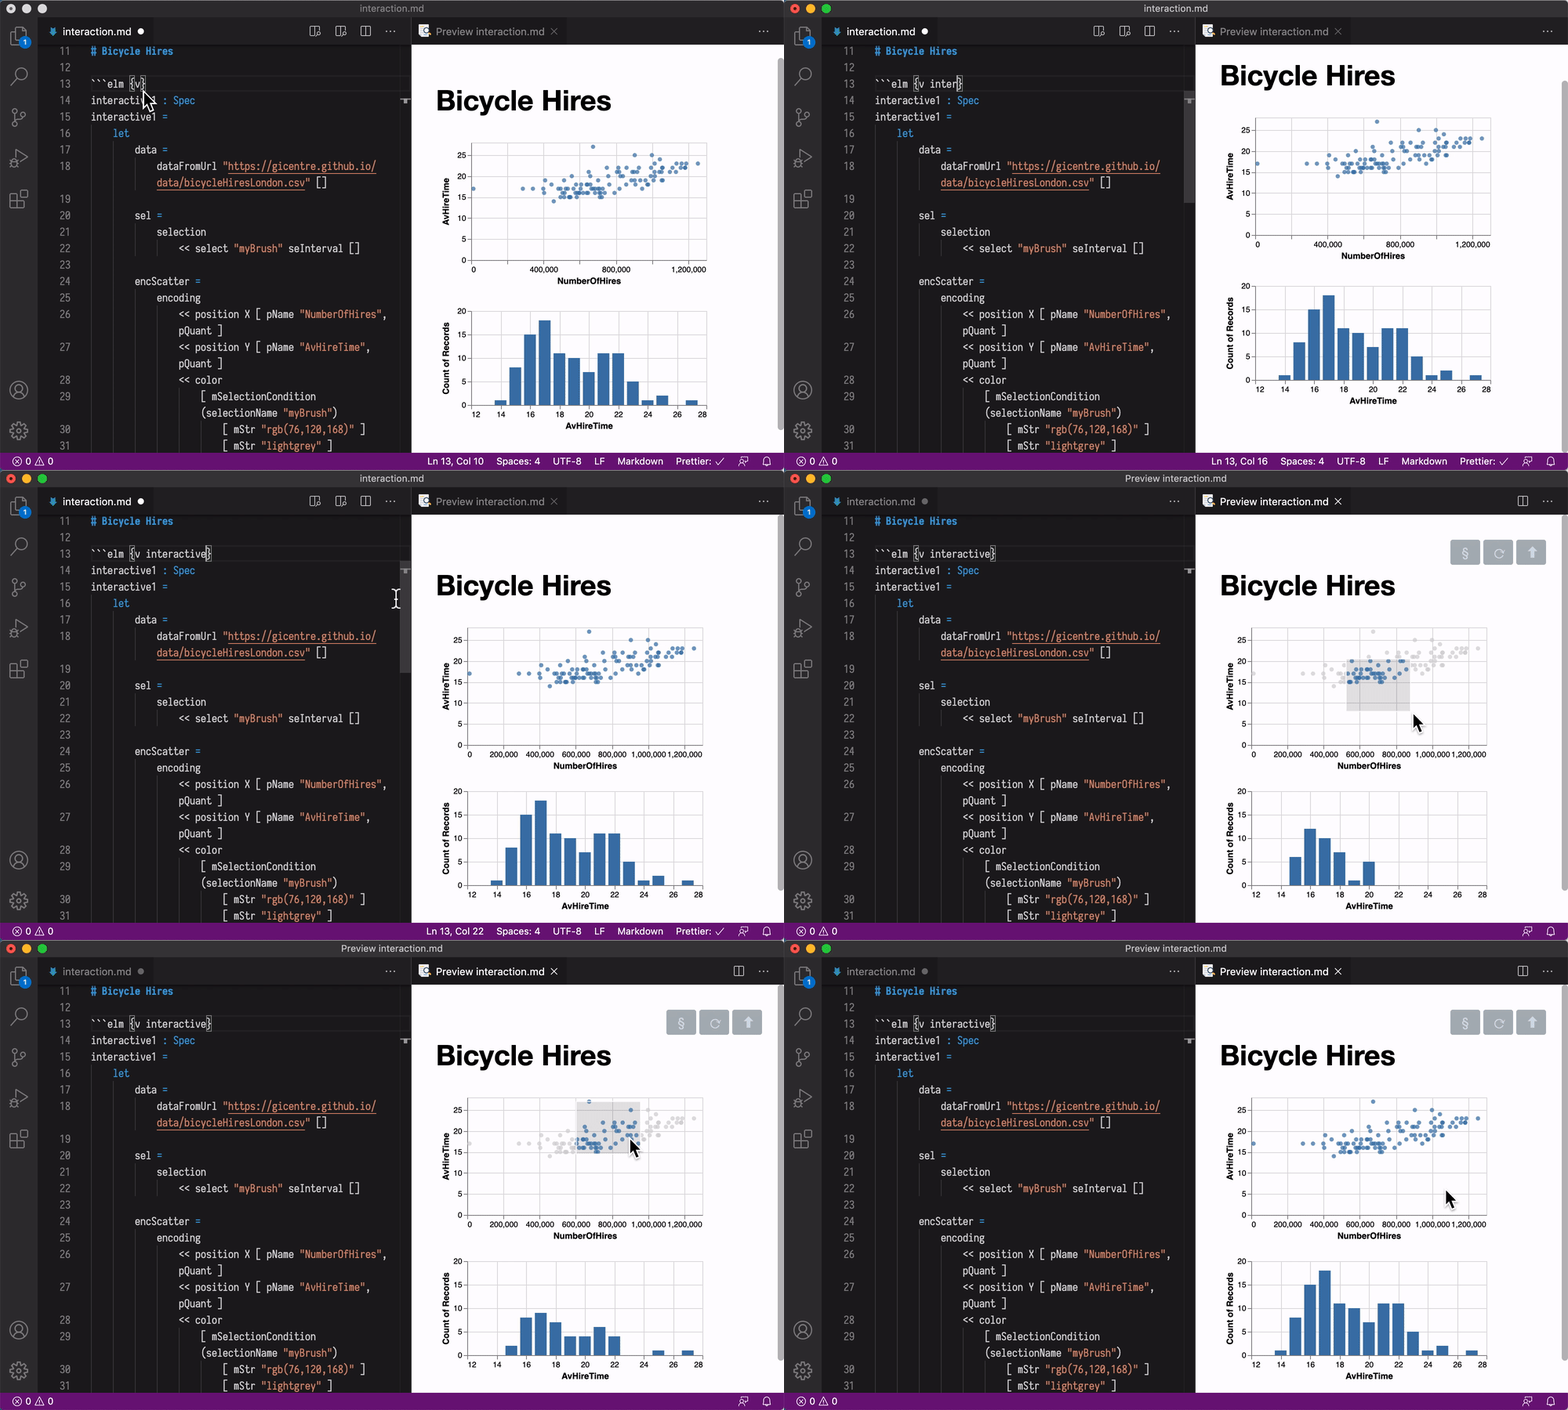
Adding interactive to a code block with v or a triple hat reference makes visualizations live if interaction is described within Spec. User input controls can be added to the document, if desired.
Multiple execution contexts
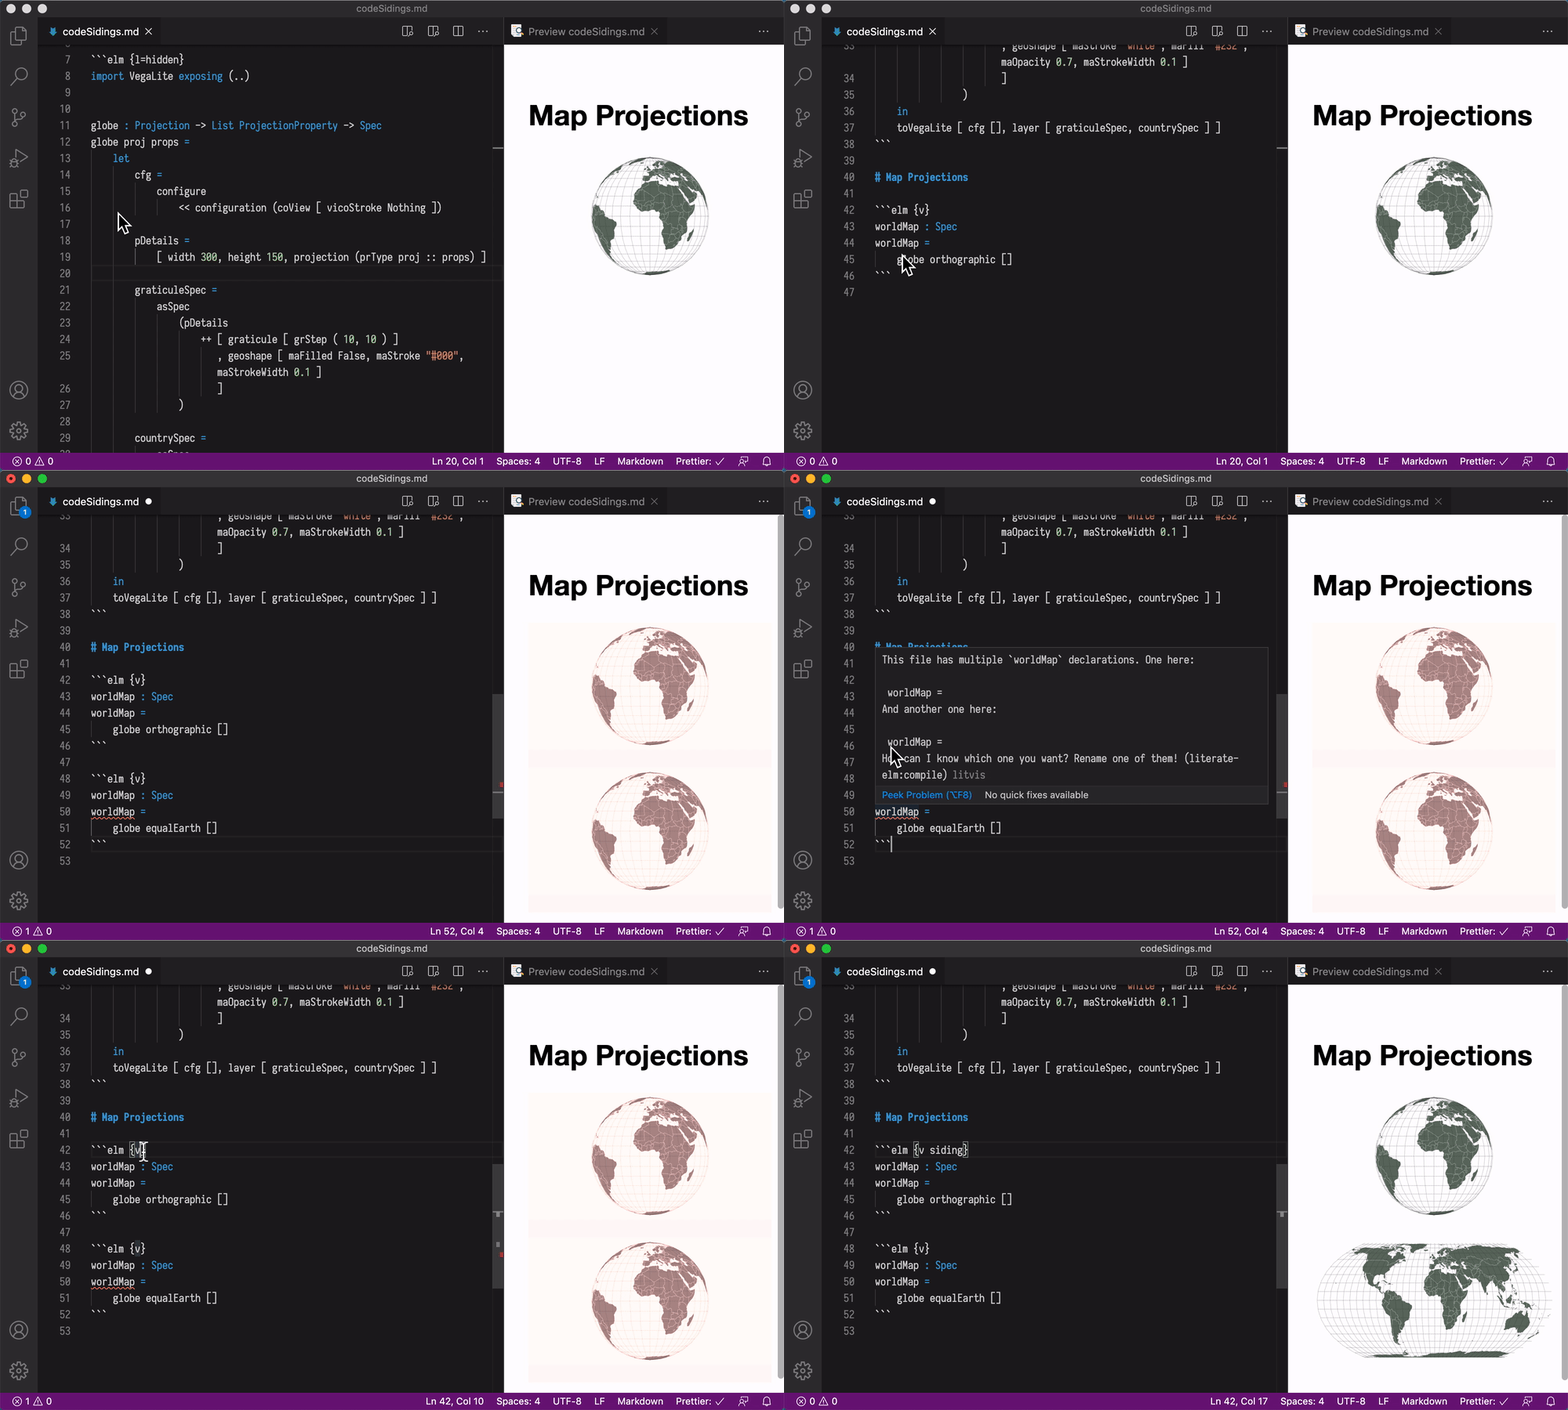
Although a single Elm execution context may be sufficient in many litvis narratives, context isolation may be desired in some cases. A number of code block attributes such as context, id, follows, isolated and siding enable fine-grained control of Elm symbol visibility, thus making it easier to accomplish certain tasks.
A siding (or s) is a shortcut for isolated follows=default. This keyword makes previously defined symbols in default context available within the code block, but avoids name clashes with any blocks later in the document.
Branching narratives
A litvis narrative can be split between multiple markdown documents, where each document follows its parent. This enables routine use of parallel branching narratives that assemble and structure document trees. Each branch in a tree can represent alternative designs each with their own rationale or focus for analysis.
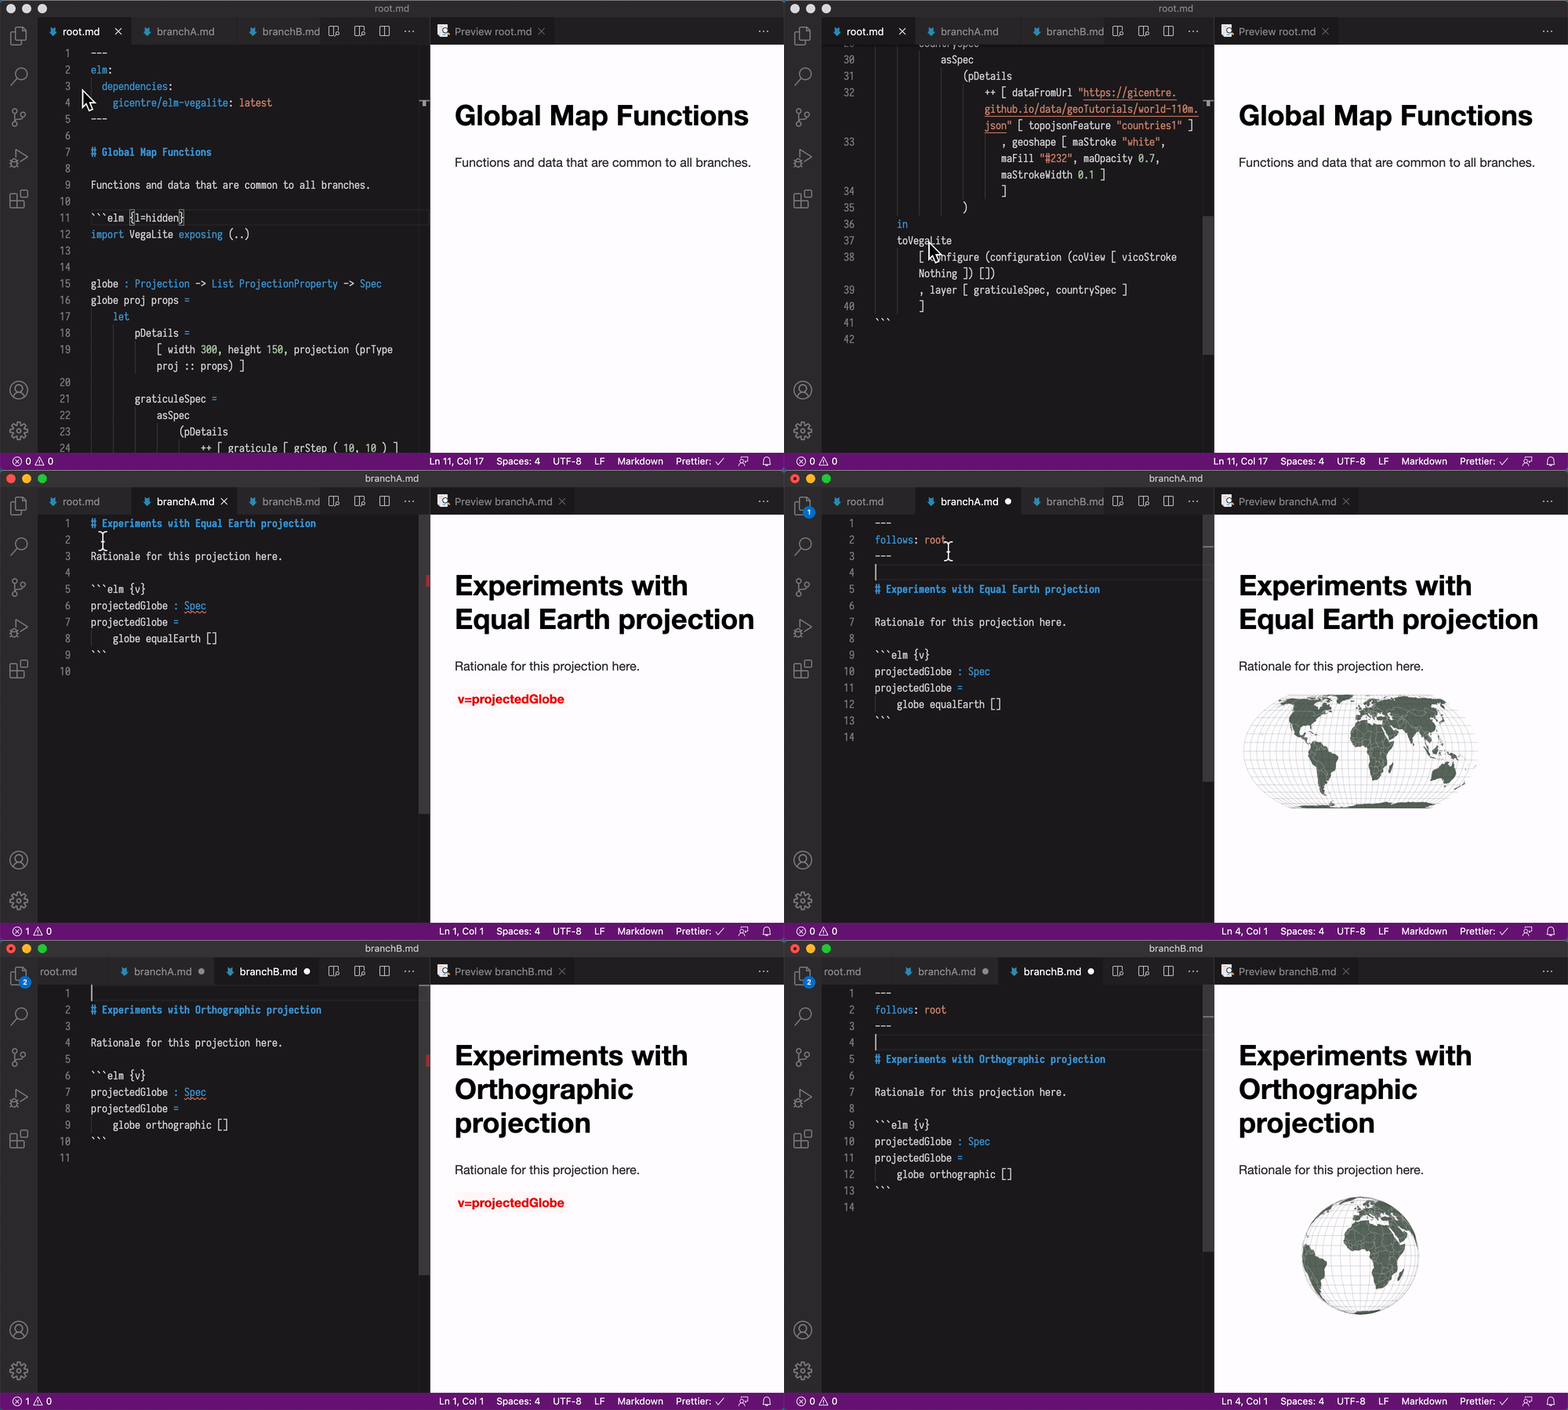
examples/features/branching/root.md > examples/features/branching/branchA.md > examples/features/branching/branchB.md
Narrative schemas
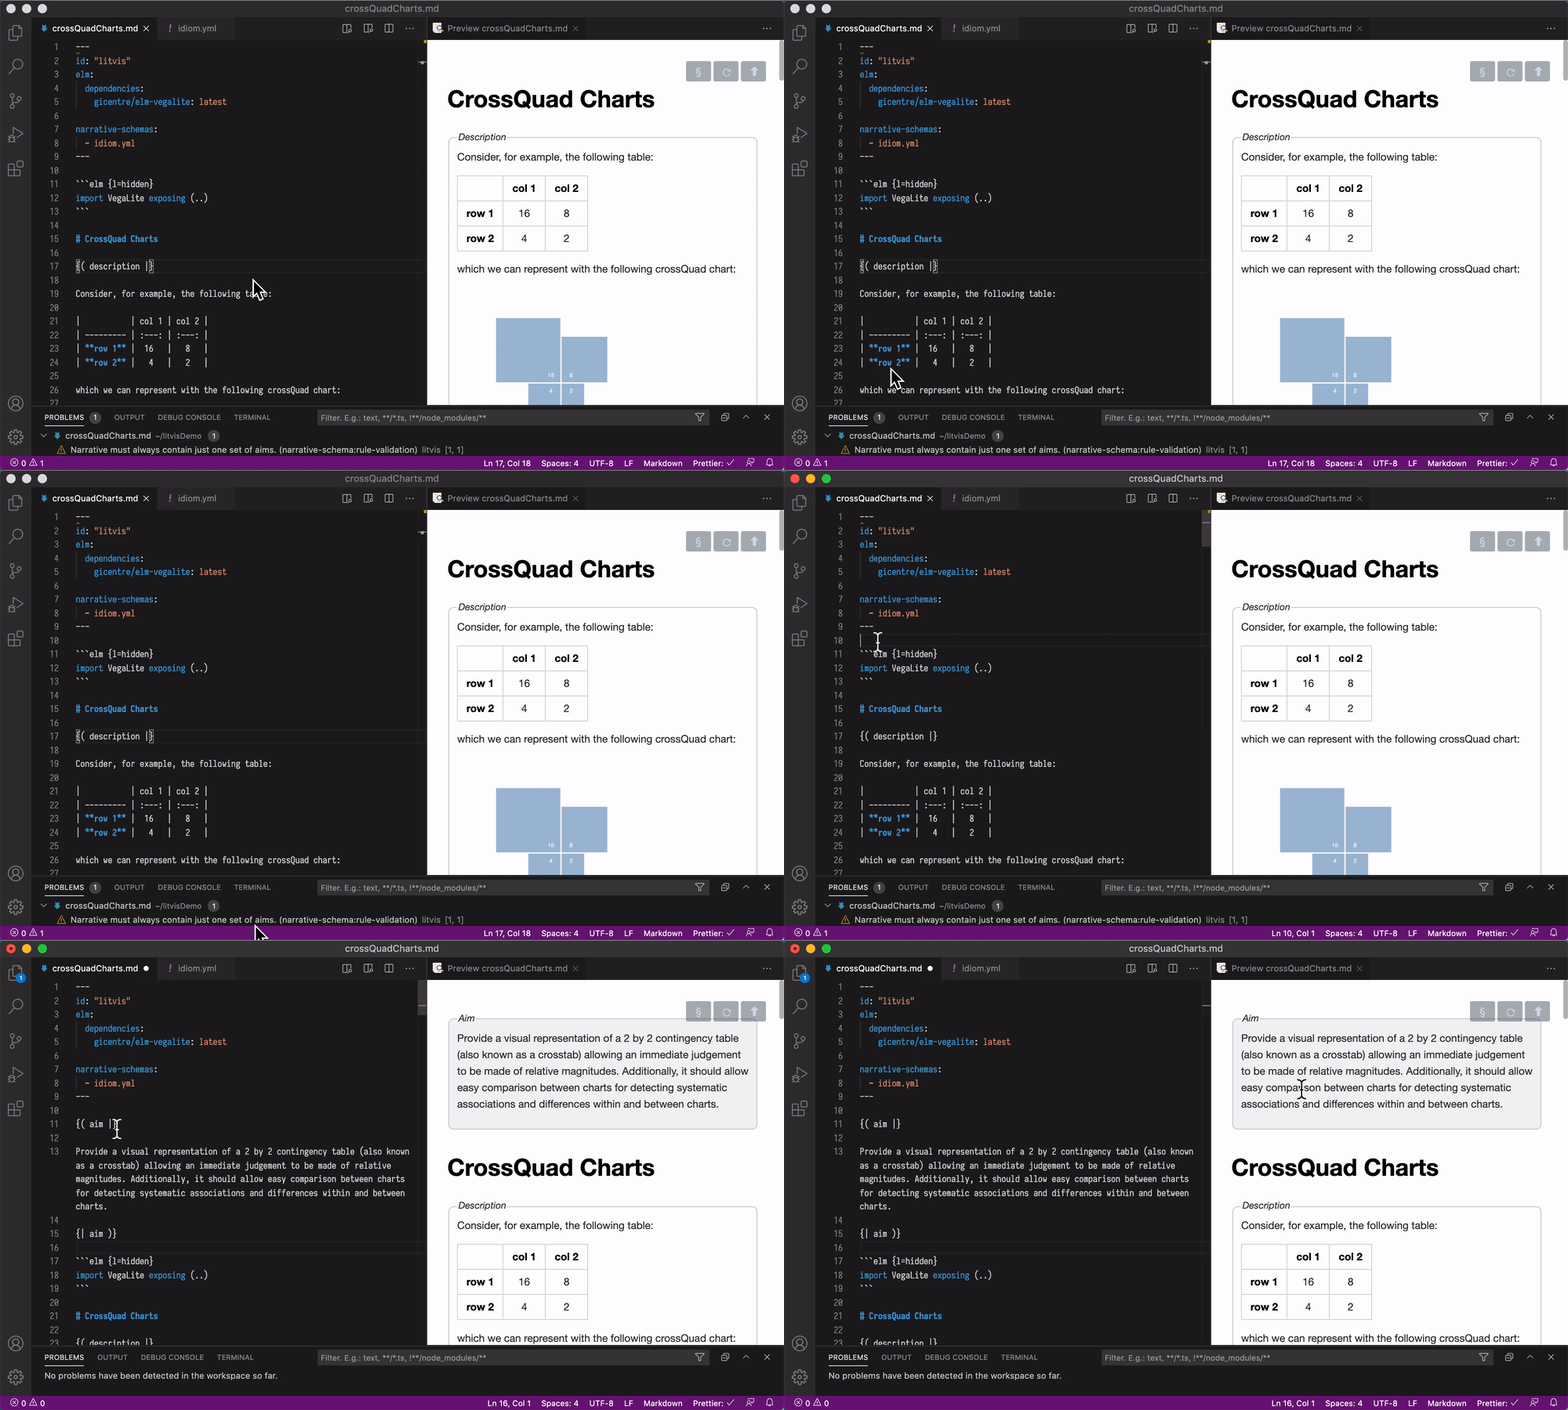
A litvis narrative can be linked to a set of YAML files, which define labels, rules and styling.
These narrative schemas can be thought of as an analogue of schemas more usually found in declarative programming contexts such as JSON and XML schema.
The purpose of the schema is to provide a set of structured guidelines to assist in writing the narrative content around visualizations. This can be thought of as form of scaffolding to assist in the process of design exposition or reasoning. Schemas can be used to validate litvis documents.
Automatic code formatting
Litvis integrates with Prettier and its Elm plugin, which enables seamless document formatting as the narrative is being written. A file is automatically prettified on save or when the Format command is explicitly called. Formatting keeps litvis files in a readable and maintainable state, which eases collaboration and reduces distraction from the higher-level tasks.
