Awesome
kaggle-right-whale
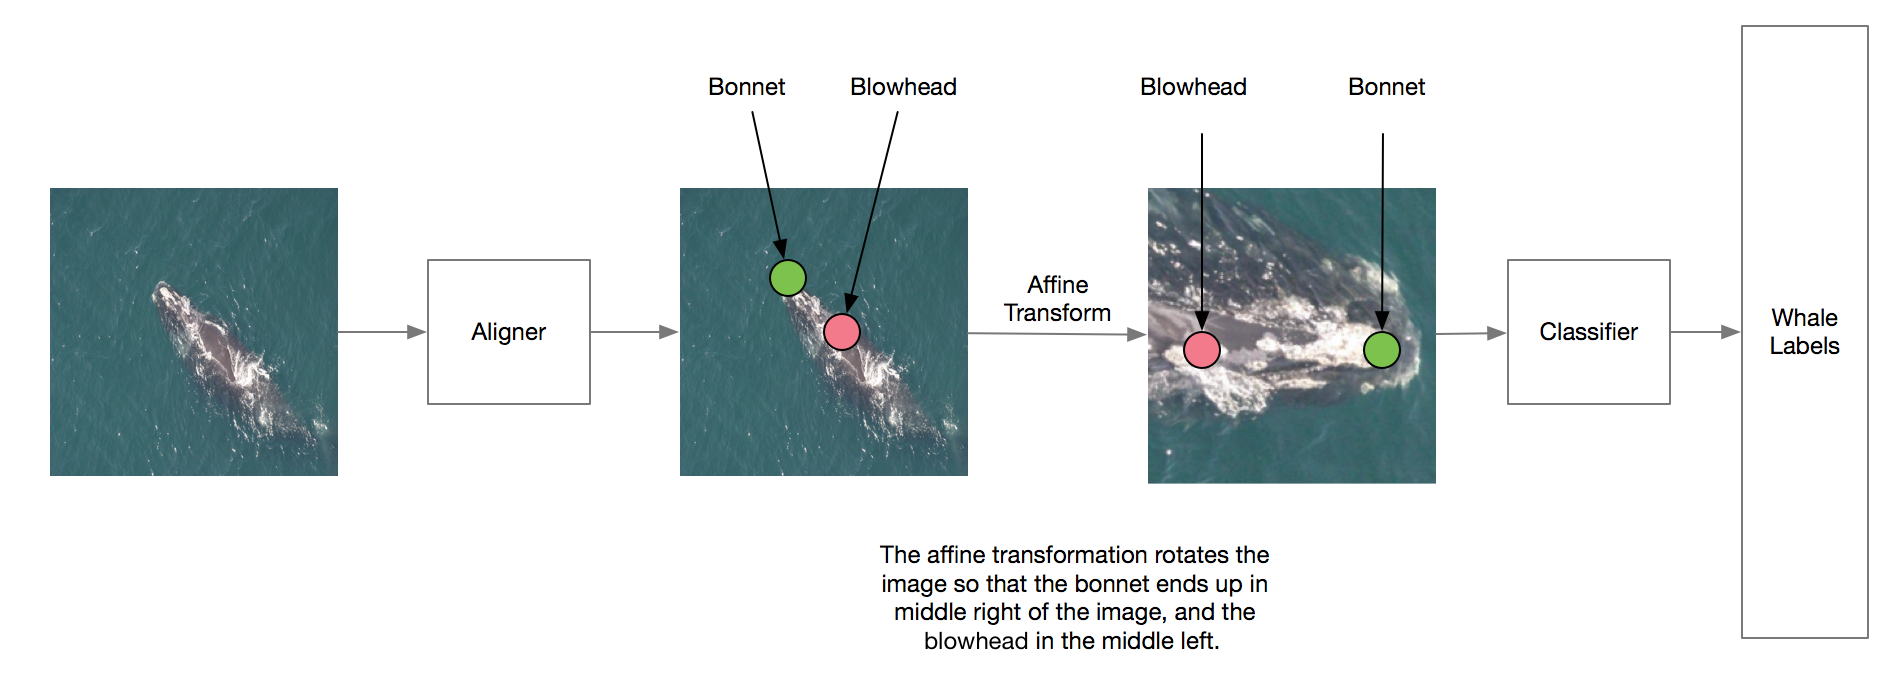
2nd place solution to the Kaggle Right Whale challenge.
You should see my blog post for detailed description of my approach.

Requirements
- Anaconda Python Distribution (any version should work but I used conda 3.19.0)
- Theano, Lasagne, nolearn, nolearn_utils.
pip install -r requirements.txt(Latest version should work fine if you have them installed withpython setup.py develop) - NVidia GPU and cuDNN v3
Alternatively you can train a model using Docker on AWS EC2 GPU instances. See README_DOCKER.md for details
Reproducing the final submission file
General notes
To prevent wasting time on decoding the jpgs over and over again, I decoded the jpgs into a numpy memmap array. The resulting files would take quite a bit of disk space.
When using long-running script, I recommend using ipython -i --pdb to drop us to the debugger when there is any uncaught exceptions and into interaction mode when the script has finished executing.
Replace [date] with the date the cache is created (e.g. 20151229). Replace [model_name] with the name of the model definition corresponding to model_definitions/*.py
1. Data
Download sample_submission.csv.zip, imgs.zip, and train.csv.zip and uncompress them to data/
Alternatively, you can place your cookies.txt for kaggle.com and use make data
You should also create the models/, cache/, model_features/ folders, ending up with a folder structure like the following:
cache/
data/
├── annotations.csv
├── cookies.txt (optional)
├── imgs
│   ├── w_0.jpg
│   ├── ...
├── imgs.zip
├── sample_submission.csv
├── sample_submission.csv.zip
├── train.csv
├── train.csv.zip
├── train_with_annotations_vinh.csv
└── w_7489.jpg
models/
model_features/
model_definitions/
utils/
scripts/
submissions/
Run ipython -i --pdb scripts/create_label_encoder.py to create models/encoder.pkl
2. Train whale head aligner
Run ipython -i --pdb scripts/create_cached_image.py -- --size 256 to create cached training images with bonnet and blowhead as the target
Run ipython -i --pdb scripts/create_cached_test_image.py -- --size 256 to create a cache for test images
Run ipython -i --pdb scripts/train_pts_models.py -- --data 256_[date] --model localize_pts_dec31 --no_test to train the aligner.
Run ipython -i --pdb scripts/create_test_head_crop_image.py -- --size 256 --data 256_[date] --model localize_pts_dec31 --tta to use the trained model to create aligned test images. This also uses test-time augmentation so it will take quite a long time. Multiple processes will be used by default.
3. Train whale recognizer
Run ipython -i --pdb scripts/create_cached_head_crop_image.py -- --size 256 to create aligned whale head training images.
Run ipython -i --pdb scripts/train_pts_models.py -- --model [model_name] --data 256_head_[date] --no_test
Below is a list of my recommended model definitions:
- cropped_dec19 (VGG max num filter 128)
- cropped_jan03 (VGG max num filter = 192)
- cropped_jan05_2 (VGG max num filter = 192)
- cropped_dec21_3 (ResNet 3-3-3-3-3)
- cropped_jan02 (ResNet 3-3-3-4-5)
- cropped_jan05_4 (ResNet 3-4-23-4)
- cropped_jan05_3 (Inception-v3-simplified)
4. Features extraction
Optional if you want to just use the output of one model.
Run the following scripts to extract features for the models you want to include in the model ensembles.
ipython scripts/extract_features.py -- --size 256 --data cache/X_cropped_256_head_[date].npy --model [model_name] --layer gp
ipython scripts/extract_features.py -- --size 256 --data cache/X_cropped_256_head_[date].npy --model [model_name] --layer out
ipython scripts/extract_features.py -- --size 256 --data cache/X_test_head_crop_localize_pts_dec31_256_tta_[date].npy --model [model_name] --layer gp
ipython scripts/extract_features.py -- --size 256 --data cache/X_test_head_crop_localize_pts_dec31_256_tta_[date].npy --model [model_name] --layer out
5. Create submission from single model
Run ipython -i --pdb scripts/predict_from_head_crop.py -- --data localize_pts_dec31_256_tta_[date] -- data_size 256 --model [model_name]
6. Create final ensemble
This final step was done with a notebook notebooks/Stacking.ipynb. It will take the features extracted from step 4 and train a simple logistic regression.