Awesome
markdown-styleguide-generator
Status
| What? | Status | What? | Status |
|---|---|---|---|
| Code Climate GPA | Licence |  | |
| Codacy | Tag |  | |
| Issues |  | GitHub Forks |  |
| GitHub Version | GitHub Followers |  | |
| NPM Version | Dependencies |
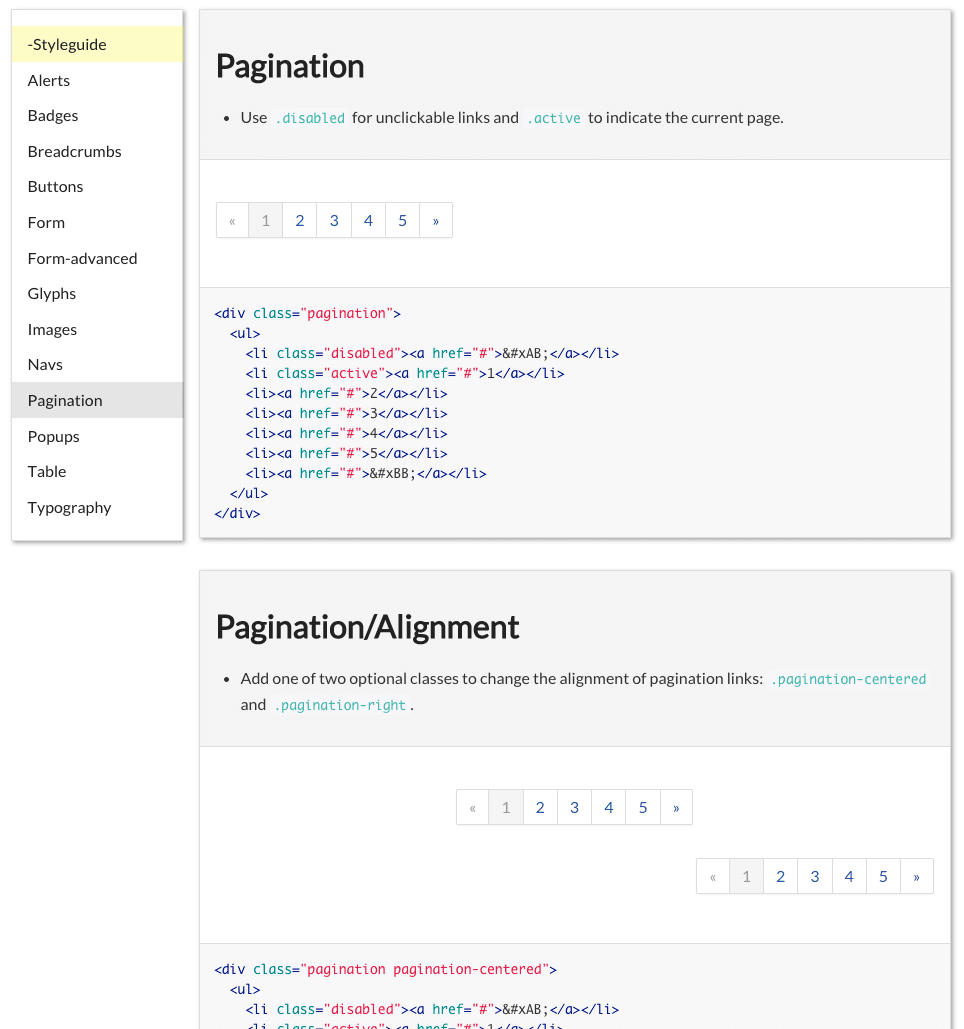
Screenshot

What is a living style guide?
To me, a style guide is a living document of [style] code, which details all the various elements and coded modules of your site or application. Beyond its use in consolidating the front-end code, it also documents the visual language, such as header styles and color palettes, used to create the site. This way, it’s a one-stop place for the entire team—from product owners and producers to designers and developers—to reference when discussing site changes and iterations. [...] - Susan Robertson/A list apart
The living part means that it uses your live css. If you change your css files, the style guide will change as well!
What this tool does, short version:
This tool will search all your style files (your .css, .scss _partial.scss, .less, .whatever) for comments and create a html file living style guide for your developers to use!
In contrast to other style guide generators, this tool generates a single file, ready to be uploaded to your website/CMS(-like system).
What this tool does, longer version:
Style guides generated by this tool do not contain any css style!
The style guide simply contains HTML markup exemplifying how to use your css rules. That means that the generated html file will not do any good on it's own. Instead the intended use is to upload the generated HTML to your site where it will inherit your site's css. This also means that if you change your css - the look of the styleguide will change aswell. This way the styleguide will always tell the truth.
If you're using a CMS(-like system), this usually means that you create an article somewhere only accessible by developers and paste the content of the generated html file into that article (usually you'll have a source mode in your article editor).
The more tech savvy will make some kind of build tool to upload the style guide automagically, or integrate generation and uploading with the CI system.
Install
Requires Node.js (if unsure if you have node install, run node -v in a console.)
Install with npm:
npm install -g markdown-styleguide-generator
and then run:
cd /your/web/project
styleguide
To override default configuration and create a .styleguide config file in the current working directory, you may run:
styleguide init
Usage
Comment your css/scss/less/whatever files. Use Markdown in the comments:
Example:
/* SG
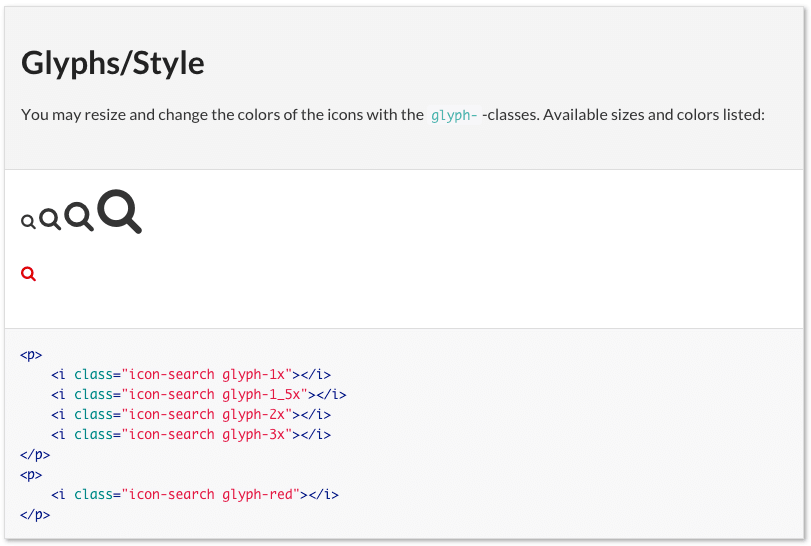
# Glyphs/Style

You may resize and change the colors of the icons with the `glyph-`-classes. Available sizes and colors listed:

```
<p>
    <i class="icon-search glyph-1x"></i>
    <i class="icon-search glyph-1_5x"></i>
    <i class="icon-search glyph-2x"></i>
    <i class="icon-search glyph-3x"></i>
</p>
<p>
    <i class="icon-search glyph-red"></i>
</p>
```
*/

a [class^="icon-"],
a [class*=" icon-"] {
	text-decoration: none;
}

[class^="icon-"],
[class*=" icon-"] {
	&.glyph-1x { font-size: 1em; }
	&.glyph-1_5x { font-size: 1.5em; }
	&.glyph-2x { font-size: 2em; }
	&.glyph-3x { font-size: 3em; }
}

.glyph-red {
	color: $moh-red;
}
This will be rendered as:

cdto the web project (any folder containing css/scss/less files. The tool will search nested folders).- run
styleguideto generate style guide. - wait a few seconds and a
styleguide.htmlis generated instyleguide/dist(this is configurable, see Configuration). - ???
- profit
Syntax
Best described by going through the example above line by line.
Line 1
/* SG
/* is just an ordinary css comment. The SG means that this is a style guide comment. Only comments beginning with /* SG will be included in the style guide, all other comments are ignored.
Line 2
# Glyphs/Style
Every style guide comment must have a heading. # is the Markdown syntax for a heading (equivalent to h1). The name of this section will be Glyphs (which will be shown in the menu). The subsection will be Style (which will be shown in the menu when it's expanded). The heading (the part before the slash) is required, the slash and the subsection are optional.
Line 4
You may resize and change the colors of the icons with the `glyph-`-classes. Available sizes and colors listed:
The comment will be shown in the style guide. Describe your css rules! Feel free to use Markdown syntax. The comment is optional but be nice to your developers!
Line 6-16
```
<p>
    <i class="icon-search glyph-1x"></i>
    <i class="icon-search glyph-1_5x"></i>
    <i class="icon-search glyph-2x"></i>
    <i class="icon-search glyph-3x"></i>
</p>
<p>
    <i class="icon-search glyph-red"></i>
</p>
```
This is where you write some HTML code to describe how to use your css rules. The HTML will be a) Rendered and used as an example, and b) Outputed with syntax highlighting. The HTML part is optional but most of the time you'll use it. Notice that the code is fenced in tripple backticks as per Markdown syntax.
Line 17
*/
Just closing the css comment.
Line 18+
a [class^="icon-"],
a [class*=" icon-"] {
	text-decoration: none;
}
...
Ordinary css!
Configuration
If you want to override the default configuration you may create a .styleguide file in your project folder (the same folder you run styleguide in).
Easiest way to create a .styleguide file is to run styleguide init which will give you a boilerplate configuration file in the current working directory.
{
	"sgComment": "SG",   // If you want to begin a style guide comment
	                     // with something else than default: "/* SG"

	"srcFolder": "",     // Folder with your css files. Will search all subfolders.
	                      //Default: current working directory.

	"outputFile": "",     // Where to output the style guide?
	                      // Default: "styleguide/dist/styleguide.html"

	"highlightStyle": "", // Syntax highlighting style.
	                      // Syntax highlighting relies on highlight.js.
	                      // See available styles here: https://highlightjs.org/static/demo/
	                      // and their internal names here:
	                      // https://github.com/isagalaev/highlight.js/tree/master/src/styles
	                      // Default: "github"

	"templateFile": "",   // Path to custom Handlebars template

	"themeFile": "",      // Path to custom  CSS file to be included in the style guide

	"excludeDirs": [""],  // Array of folders not to search for css files.
	                      // default: ["target","node_modules"]

	"fileExtensions": {}, // File extensions to search for style guide comments
	                      // default: {scss: true, sass: true, css: true, less: true}

	"customVars": {}      // Holds an object with custom variables which will be
	                      // available in the handlebars template. e.g:
	                      // customVars: { sampleVar: 'Hi there' }
	                      // 'Hi there' will be printed if you request
	                      // {{customVars/sampleVar}} in the handlebars template.

	                      // ADVANCED

	"walkerOptions": {
		"followLinks": bool // Follow symlinks when searching for files?
		                    // default: false
		                    // You may also add aditional walker options,
		                    // see: https://github.com/coolaj86/node-walk
	},
	"jqFile": "",         // jQuery file, is included in package.
	"highlightFolder": "" // folder to look for highlight stylse in.
	                      // Default is highlight.js folder which is installed as
	                      // a dependency to this package
}
Custom look and feel
The final look and feel of the style guide is based on three different files:
- template file - Handlebars template which will produce the final html.
- theme file - css file which will be included in the template file.
- highlight file - Syntax highlighting relies on highlight.js. To change the highlight style - set the
highlightStyleto the name of the style (filename minus.css, see the list of styles ) in your.styleguide. See the demoes of available styles.
To create your own template/theme, copy the template.html and theme.css to a folder of your choice. Then set the templateFile and themeFile in your .styleguide to the corresponding paths.
The Javascript object which you may use in your template file looks like this:
{
	sections: [
		{
			id: 'HTML safe unique identifier',
			section: 'Section Name (from the "# Section/Heading" Markdown)',
			heading: 'Heading Name (from the "# Section/Heading" Markdown)',
			code: 'HTML Code',
			markup: 'Highlighted HTML Code',
			comment: 'Markdown comment converted to HTML',
		},
		{...}
	],
	menu: [
		{
			name: 'Section Name (one per unique "# Section")',
			headings: [
				{
					id: 'HTML safe unique identifier',
					name: 'Heading Name'
				},
				{...}
			]
		},
		{...}
	]
}
Run with gulp/grunt
If you want to re-create the styleguide automagicalle every time a stylesheet file is changed, you can run it with your favorite task runner. One way of running it with gulp would be using gulp-shell to execute the shell command styleguide when a file is changed.
Sample gulp script:
var gulp  = require('gulp');
var shell = require('gulp-shell');
var watch = require('gulp-watch');

gulp.task('watch', function() {
  gulp.watch('path/to/watch/for/changes/**/*.scss', ['makeStyleguide']);
});

gulp.task('makeStyleguide',
  shell.task(
    ['styleguide']
  )
);

gulp.task('default', ['watch']);