Awesome
<div align="center">elixir-auth-github 💧 🔒 :octocat:
The easiest way to add GitHub OAuth authentication to your Elixir/Phoenix Apps.
<!-- Sadly libraries.io is giving 404's on images ... [](https://libraries.io/hex/elixir_auth_github) --> </div>Why? 🤷
We needed a much simpler and extensively documented way to add "Sign-in with GitHub" capability to our Elixir App(s). <br />
We created this package because everyone @dwyl uses GitHub so using GitHub OAuth makes sense for our internal (and external) tools. By making it into a well-documented and tested reusable module other people can benefit from it.
What? 💭
An Elixir package that seamlessly handles GitHub OAuth Authentication/Authorization in as few steps as possible. <br /> Following best practices for security & privacy and avoiding complexity by having sensible defaults for all settings.
Who? 👥
This module is for people building apps using Elixir/Phoenix who want to ship the "Sign-in with GitHub" feature faster and more maintainably.
It's targeted at complete beginners with no prior experience/knowledge of auth "schemes" or "strategies". <br /> Just follow the detailed instructions and you'll be up and running in 5 minutes.
How? 💻
Add GitHub Auth to your Elixir/Phoenix project by following these 5 simple steps:
If you get stuck setting up your App, checkout our working demo: dwyl/elixir-auth-github-demo <br /> The demo is deployed on Fly.io: https://elixir-auth-github-demo.fly.dev
1. Add the hex package to deps 📦
Open your project's mix.exs file
and locate the deps (dependencies) section. <br />
Add a line for :elixir_auth_github in the deps list:
def deps do
  [
    {:elixir_auth_github, "~> 1.6"}
  ]
end
Once you have added the line to your mix.exs,
remember to run the mix deps.get command
in your terminal
to download the dependencies.
2. Create a GitHub App and OAuth2 Credentials 🆕
Create a GitHub Application if you don't already have one, generate the OAuth2 Credentials for the application and save the credentials as environment variables accessible by your app.
Note: There are a few steps for creating a set of GitHub APIs credentials, so if you don't already have a GitHub App, we created the following step-by-step guide to make it quick and relatively painless: create-github-app-guide.md <br /> Don't be intimidated by all the buzz-words; it's quite straightforward. And if you get stuck, ask for help!
By the end of this step you should have these two environment variables set:
GITHUB_CLIENT_ID=d6fca75c63daa014c187
GITHUB_CLIENT_SECRET=8eeb143935d1a505692aaef856db9b4da8245f3c
⚠️ Don't worry, these keys aren't valid (they were revoked
beforewe published this guide). <br /> They are just here for illustration purposes.
💡 Tip: We tend to use an
.envfile to manage our environment variables on ourlocalhostand then use whichever system for environment variables appropriate for our deployment. For an example.envfile with the environment variables required byelixir-auth-githubsee:.env_sample
3. Create 2 New Files ➕
Create two files in order to handle the requests to the GitHub OAuth API and display data to people using your app.
3.1 Create a GithubAuthController in your Project
In order to process and display the data
returned by the GitHub OAuth2 API,
we need to create a new controller.
Create a new file called
lib/app_web/controllers/github_auth_controller.ex
Add the following code to the file:
defmodule AppWeb.GithubAuthController do
  use AppWeb, :controller

  @doc """
  `index/2` handles the callback from GitHub Auth API redirect.
  """
  def index(conn, %{"code" => code}) do
    {:ok, profile} = ElixirAuthGithub.github_auth(code)
    conn
    |> put_view(AppWeb.PageView)
    |> render(:welcome, profile: profile)
  end
end
This function is invoked as the callback when the person has successfully authenticated with GitHub.
The code does 2 things:
- Request the person's profile data from GitHub
based on the
codesent by GitHub's callback request. - Renders a
:welcomeview displaying some profile data to confirm that login with GitHub was successful.
Note: we are placing the
welcome.html.heextemplate in thetemplate/pagedirectory to save having to create any more directories and view files. You are free to organize your code however you prefer. 👍
3.2 Create welcome template 📝
Create a new file with the following path:
lib/app_web/templates/page/welcome.html.heex
And type (or paste) the following code in it:
<section class="phx-hero">
  <h1>
    Welcome <%= @profile.name %>!
    <img width="32px" src="{@profile.avatar_url}" alt="avatar" />
  </h1>
  <p>
    You are <strong>signed in</strong> with your
    <strong>GitHub Account</strong> <br />
    <strong style="color:teal;"><%= @profile.email %></strong>
  </p>
</section>
Invoking ElixirAuthGithub.github_auth(code)
in the GithubAuthController
index function will
make an HTTP request to the GitHub Auth API
and will return {:ok, profile}
where the profile
is the following format:
%{
  site_admin: false,
  disk_usage: 265154,
  access_token: "8eeb143935d1a505692aaef856db9b4da8245f3c",
  private_gists: 0,
  followers_url: "https://api.github.com/users/nelsonic/followers",
  public_repos: 291,
  gists_url: "https://api.github.com/users/nelsonic/gists{/gist_id}",
  subscriptions_url: "https://api.github.com/users/nelsonic/subscriptions",
  plan: %{
    "collaborators" => 0,
    "name" => "pro",
    "private_repos" => 9999,
    "space" => 976562499
  },
  node_id: "MDQ6VXNlcjE5NDQwMA==",
  created_at: "2010-02-02T08:44:49Z",
  blog: "http://www.dwyl.io/",
  type: "User",
  bio: "Learn something new every day. github.com/dwyl/?q=learn",
  following_url: "https://api.github.com/users/nelsonic/following{/other_user}",
  repos_url: "https://api.github.com/users/nelsonic/repos",
  total_private_repos: 5,
  html_url: "https://github.com/nelsonic",
  public_gists: 29,
  avatar_url: "https://avatars3.githubusercontent.com/u/194400?v=4",
  organizations_url: "https://api.github.com/users/nelsonic/orgs",
  url: "https://api.github.com/users/nelsonic",
  followers: 2778,
  updated_at: "2020-02-01T21:14:20Z",
  location: "London",
  hireable: nil,
  name: "Nelson",
  owned_private_repos: 5,
  company: "@dwyl",
  email: "nelson@gmail.com",
  two_factor_authentication: true,
  starred_url: "https://api.github.com/users/nelsonic/starred{/owner}{/repo}",
  id: 194400,
  following: 173,
  login: "nelsonic",
  collaborators: 8,
  scope: "repo,user:email"
}
More info: https://developer.github.com/v3/users
You can use this data however you see fit. (obviously treat it with respect, only store what you need and keep it secure)
4. Add the /auth/github/callback to router.ex
Open your lib/app_web/router.ex file
and locate the section that looks like scope "/", AppWeb do
Add the following line:
get "/auth/github/callback", GithubAuthController, :index
That will direct the API request response
to the GithubAuthController :index function we defined above.
Example: /lib/app_web/router.ex#L20
5. Update PageController.index
In order to display the "Sign-in with GitHub" button in the UI, we need to generate the URL for the button in the relevant controller, and pass it to the template.
Open the lib/app_web/controllers/page_controller.ex file
and update the index function:
From:
def index(conn, _params) do
  render(conn, "index.html")
end
To:
def index(conn, _params) do
  oauth_github_url = ElixirAuthGithub.login_url(%{scopes: ["user:email"]})
  render(conn, "index.html", [oauth_github_url: oauth_github_url])
end
Example:
lib/app_web/controllers/page_controller.ex#L4-L7
5.1 Update the page/index.html.eex Template
Open the /lib/app_web/templates/page/index.html.eex file
and type (or paste) the following code:
<section class="phx-hero">
  <h1>Welcome to Awesome App!</h1>
  <p>To get started, login to your GitHub Account:</p>
  <a href="{@oauth_github_url}">
    <img src="https://i.imgur.com/qwoHBIZ.png" alt="Sign in with GitHub" />
  </a>
</section>
Note: we are using an
<img>button for code brevity. <br /> We suggest you use theSVG+CSSapproach described below. 👇
6. Run the App!
Run the app with the command:
mix phx.server
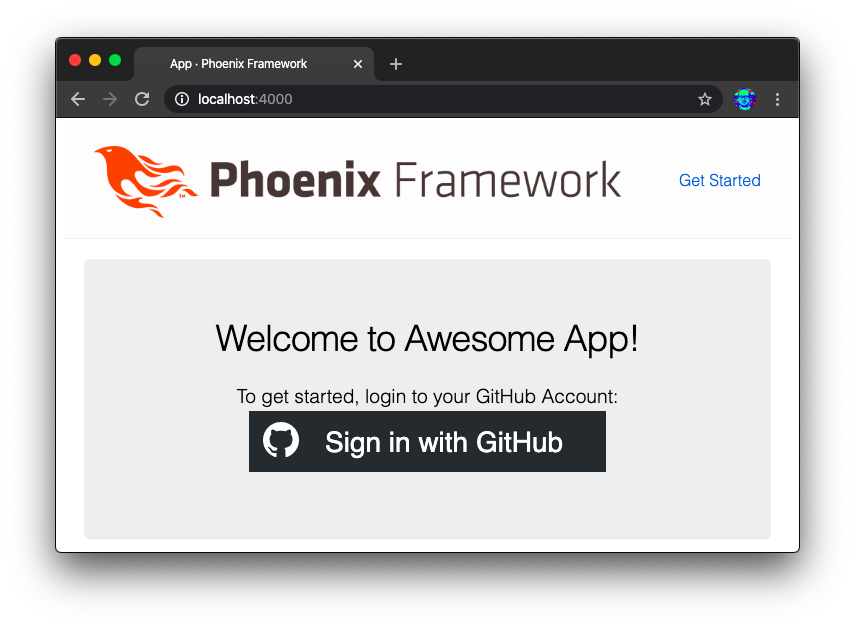
Visit the home page of the app where you will see a "Sign in with GitHub" button: http://localhost:4000
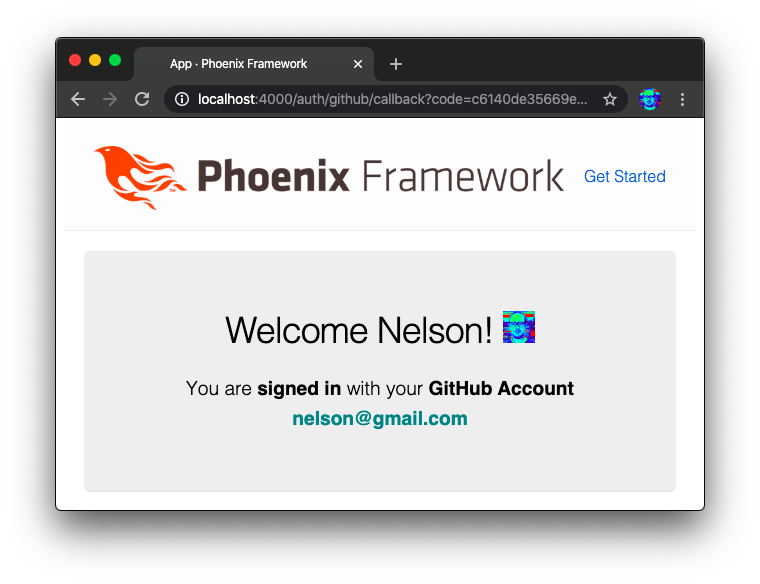
Once the user authorizes the App, they will be redirected back to the Phoenix App and will see welcome message:
Congratulations! You have GitHub Oauth in your Elixir App! 🎉
<br />If you got stuck setting up your App, check out our working demo: https://github.com/dwyl/elixir-auth-github-demo <br /> The demo is deployed on Heroku: https://elixir-auth-github-demo.herokuapp.com

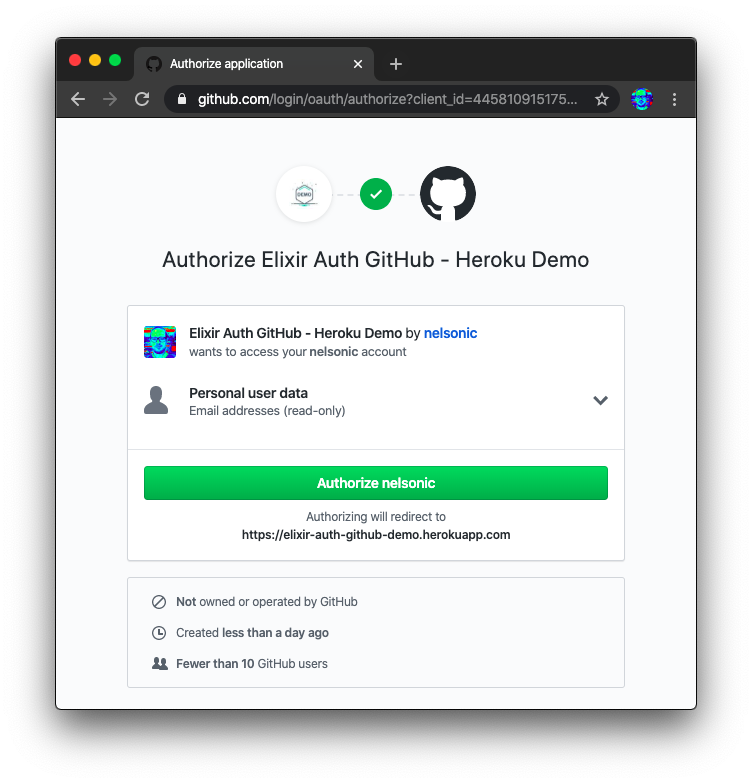
Auth Step:
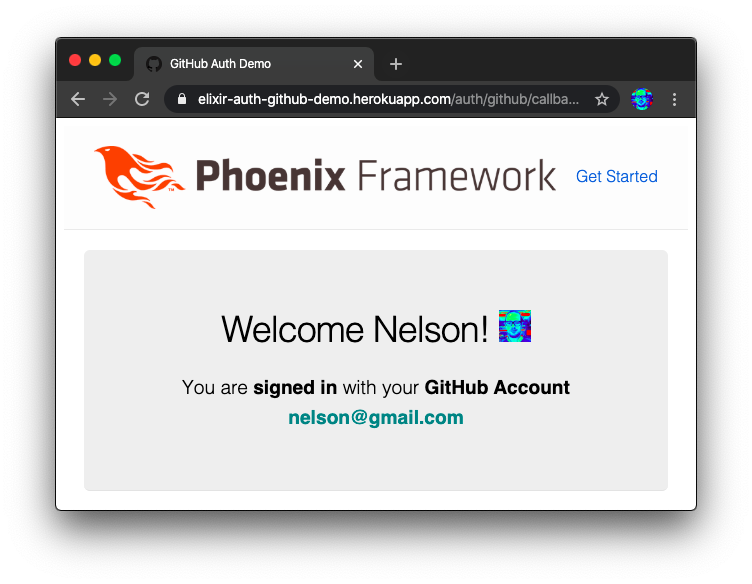
Success:
Testing
@dwyl we feel that testing is 1/3 of the "deliverable" (with the other two thirds being docs and business logic) so we pay close attention to "testability".
With that in mind we have exported a transparent
"TestDouble"
which intercepts HTTP requests when the MIX_ENV is "test".
To see the responses returned by the TestDouble,
see:
lib/httpoison_mock.ex
And to see how the tests assert these responses,
see:
test/elixir_auth_github_test.exs
To use the tests add the following config to your test.exs file:
config :elixir_auth_github,
  client_id: "d6fca75c63daa014c187",
  client_secret: "8eeb143935d1a505692aaef856db9b4da8245f3c",
  httpoison_mock: true
<br /> <br />
Optimised SVG+CSS Button
In step 5.1 above, we suggest using an <img>
for the Sign in with GitHub button.
But even though this image appears small 357 × 61 px
https://i.imgur.com/qwoHBIZ.png it is 9kb:
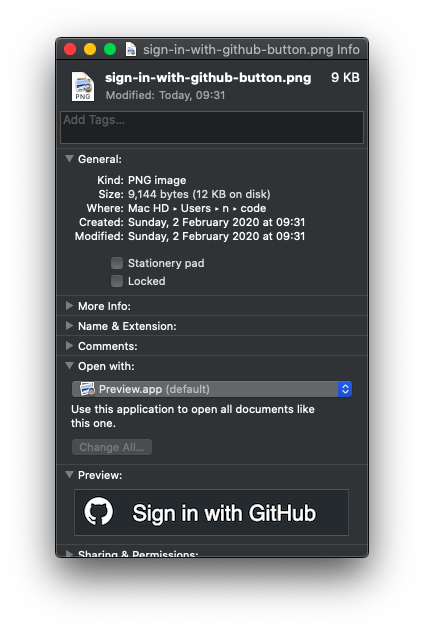
We could spend some time in a graphics editor optimising the image,
but we know we can do better by using our CSS skills! 💡
The following code re-creates the <img>
using the GitHub logo SVG
and CSS for layout/style:
<div style="display:flex; flex-direction:column; width:180px; margin-left:20px">
  <link href="https://fonts.googleapis.com/css?family=Roboto&display=swap" />
  <a
    href="<%= @oauth_github_url %>"
    style="display:inline-flex; align-items:center; min-height:30px;
      background-color:#24292e; font-family:'Roboto',sans-serif;
      font-size:14px; color:white; text-decoration:none;"
  >
    <div style="margin: 1px; padding-top:5px; min-height:30px;">
      <svg height="18" viewBox="0 0 16 16" width="32px" style="fill:white;">
        <path
          fill-rule="evenodd"
          d="M8 0C3.58 0 0 3.58 0 8c0 3.54 2.29 6.53 5.47 7.59.4.07.55-.17.55-.38
      0-.19-.01-.82-.01-1.49-2.01.37-2.53-.49-2.69-.94-.09-.23-.48-.94-.82-1.13-.28-.15-.68-.52-.01-.53.63-.01
      1.08.58 1.23.82.72 1.21 1.87.87
      2.33.66.07-.52.28-.87.51-1.07-1.78-.2-3.64-.89-3.64-3.95 0-.87.31-1.59.82-2.15-.08-.2-.36-1.02.08-2.12
      0 0 .67-.21 2.2.82.64-.18 1.32-.27 2-.27.68 0 1.36.09 2 .27 1.53-1.04 2.2-.82 2.2-.82.44 1.1.16 1.92.08
      2.12.51.56.82 1.27.82 2.15 0 3.07-1.87 3.75-3.65 3.95.29.25.54.73.54 1.48 0 1.07-.01 1.93-.01 2.2 0
      .21.15.46.55.38A8.013 8.013 0 0016 8c0-4.42-3.58-8-8-8z"
        />
      </svg>
    </div>
    <div style="margin-left: 5px;">Sign in with GitHub</div>
  </a>
  <div></div>
</div>
The result looks better than the <img> button:

It can be scaled to any screen size so it will always look great! <br />
Using http://bytesizematters.com we see that our SVG+CSS button is only 1kb:

That is an 87.5% bandwidth saving
on the 9kb of the
.png button.
And what's more it reduces the number of HTTP requests
which means the page loads even faster.
This is used in the Demo app:
lib/app_web/templates/page/index.html.eex
i18n
The biggest advantage of having an SVG+CSS button is that you can translate the button text! <br /> Since the text/copy of the button is now just text in standard HTML, the user's web browser can automatically translate it! <br /> e.g: French 🇬🇧 > 🇫🇷

This is much better UX for the 80% of people in the world who do not speak English fluently. The single biggest engine for growth in startup companies is translating their user interface into more languages. Obviously don't focus on translations while you're building your MVP, but if it's no extra work to use this SVG+CSS button and it means the person's web browser can automatically localise your App!
Accessibility
The SVG+CSS button is more accessible than the image.
Even thought the <img> had an alt attribute
which is a lot better than nothing,
the SVG+CSS button can be re-interpreted
by a non-screen device and more easily transformed.
Useful Links and Further Reading
- GitHub Apps docs: https://developer.github.com/apps/building-github-apps/creating-a-github-app
- Authorizing OAuth Apps: https://developer.github.com/apps/building-oauth-apps/authorizing-oauth-apps
- Basics of Authentication: https://developer.github.com/v3/guides/basics-of-authentication/
- GitHub Logos and Usage: https://github.com/logos <br /> (tldr: no official auth buttons but use of Octocat logo is encouraged to help users identify that your App has a GitHub integration)


