Awesome
Stateful UI
A library for structured state-based UI development in Unity.
For more details, please read this article on HackerNoon or watch this session on YouTube.

Usage
The StatefulComponent component is the key element of the library. It should be placed on the root GameObject of every screen and contains all the necessary references to internal elements distributed across tabs.

Each link is named after its role. From a coding perspective, the set of roles is a regular enum. Separate sets of roles are prepared for each type of UI element.
public enum ButtonRole
{
    Unknown = 0,
    Start = -1436209294, // -1436209294 == "Start".GetHashCode()
    Settings = 681682073,
    Close = -1261564850,
    Quests = 1375430261,
}
public enum ImageRole { ... }
public enum TextRole { ... }
Creating a New Role
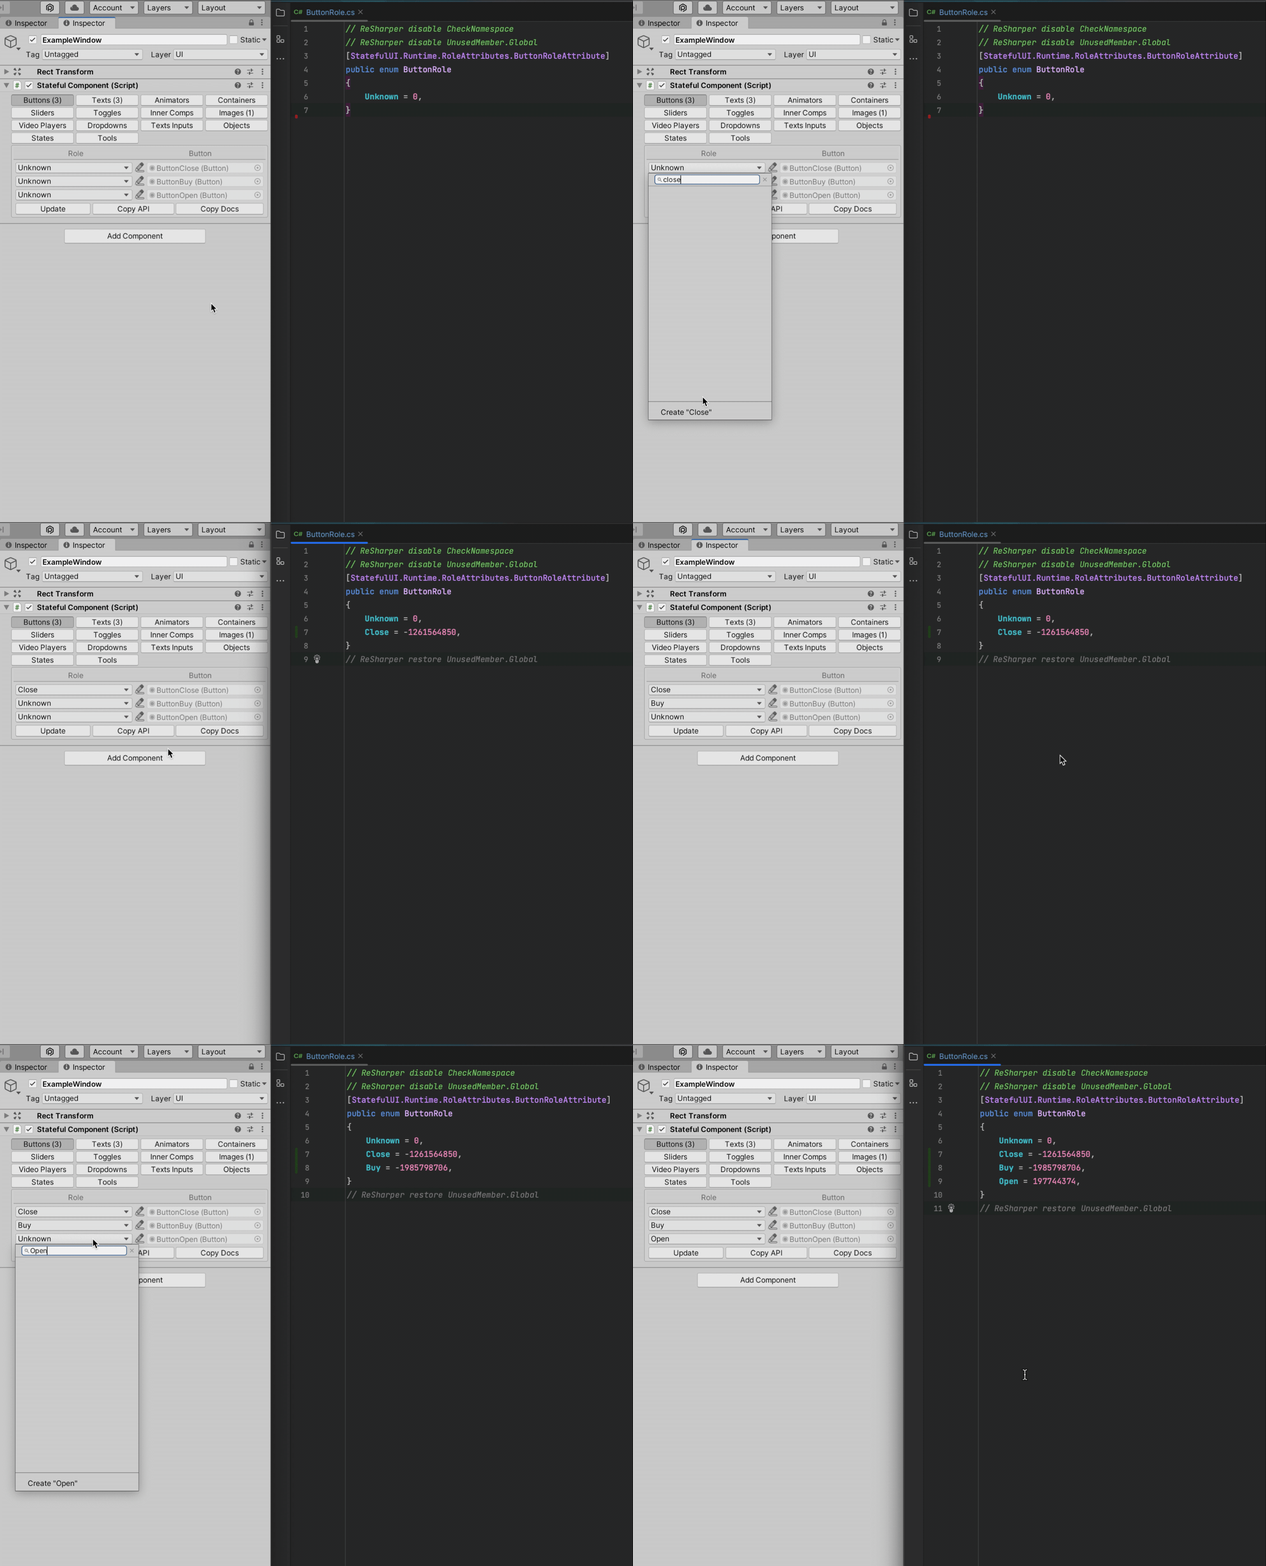
When you type the name of a new role, the create button will appear at the bottom of the roles dropdown:
<img src="https://raw.githubusercontent.com/dmitry-ivashenko/StatefulUI/main/docs/images/create_role.png" width="50%">Just click it, and the new role will be created and selected, and also the new enum item will be inserted into the code.

Using Roles
There are methods available for working with annotated objects. In your code, you can use a reference to StatefulComponent or inherit the class from StatefulView.
public class ExamplePresenter
{
    private StatefulComponent _view;

    public void OnOpen()
    {
        _view.GetButton(ButtonRole.Settings).onClick.AddListener(OnSettingsClicked);
        _view.GetButton(ButtonRole.Close).onClick.AddListener(OnCloseClicked);
        _view.GetSlider(SliderRole.Volume).onValueChanged.AddListener(OnVolumeChanged);
    }
}

public class ExampleScreen : StatefulView
{
    private void Start()
    {
        SetText(TextRole.Title, "Hello World");
        SetTextValues(TextRole.Timer, hours, minutes, seconds);
        SetImage(ImageRole.UserAvatar, avatarSprite);
    }
}
States
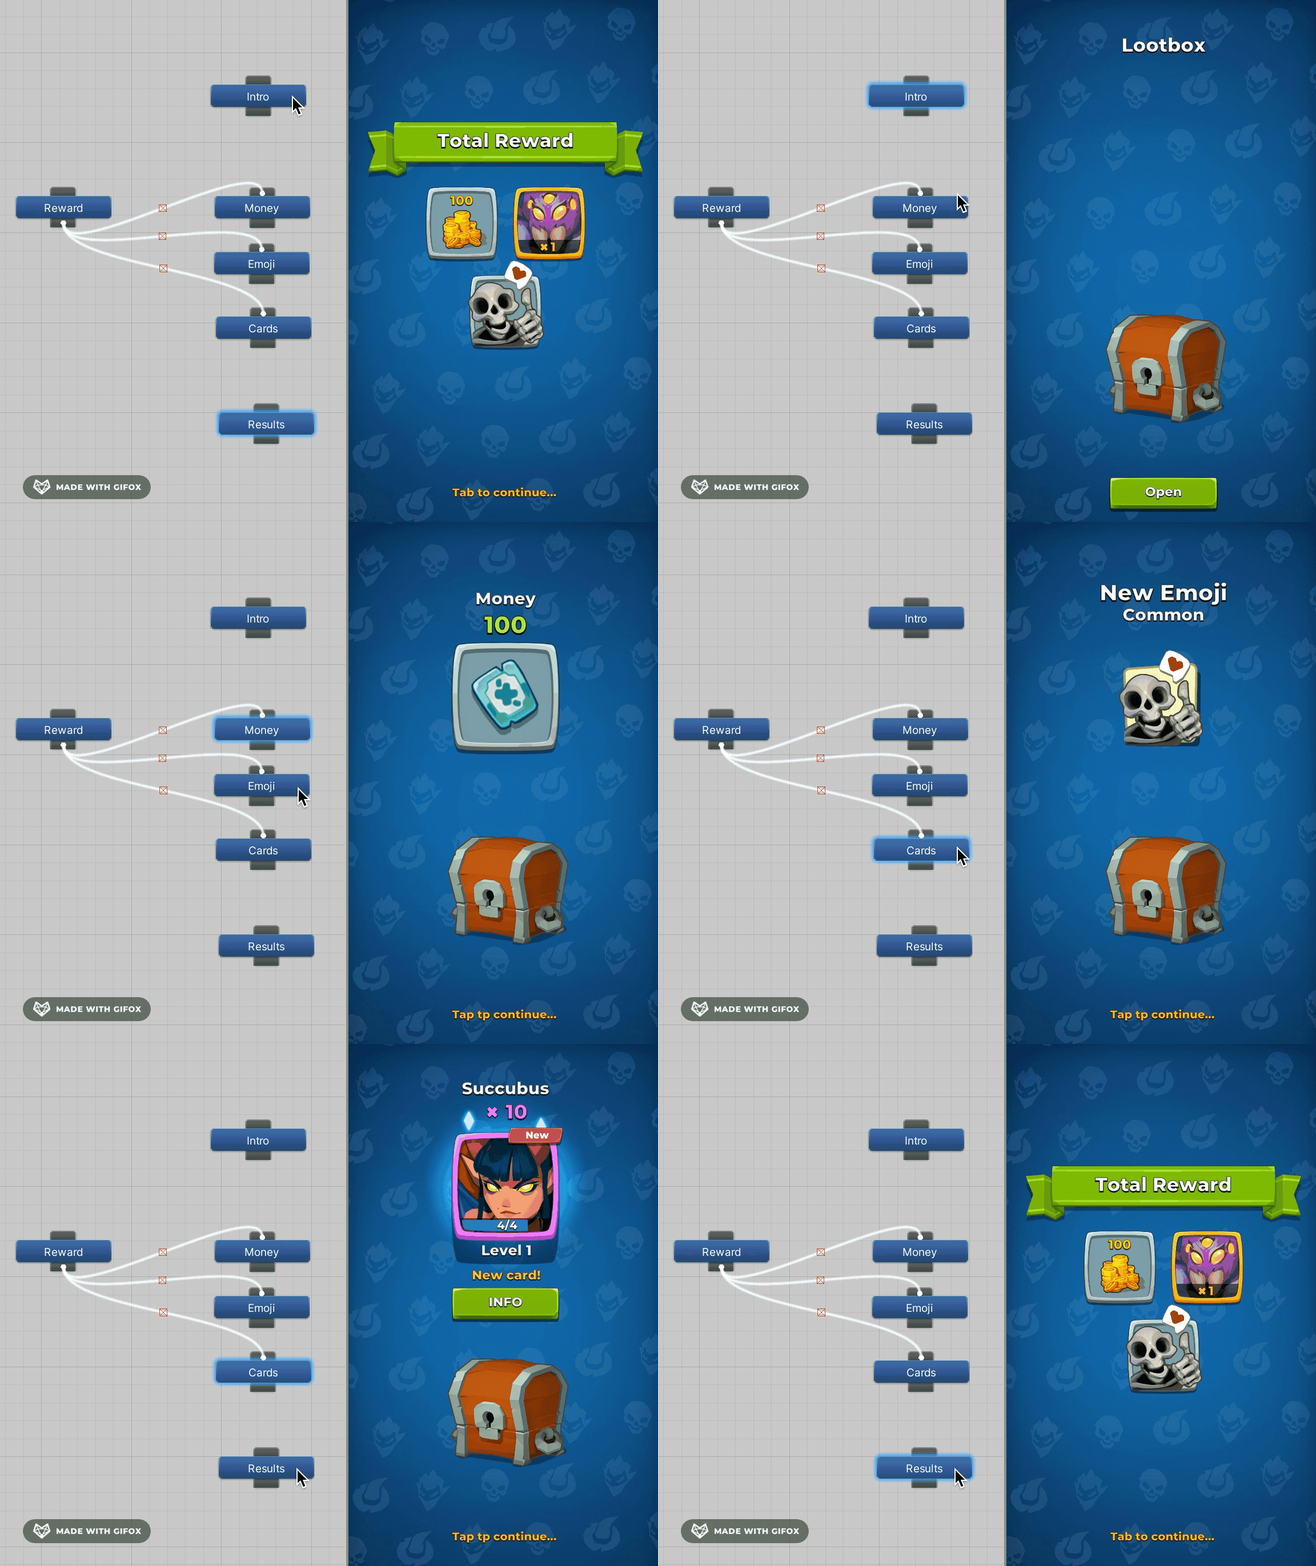
We define a State as a named set of changes to a prefab, with the name being a role from the StateRole enum. Changes can include enabling and disabling GameObjects, replacing sprites or materials for Image objects, moving objects on the screen, changing text and appearance, playing animations, and more. Users can also add their own types of object manipulations. A set of changes, or State Description, can be configured on the States tab and then applied directly from the inspector.

public void ShowIntro()
{
    SetState(StateRole.Intro);
}

public void ShowReward(IReward reward)
{
    // Update the inner view with the reward
    reward.UpdateView(GetInnerComponent(InnerComponentRole.Reward));

    // Switch on the type of reward
    switch (reward)
    {
        case ICardsReward cardsReward: SetState(StateRole.Cards); break;
        case IMoneyReward moneyReward: SetState(StateRole.Money); break;
        case IEmojiReward emojiReward: SetState(StateRole.Emoji); break;
    }
}

public void ShowResults(IEnumerable<IReward> rewards)
{
    SetState(StateRole.Results);

    // Fill the container with the rewards
    GetContainer(ContainerRole.TotalReward)
        .FillWithItems(rewards, (view, reward) => reward.UpdateView(view));
}
Installation
Install via UPM (using Git URL)
- Open UPM from Window -> Package Manager.
- Click "+" then click "Add package from git URL"
- Enter the URL "https://github.com/dmitry-ivashenko/StatefulUI.git?path=Assets/Plugins/StatefulUI" and click add.
- UPM should now install the package.
Install manually (using .unitypackage)
- Download the .unitypackage from releases page.
- Open .unitypackage file.
Roadmap
- Enhancing State capabilities, including new UI changes such as animations and sound effects.
- Adding color palette support for text and images.
- Implementing lists of reusable GameObjects.
- Supporting a greater number of Unity UI elements.
- Automating the unloading of localized text.
- Implementing a test framework to create ScriptableObject-based scenarios.
- Creating a tutorial system with ScriptableObject-based instructions.
License

