Awesome
docsify-chat
A docsify plugin for generate chat panel from markdown
Read this in other languages: English | 简体中文
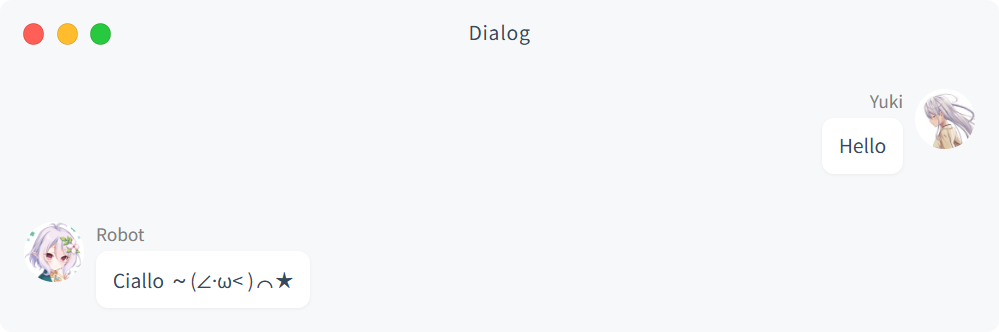
<!-- chat:start -->

#### **Yuki**

Hello

#### **Robot**

Ciallo ~(∠·ω< )⌒★

<!-- chat:end -->
Installation
-
Add the docsify-chat plugin to your
index.htmlafter docsify.<!-- Docsify --> <script src="//cdn.jsdelivr.net/npm/docsify/lib/docsify.min.js"></script> <!-- Docsify Chat --> <script src="//cdn.jsdelivr.net/npm/docsify-chat/lib/docsify-chat.min.js"></script> -
Review the Options section and configure as needed.
window.$docsify = {
  // ...
  chat: {
    // chat panel title
    title: 'Dialog',
    // set avatar url
    users: [
      { nickname: 'Yuki', avatar: '' },
      { nickname: 'Robot', avatar: '' },
    ],
  },
};
Usage
-
Define a chat set using
chat:startandchat:endHTML comments.HTML comments are used to mark the start and end of a chat set.
<!-- chat:start --> ... <!-- chat:end --> -
Define chat within a message set using heading + bold markdown.
Heading text will be used as the user nickname, and all proceeding content will be associated with that chat up to start of the next message or a
chat:endcomment.<!-- chat:start --> #### **Yuki** hello #### **Robot** hello world <!-- chat:end --> -
Generate and display your chat panel.
If you do not specify a user avatar, the initials of the nickname will be displayed by default.

Options
Options are set within the window.$docsify configuration under the chat key:
<script>
  window.$docsify = {
    // ...
    chat: {
      // chat panel title
      title: 'Dialog',
      // set avatar url
      users: [],
      // message dialog on the right (myself)
      self: 'Yuki',
      // animation interval (ms)
      animation: 50,
      // Panel navigation bar style, supporting "mac" and "windows"
      os: 'mac',
    },
  };
</script>
title
- Type:
string - Default:
'Dialog'
Sets the chat panel title.
You can also set the title for each chat panel individually in <!-- title:xxx -->.
Configuration
window.$docsify = {
  // ...
  chat: {
    title: 'chat history',
  },
};
Example
<!-- chat:start -->

<!-- title:Yuki's chat history -->

<!-- chat:end -->
users
- Type:
array - Default:
[]
Specify a nickname to match the user's avatar.
Configuration
window.$docsify = {
  // ...
  chat: {
    users: [
      { nickname: 'Yuki', avatar: 'images/yuki.png' },
      { nickname: 'Robot', avatar: 'images/robot.png' },
    ],
  },
};
self
Before v0.5.0, this attribute was named 'myself', but it has now been renamed 'self'.
- Type:
string - Default:
null
Set your own global nickname, the dialog will be displayed on the right side of the chat panel.
You can also set the user for each chat panel individually in <!-- self:xxx -->.
Configuration
window.$docsify = {
  // ...
  chat: {
    myself: 'Yuki',
  },
};
Example
<!-- chat:start -->

<!-- self:Robot -->

<!-- chat:end -->
animation
- Type:
number - Default:
50
Adjust the duration of the chat panel fade-in and fade-out animation.
Configuration
window.$docsify = {
  // ...
  chat: {
    animation: 50,
  },
};
os
- Type:
string - Default:
null
Define the system style of the title bar, support "mac" and "windows".
If it is not set, it will be based on the current browser navigator Platform Automatic rendering.
Configuration
window.$docsify = {
  // ...
  chat: {
    os: 'mac',
  },
};
Postscript
Because I wrote a chatbot framework, I needed a chat panel for illustrate. before I took screenshots directly in the software, but it felt too troublesome. I was thinking why can't it be generated directly with markdown? I've been looking for a long time, but I can't find any similar plugins, so I made one myself.
In order to save time, the syntax refers to docsify-tabs, which took only half a day to make. Although it basically meets daily use, there may be some unknown bugs.