Awesome
Angular Lib for OpenID Connect & OAuth2
<p align="center"> <a href="https://angular-auth-oidc-client.com/"><img src="https://raw.githubusercontent.com/damienbod/angular-auth-oidc-client/main/.github/angular-auth-logo.png" alt="" width="350" /></a> </p>Secure your Angular app using the latest standards for OpenID Connect & OAuth2. Provides support for token refresh, all modern OIDC Identity Providers and more.
Acknowledgements
This library is <a href="http://openid.net/certification/#RPs">certified</a> by OpenID Foundation. (RP Implicit and Config RP)
<p align="center"> <a href="http://openid.net/certification/#RPs"><img src="https://damienbod.files.wordpress.com/2017/06/oid-l-certification-mark-l-rgb-150dpi-90mm.png" alt="" width="400" /></a> </p>Features
- Code samples for most of the common use cases
- Supports schematics via
ng addsupport - Supports all modern OIDC identity providers
- Supports OpenID Connect Code Flow with PKCE
- Supports Code Flow PKCE with Refresh tokens
- Supports OpenID Connect Implicit Flow
- Supports OpenID Connect Session Management 1.0
- Supports RFC7009 - OAuth 2.0 Token Revocation
- Supports RFC7636 - Proof Key for Code Exchange (PKCE)
- Supports OAuth 2.0 Pushed authorisation requests (PAR) draft
- Semantic releases
- Github actions
- Modern coding guidelines with prettier, husky
- Up to date documentation
- Implements OIDC validation as specified, complete client side validation for REQUIRED features
- Supports authentication using redirect or popup
Installation
Ng Add
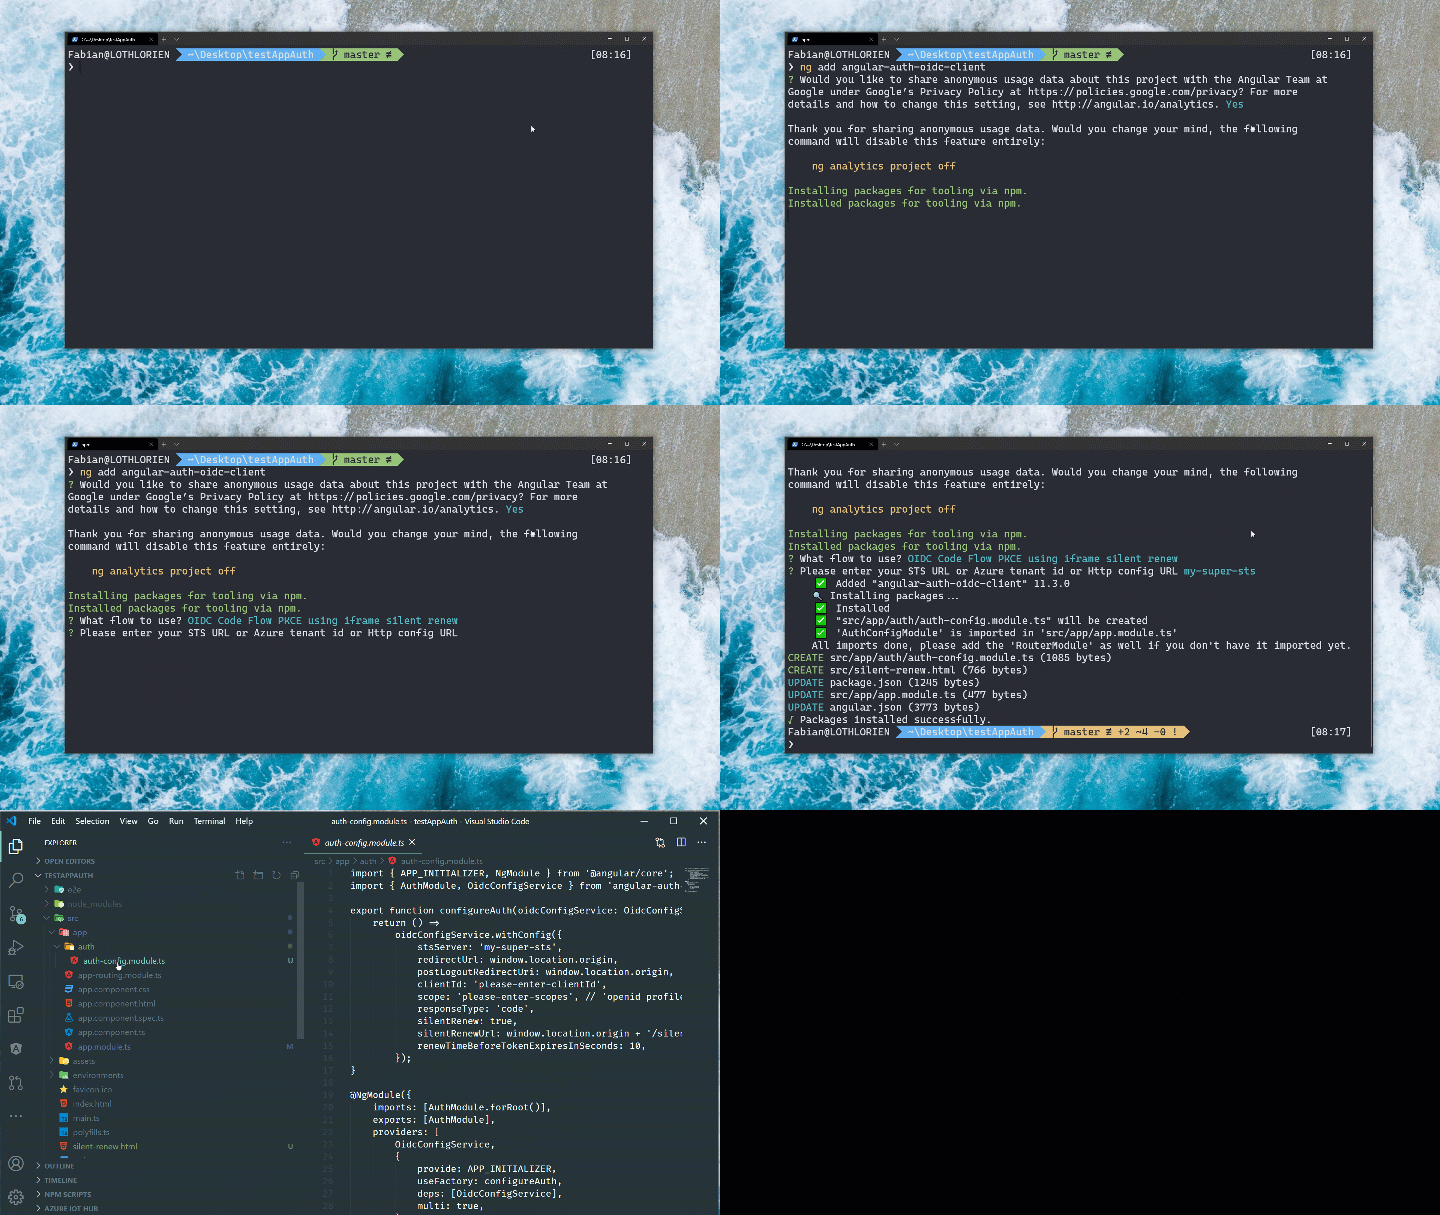
You can use the schematics and ng add the library.
ng add angular-auth-oidc-client
And answer the questions. A module will be created which encapsulates your configuration.

Npm / Yarn
Navigate to the level of your package.json and type
npm install angular-auth-oidc-client
or with yarn
yarn add angular-auth-oidc-client
Documentation
Samples
Quickstart
For the example of the Code Flow. For further examples please check the Samples Section.
If you have done the installation with the schematics, these modules and files should be available already!
Configuration
Import the AuthModule in your module.
import { NgModule } from '@angular/core';
import { AuthModule, LogLevel } from 'angular-auth-oidc-client';
// ...

@NgModule({
  // ...
  imports: [
    // ...
    AuthModule.forRoot({
      config: {
        authority: '<your authority address here>',
        redirectUrl: window.location.origin,
        postLogoutRedirectUri: window.location.origin,
        clientId: '<your clientId>',
        scope: 'openid profile email offline_access',
        responseType: 'code',
        silentRenew: true,
        useRefreshToken: true,
        logLevel: LogLevel.Debug,
      },
    }),
  ],
  // ...
})
export class AppModule {}
And call the method checkAuth() from your app.component.ts. The method checkAuth() is needed to process the redirect from your Security Token Service and set the correct states. This method must be used to ensure the correct functioning of the library.
import { Component, OnInit, inject } from '@angular/core';
import { OidcSecurityService } from 'angular-auth-oidc-client';

@Component({
  /*...*/
})
export class AppComponent implements OnInit {
  private readonly oidcSecurityService = inject(OidcSecurityService);

  ngOnInit() {
    this.oidcSecurityService
      .checkAuth()
      .subscribe((loginResponse: LoginResponse) => {
        const { isAuthenticated, userData, accessToken, idToken, configId } =
          loginResponse;

        /*...*/
      });
  }

  login() {
    this.oidcSecurityService.authorize();
  }

  logout() {
    this.oidcSecurityService
      .logoff()
      .subscribe((result) => console.log(result));
  }
}
Using the access token
You can get the access token by calling the method getAccessToken() on the OidcSecurityService
const token = this.oidcSecurityService.getAccessToken().subscribe(...);
And then you can use it in the HttpHeaders
import { HttpHeaders } from '@angular/common/http';

const token = this.oidcSecurityServices.getAccessToken().subscribe((token) => {
  const httpOptions = {
    headers: new HttpHeaders({
      Authorization: 'Bearer ' + token,
    }),
  };
});
You can use the built in interceptor to add the accesstokens to your request
AuthModule.forRoot({
  config: {
    // ...
    secureRoutes: ['https://my-secure-url.com/', 'https://my-second-secure-url.com/'],
  },
}),
 providers: [
    { provide: HTTP_INTERCEPTORS, useClass: AuthInterceptor, multi: true },
  ],
Versions
Current Version is Version 18.x
- Info about Version 17
- Info about Version 16
- Info about Version 15
- Info about Version 14
- Info about Version 13
- Info about Version 12
- Info about Version 11
- Info about Version 10


