Awesome
Grabcut
Labeling tool for machine vision based segmentation, based on work by Kris Kitani
Dependencies
IDE
This project is ported to work in Apple's Xcode; it tested with Xcode 7.3.1.
This project also uses the OpenCV library; it is tested with Versions or 2.4.12 and 2.4.13.
Installing OpenCV on OS X
Two ways to install OpenCV on OS X; we recommend the first:
- Use Homebrew, from the terminal:
brew update
brew tap homebrew/science
brew install opencv
* Note: Make sure OpenCV's dependencies are also installed, you can check using `brew info opencv`
2. Download OpenCV and building it using cMake * This tutorial provides greater detail for setting up OpenCV with cMake and Xcode.
Project Installation
To install the Grabcut project, complete the following steps:
- Clone this repository:
git clone with https://github.com/cmuartfab/grabcut.git`
-
Double click
grabcut.xcodeprojto open it in Xcode -
Navigate to the /usr/local/lib directory and select all of the libopencv.dylib files and drag and drop them into the lib folder in the Xcode project. You should see all the
libopencv.dylibfiles in the Grabcut project lib folder. -
In the Xcode project's build settings Under targets on the left column, select grabcut.
-
Make sure the paths under
Library Search Pathsinclure the directory where OpenCV is installed on your machine. If you used Homebrew to install OpenCV, it should be inusr/local/Cellar
Running the Xcode project
- Double click
grabcut.xcodeprojto open it in Xcode - grabcut/main.cpp, update this line with the right path to the datasets folder
string root = "/xxx/dataset/"; //Update this line to point to your dataset folder
- To label and generate masks for new images, add new images to 'dataset/img/ASAP/' and name them using names with the format 00000xxx.jpg, starting at 101, like this:
00000101.jpg
00000102.jpg
00000103.jpg
...
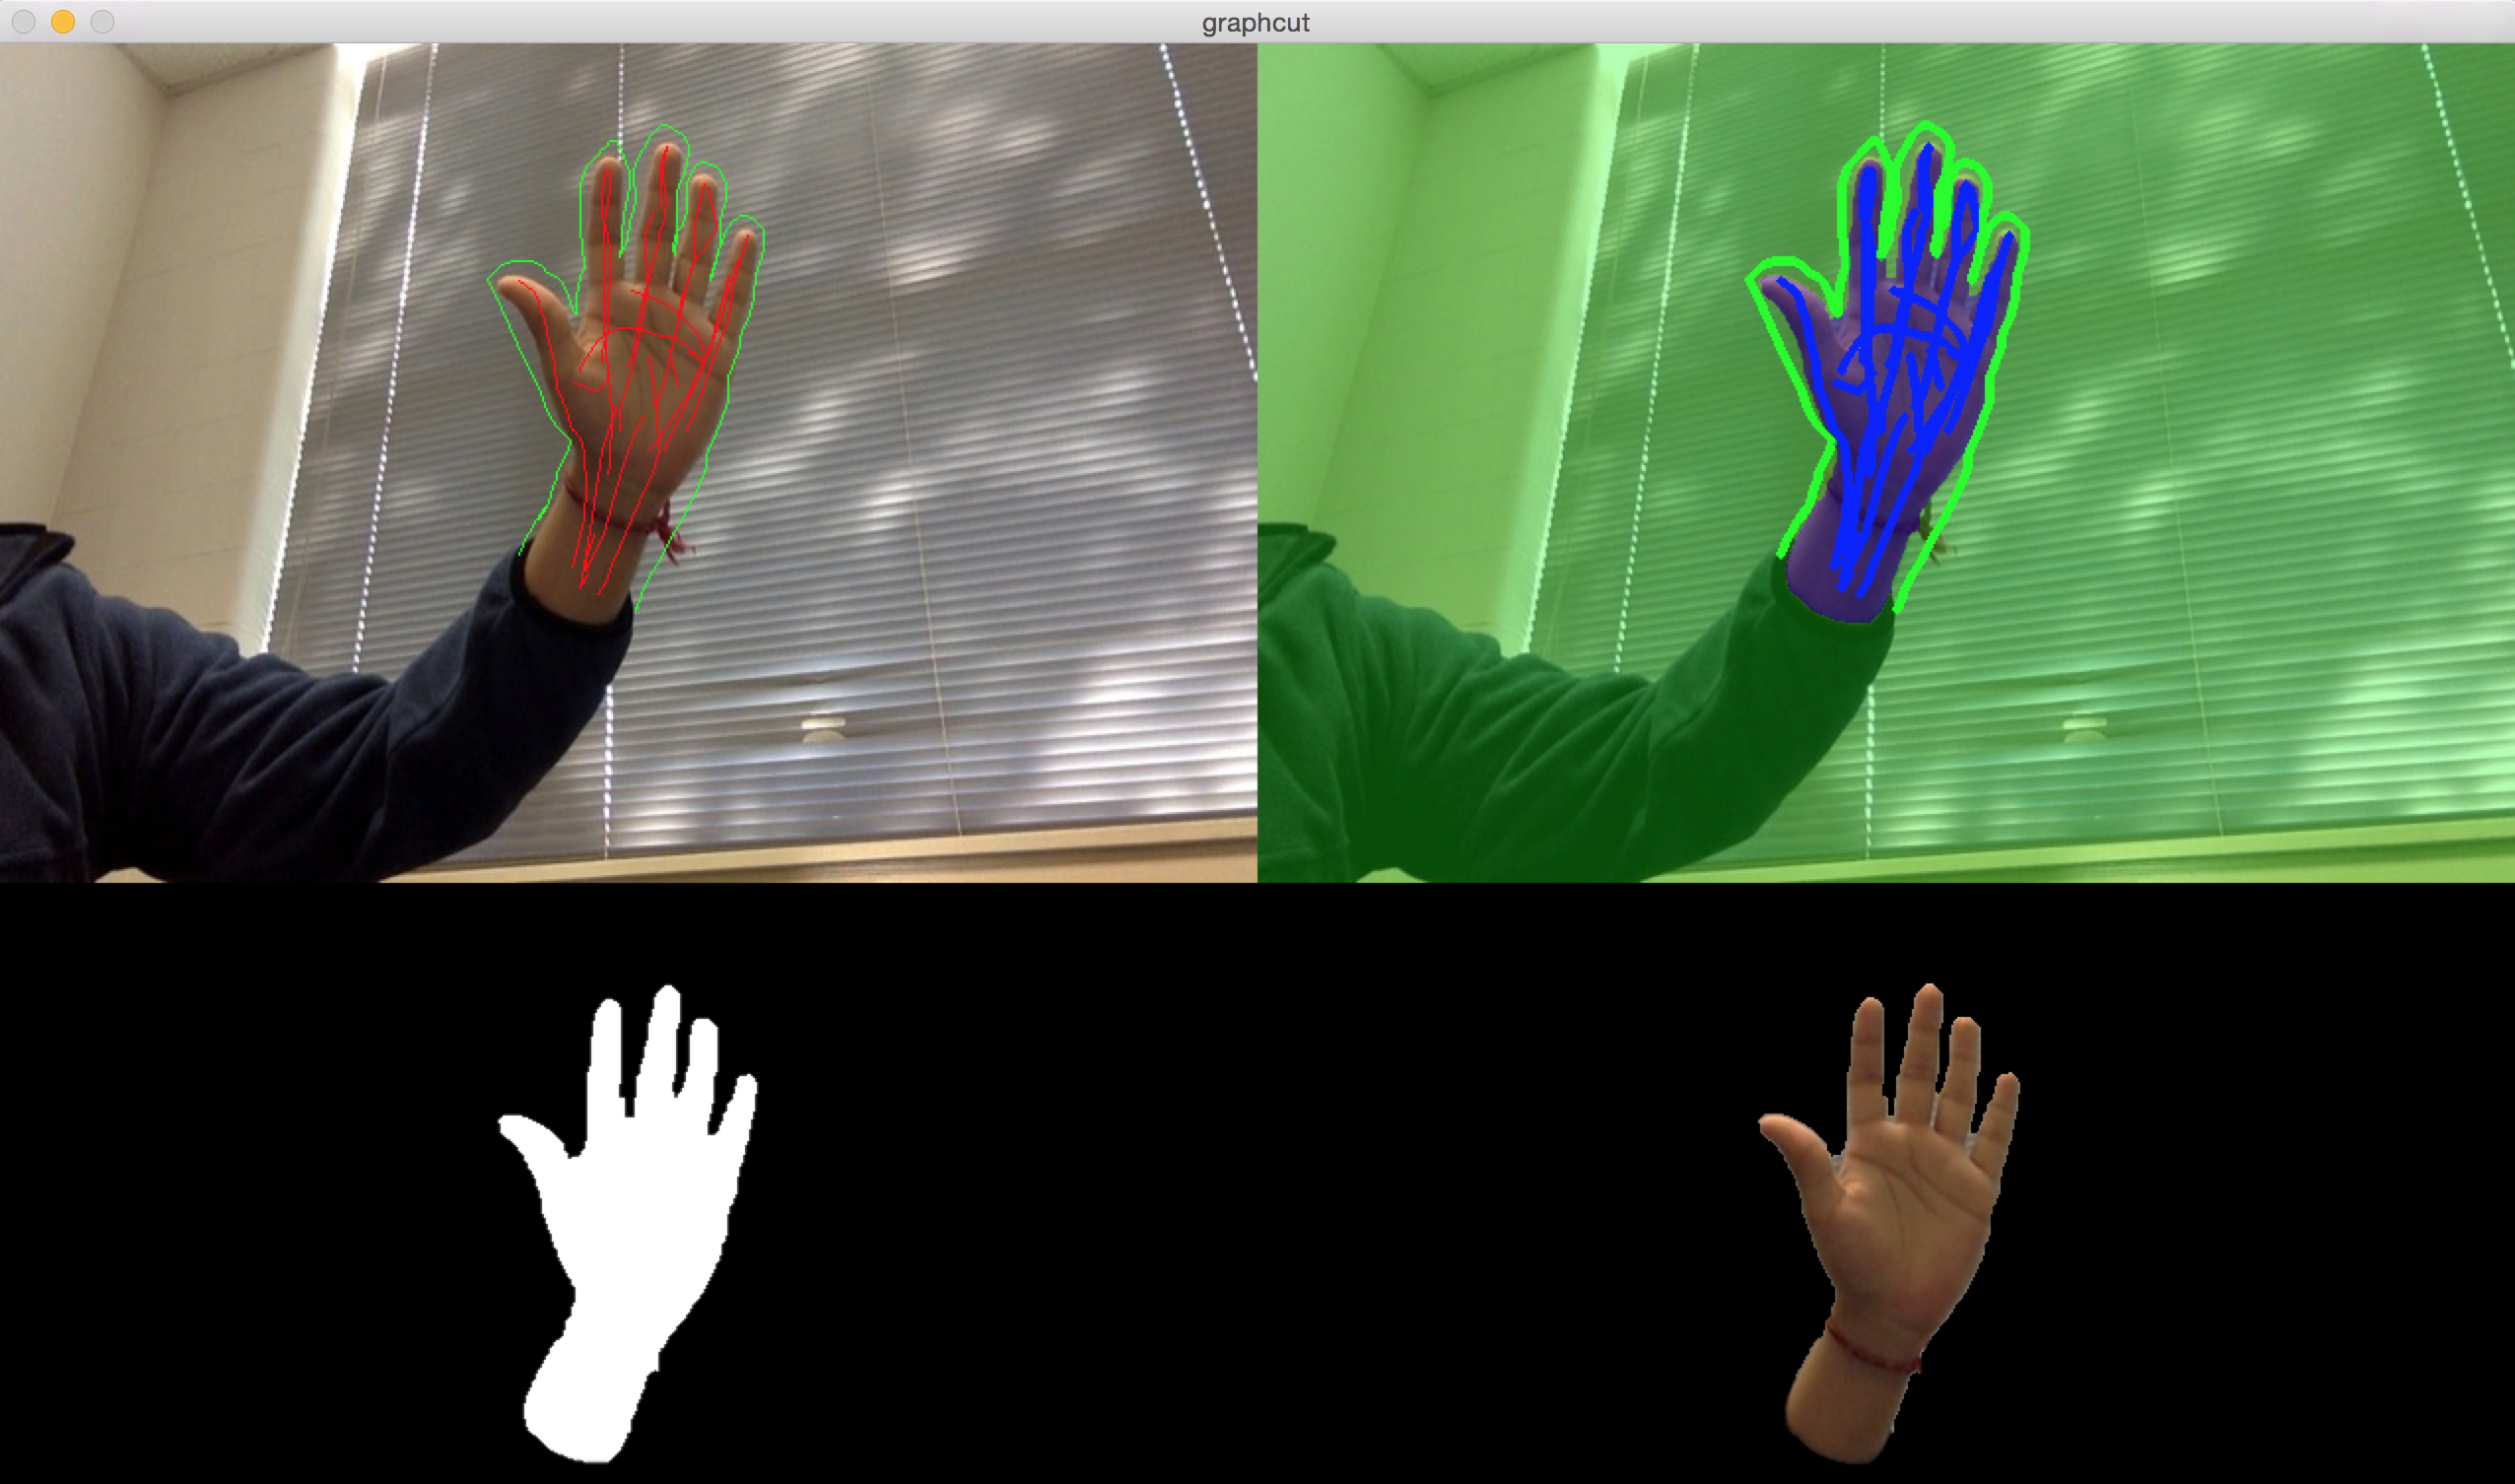
- Label the foreground and background with the following keys:
- 'b' - Background Mode: using the mouse, draw Green lines on the background, outlining the foreground object (see top left of image below)
- 'f' - Foreground Mode: using the mouse, draw Red lines within the outline of the foreground object (see top left of image below)
- 'd' - Done: moves to the next image
- 'r' - Reset: resets current image

- Top Left: Green background and red foreground lines
- Top Right: Foreground background separation; Foreground in pulple, and background in green
- Bottom Left: calculated mask
- Bottom Right: Mask applied to original source image