Awesome
<img src="https://raw.githubusercontent.com/chenzhaiyu/abspy/main/docs/source/_static/images/logo.png" width="480"/>Introduction
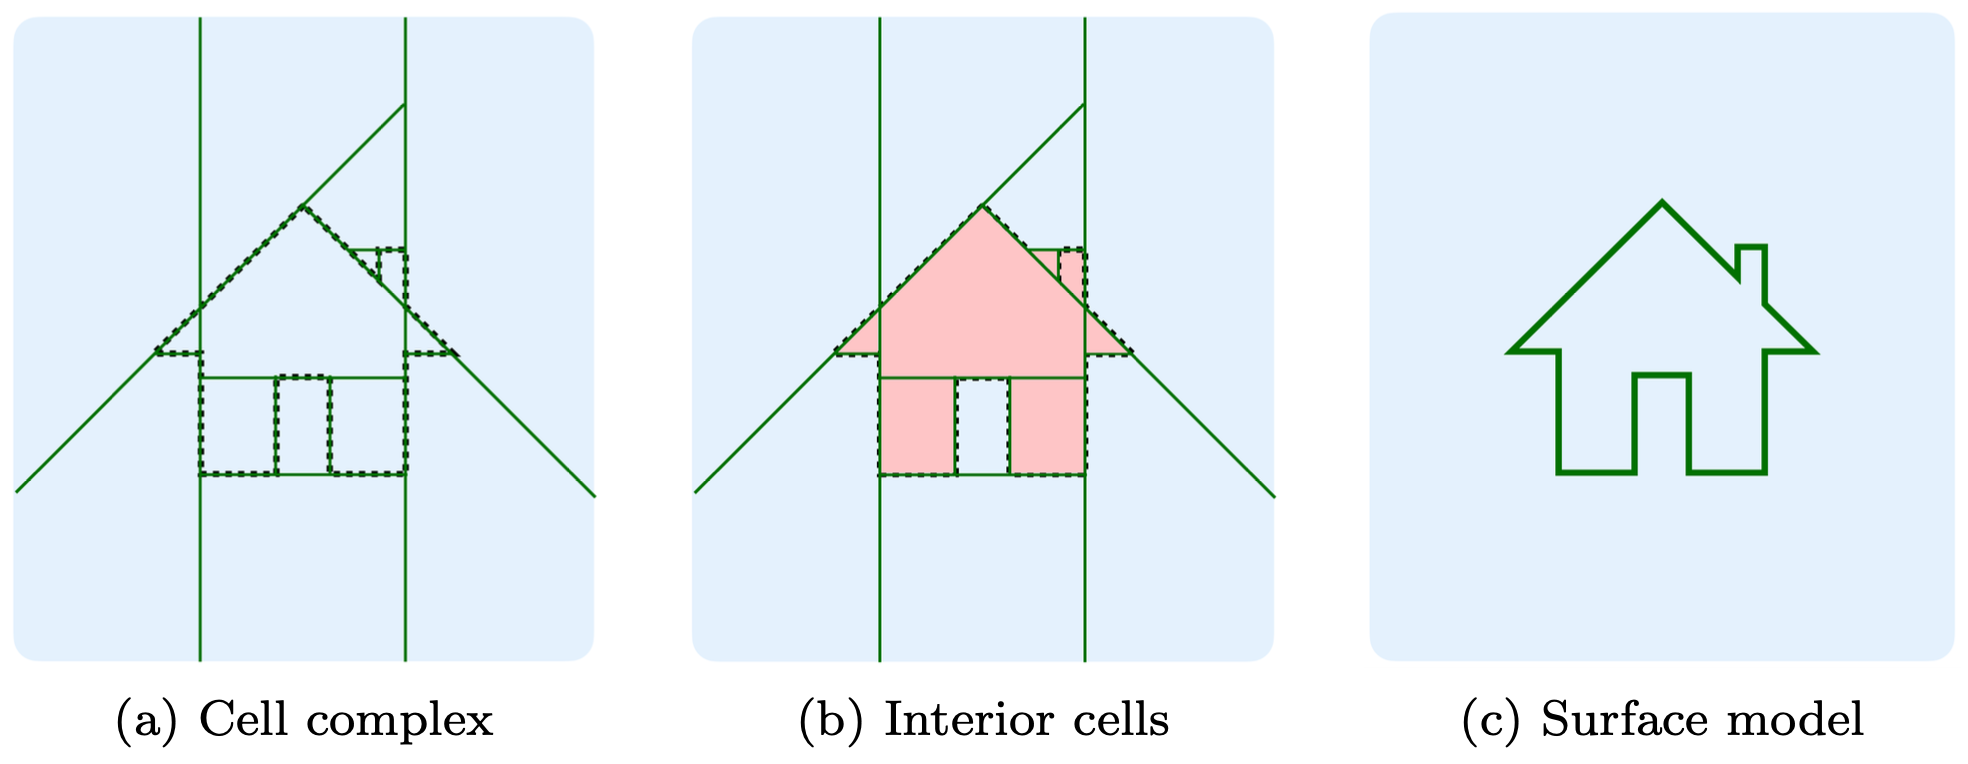
abspy is a Python tool for 3D adaptive binary space partitioning and beyond: an ambient 3D space is adaptively partitioned to form a linear cell complex with planar primitives, where an adjacency graph is dynamically obtained. The tool is designed primarily to support compact surface reconstruction and other applications as well.
<div align="center" width="480"> <img src="https://raw.githubusercontent.com/chenzhaiyu/abspy/main/docs/source/_static/images/animation.gif"><br> </div>Key features
- Manipulation of planar primitives from point cloud or reference mesh
- Linear cell complex creation with adaptive binary space partitioning (a-BSP)
- Dynamic BSP-tree (NetworkX graph) updated locally upon primitive insertion
- Support of polygonal surface reconstruction with graph cut
- Compatible data structure with Easy3D on point cloud, primitive, mesh and cell complex
- Robust spatial operations underpinned by the rational ring from SageMath's exact kernel
Installation
All-in-one installation
Create a conda environment with the latest abspy release and all its dependencies installed:
git clone https://github.com/chenzhaiyu/abspy && cd abspy
conda env create -f environment.yml && conda activate abspy
Manual installation
Still easy! Create a conda environment and enter it:
conda create --name abspy python=3.10 && conda activate abspy
Install the dependencies:
conda install -c conda-forge networkx numpy tqdm scikit-learn matplotlib colorlog scipy trimesh rtree pyglet sage=10.0
Alternatively, you can use mamba for faster package parsing installation:
conda install mamba -c conda-forge
mamba install -c conda-forge networkx numpy tqdm scikit-learn matplotlib colorlog scipy trimesh rtree pyglet sage=10.0
Preferably, the latest abspy release can be found and installed via PyPI:
pip install abspy
Otherwise, you can install the latest version locally:
git clone https://github.com/chenzhaiyu/abspy && cd abspy
pip install .
Quick start
Example 1 - Reconstruction from point cloud
The example loads a point cloud to VertexGroup (.vg), partitions ambient space into a cell complex, creates the adjacency graph, and extracts the object's outer surface.
from abspy import VertexGroup, AdjacencyGraph, CellComplex

# load a point cloud in VertexGroup
vertex_group = VertexGroup(filepath='points.vg')

# normalise point cloud
vertex_group.normalise_to_centroid_and_scale()

# additional planes to append (e.g., a bounding plane)
additional_planes = [[0, 0, 1, -vertex_group.aabbs[:, 0, 2].min()]]

# initialise cell complex
cell_complex = CellComplex(vertex_group.planes, vertex_group.aabbs, vertex_group.obbs, vertex_group.points_grouped, build_graph=True, additional_planes=additional_planes)

# refine planar primitives
cell_complex.refine_planes()

# prioritise certain planes (e.g., vertical ones)
cell_complex.prioritise_planes(prioritise_verticals=True)

# construct cell complex
cell_complex.construct()

# print info about cell complex
cell_complex.print_info()

# build adjacency graph from cell complex
adjacency_graph = AdjacencyGraph(cell_complex.graph)

# assign weights (e.g., occupancy by neural network prediction) to graph
adjacency_graph.assign_weights_to_n_links(cell_complex.cells, attribute='area_overlap', factor=0.001, cache_interfaces=True)
adjacency_graph.assign_weights_to_st_links(...)

# perform graph cut to extract surface
_, _ = adjacency_graph.cut()

# save surface model to an OBJ file
adjacency_graph.save_surface_obj('surface.obj', engine='rendering')
Example 2 - Convex decomposition from mesh
The example loads a mesh to VertexGroupReference, partitions ambient space into a cell complex, identifies cells inside reference mesh, and visualizes the cells.
from abspy import VertexGroupReference
vertex_group_reference = VertexGroupReference(filepath='mesh.obj')

# initialise cell complex
cell_complex = CellComplex(vertex_group_reference.planes, vertex_group_reference.aabbs, vertex_group_reference.obbs, build_graph=True)

# construct cell complex
cell_complex.construct()

# cells inside reference mesh
cells_in_mesh = cell_complex.cells_in_mesh('mesh.obj', engine='distance')

# save cell complex file
cell_complex.save('complex.cc')

# visualise the inside cells
if len(cells_in_mesh):
    cell_complex.visualise(indices_cells=cells_in_mesh)
Please find the usage of abspy at API reference. For the data structure of a .vg/.bvg file, please refer to VertexGroup.
FAQ
- How can I install abspy on Windows?
For Windows users, you may need to build SageMath from source or install all other dependencies into a pre-built SageMath environment. Otherwise, virtualization with docker may come to the rescue.
- How can I use abspy for surface reconstruction?
As demonstrated in Example 1, the surface can be addressed by graph cut — in between adjacent cells where one being inside and the other being outside — exactly where the cut is performed. For more information, please refer to Points2Poly which wraps abspy for building surface reconstruction.

License
Citation
If you use abspy in a scientific work, please consider citing the paper:
@article{chen2022points2poly,
  title = {Reconstructing compact building models from point clouds using deep implicit fields},
  journal = {ISPRS Journal of Photogrammetry and Remote Sensing},
  volume = {194},
  pages = {58-73},
  year = {2022},
  issn = {0924-2716},
  doi = {https://doi.org/10.1016/j.isprsjprs.2022.09.017},
  url = {https://www.sciencedirect.com/science/article/pii/S0924271622002611},
  author = {Zhaiyu Chen and Hugo Ledoux and Seyran Khademi and Liangliang Nan}
}

