Awesome
Alles - the mesh synthesizer
 Chat about Alles on our Discord!
Check out this video!
Alles is a many-speaker distributed mesh synthesizer that responds over WiFi. Each synth -- there can be hundreds in a mesh -- supports up to 120 additive oscillators, with filters, modulation / LFOs and ADSRs per oscillator. The mesh of speakers can be composed of any combination of our custom hardware speakers or programs running on computers. The software and hardware are open source: you can build it yourself or buy a PCB from us.
The synthesizers automatically form a mesh and listen to multicast WiFi messages. You can control the mesh from a host computer using any programming language or environments like Max or Pd.
We intended their first use as distributed / spatial version of an Alles Machine / Atari AMY additive synthesizer where each speaker represents up to 64 partials, all controlled as a group or individually. But you can just treat them as dozens of individual synthesizers and do whatever you want with them. It's pretty fun!
Want to try it today? Build your own Alles, or install the software version, and then read our getting started tutorial!
Synthesizer specs
Each individual synth is powered by the AMY synthesizer library, you can read more details there.
Using it -- hardware Alles
On first boot, each hardware speaker will create a captive wifi network called alles-synth-X where X is some ID of the synth. Join it (preferably on a mobile device), and you should get redirected to a captive wifi setup page. If not, go to http://10.10.0.1 in your browser after joining the network. Once you tell each synth what the wifi SSID and password you want it to join are, it will reboot. You only need to do that once per synth.
Using it -- software Alles
If you don't want to build or buy an Alles speaker, you can run Alles locally on your computer(s), as many as you want. As long as each copy of the software is running within the same network, they will automatically form in the mesh just like the hardware speakers. And the hardware and software speakers can be used interchangeably.
To build and run alles on a computer, simply clone this repository and
$ cd alles/main
$ make
$ ./alles
$ ./alles -h # shows all the useful commandline parameters, like changing which channel/sound card, or source IP address
Controlling the mesh
Check out our brand new Getting Started page for a tutorial!
You can control every synth on the mesh from a single host, using UDP over WiFi. You can address any synth in the mesh or all of them at once with one message, or use groups. This method can be used in music environments like Max or Pd, or by musicians or developers using languages like Python, or for plug-in developers who want to bridge Alles's full features to DAWs.
Alles's wire protocol is a series of numbers delimited by ascii characters that define all possible parameters of an oscillator. This is a design decision intended to make using Alles from any sort of environment as easy as possible, with no data structure or parsing overhead on the client. It's also readable and compact, far more expressive than MIDI and can be sent over network links, UARTs, or as arguments to functions or commands.
Alles accepts commands in ASCII, each command separated with a Z (you can group multiple messages in one, to avoid network overhead if that's your transport). Like so:
v0w4f440.0l0.9Z
See AMY's readme for the full list of synth parameters.
alles.py
Alles comes with its own full-featured client, written in Python. Feel free to adapt it or use it in your own clients. It can be seen as documentation, an API as well as a testing suite. You simply import alles and can control the entire mesh.
$ python3
>>> import alles
>>> alles.drums() # plays a drum pattern on all synths
>>> alles.drums(client=2) # just on one
To see more examples, check out our brand new Getting Started page.
Addressing individual synthesizers
By default, a message is played by all booted synthesizers. But you can address them individually or in groups using the client parameter.
The synthesizers form a mesh that self-identify who is running. They get auto-addressed client_ids starting at 0 through 255. The first synth to be booted in the mesh gets 0, then 1, and so on. If a synth is shut off or otherwise no longer sends a heartbeat signal to the mesh, the client_ids will reform so that they are always contiguous. A synth may take 10-20 seconds to join the mesh and get assigned a client_id after booting, but it will immediately receive messages sent to all synths.
The client parameter wraps around given the number of booted synthesizers to make it easy on the composer. If you have 6 booted synths, a client of 0 only reaches the first synth, 1 only reaches the 2nd synth, and a client of 7 reaches the 2nd synth (7 % 6 = 1).
Setting client to a number greater than 255 allows you to address groups. For example, a client of 257 performs the following check on each booted synthesizer: my_client_id % (client-255) == 0. This would only address every other synthesizer. A client of 259 would address every fourth synthesizer, and so on.
You can read the heartbeat messages on your host if you want to enumerate the synthesizers locally, see sync below.
Timing & latency
Alles is not designed as a low latency real-time performance instrument, where your actions have an immediate effect on the sound. Changes you make on the host will take a fixed latency -- currently set at 1000ms by default -- to get to every synth. This fixed latency ensures that messages arrive to every synth -- both ESP32 based and those running on computers -- in the mesh in time to play in perfect sync, even though Wi-Fi's transmission latency varies widely. This allows you to have millisecond-accurate timing in your performance across dozens of speakers in a large space.
Your host should send along the time parameter of the relative time when you expect the sound to play. I'd suggest using the number of milliseconds since your host started, e.g. in Python:
def millis():
    d = datetime.datetime.now()
    return int((datetime.datetime.utcnow() - datetime.datetime(d.year, d.month, d.day)).total_seconds()*1000)
If you're using alles.py, we do this for you!
If using Max, use the cpuclock object as the time parameter.
The first time you send a message with time the synth mesh uses it to figure out the delta between its time and your expected time. (If you never send a time parameter, you're at the mercy of WiFi jitter.) Further messages will be millisecond accurate message-to-message, but with the fixed latency. You can adapt time per client if you want to account for speed-of-sound delay.
The time parameter is not meant to schedule things far in the future on the clients. If you send a new time that is outside 20,000ms from its expected delta, the clock base will re-compute. Your host should be the main "sequencer" and keep track of performance state and future events.
Latency is adjustable, if you are comfortable with your network you can set it lower, or if using a local (127.0.0.1) connection, or directly sending messages in code, you can set it to 0.
Enumerating synths
The sync command (see alles.sync()) triggers an immediate response back from each on-line synthesizer. The response looks like _s65201i4c248y2, where s is the time on the client, i is the index it is responding to, y has battery status (for versions that support that) and c is the client id. This lets you build a map of not only each booted synthesizer, but if you send many messages with different indexes, will also let you figure the round-trip latency for each one along with the reliability.
WiFi & reliability for performances
UDP multicast is naturally 'lossy' -- there is no guarantee that a message will be received by a synth. Depending on a lot of factors, but most especially your wireless router and the presence of other devices, that reliability can sometimes go as low as 70%. For performance purposes, I highly suggest using a dedicated wireless router instead of an existing WiFi network. You'll want to be able to turn off many "quality of service" features (these prioritize a randomly chosen synth and will make sync hard to work with), and you'll want to in the best case only have synthesizers as direct WiFi clients. An easy way to do this is to set up a dedicated wireless router but not wire any internet into it. Connect your laptop or host machine to the router over a wired connection (via a USB-ethernet adapter if you need one), but keep your laptop's wifi or other internet network active. In your controlling software, you simply set the source network address to send and receive multicast packets from. alles_util.py has setup code for this. This will keep your host machine on its normal network but allow you to control the synths from a second interface.
If you're in a place where you can't control your network, you can mitigate reliability by simply sending messages N times. Sending multiple duplicate messages (with the same time parameter) do not have any adverse effect on the synths.
Clients
Minimal Python example:
import socket
multicast_group = ('232.10.11.12', 9294)
sock = socket.socket(socket.AF_INET, socket.SOCK_DGRAM)

def send(oscillator=0, freq=0, vel=1):
    sock.sendto("v%df%fl%fZ" % (oscillator, freq, vel), multicast_group)

def c_major(octave=2):
    send(oscillator=0,freq=220.5*octave)
    send(oscillator=1,freq=138.5*octave)
    send(oscillator=2,freq=164.5*octave)
See alles.py for a better example. Any language that supports sockets and multicast can work, I encourage pull requests with new clients!
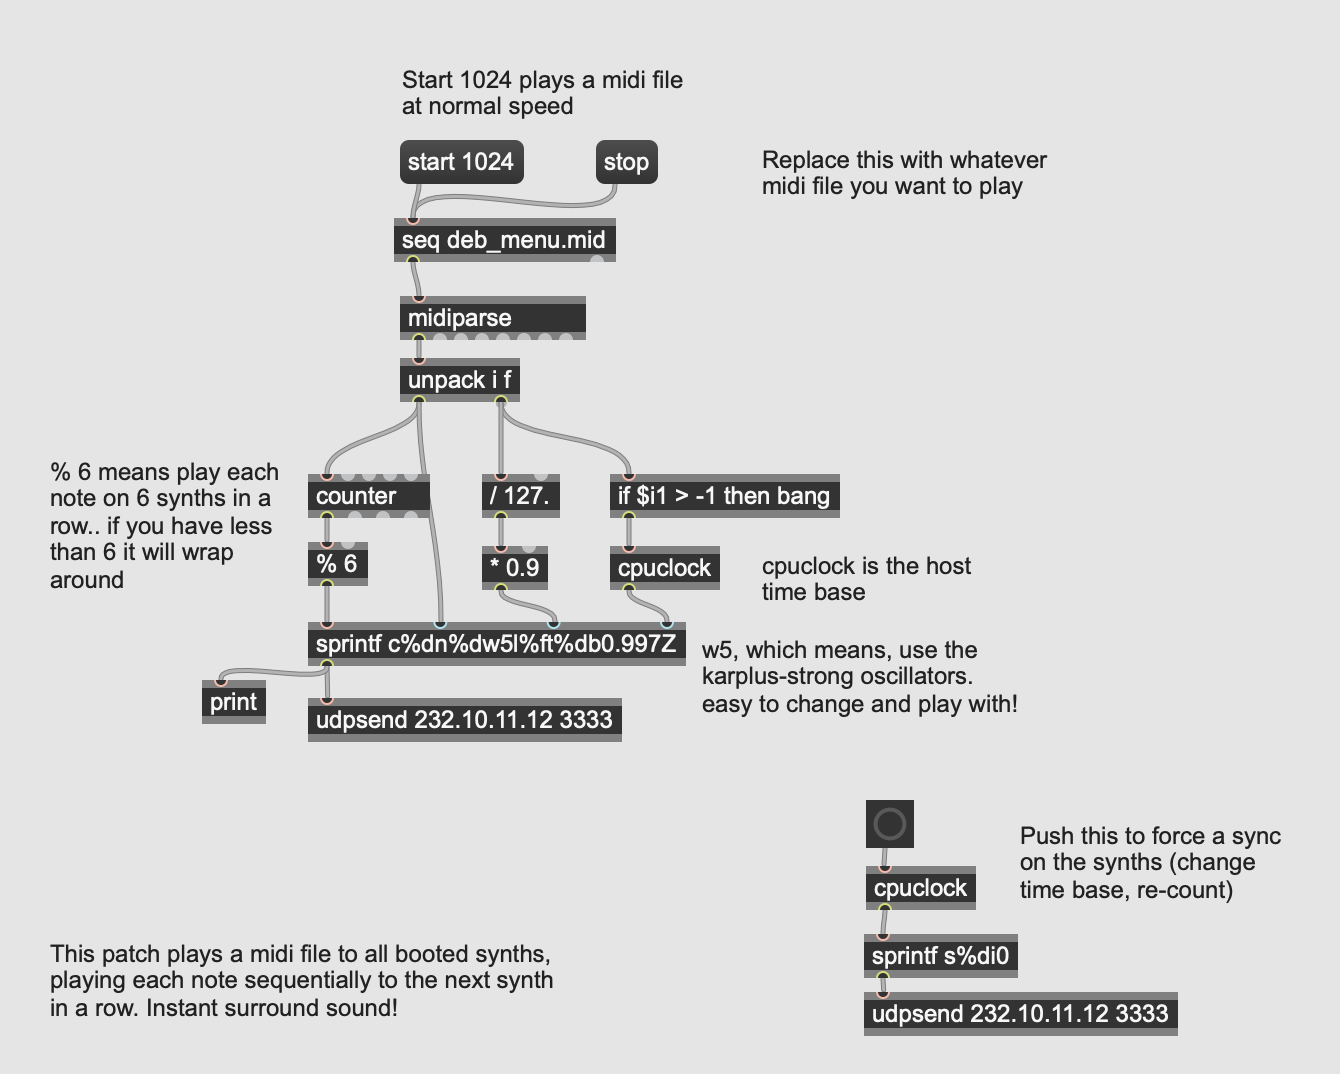
You can also easily use it in Max or Pd:
Synthesizer Details
See AMY's readme for more details on the synthesizer itself.
Get your own Alles!
Read here how to install a PCB into a speaker shell!
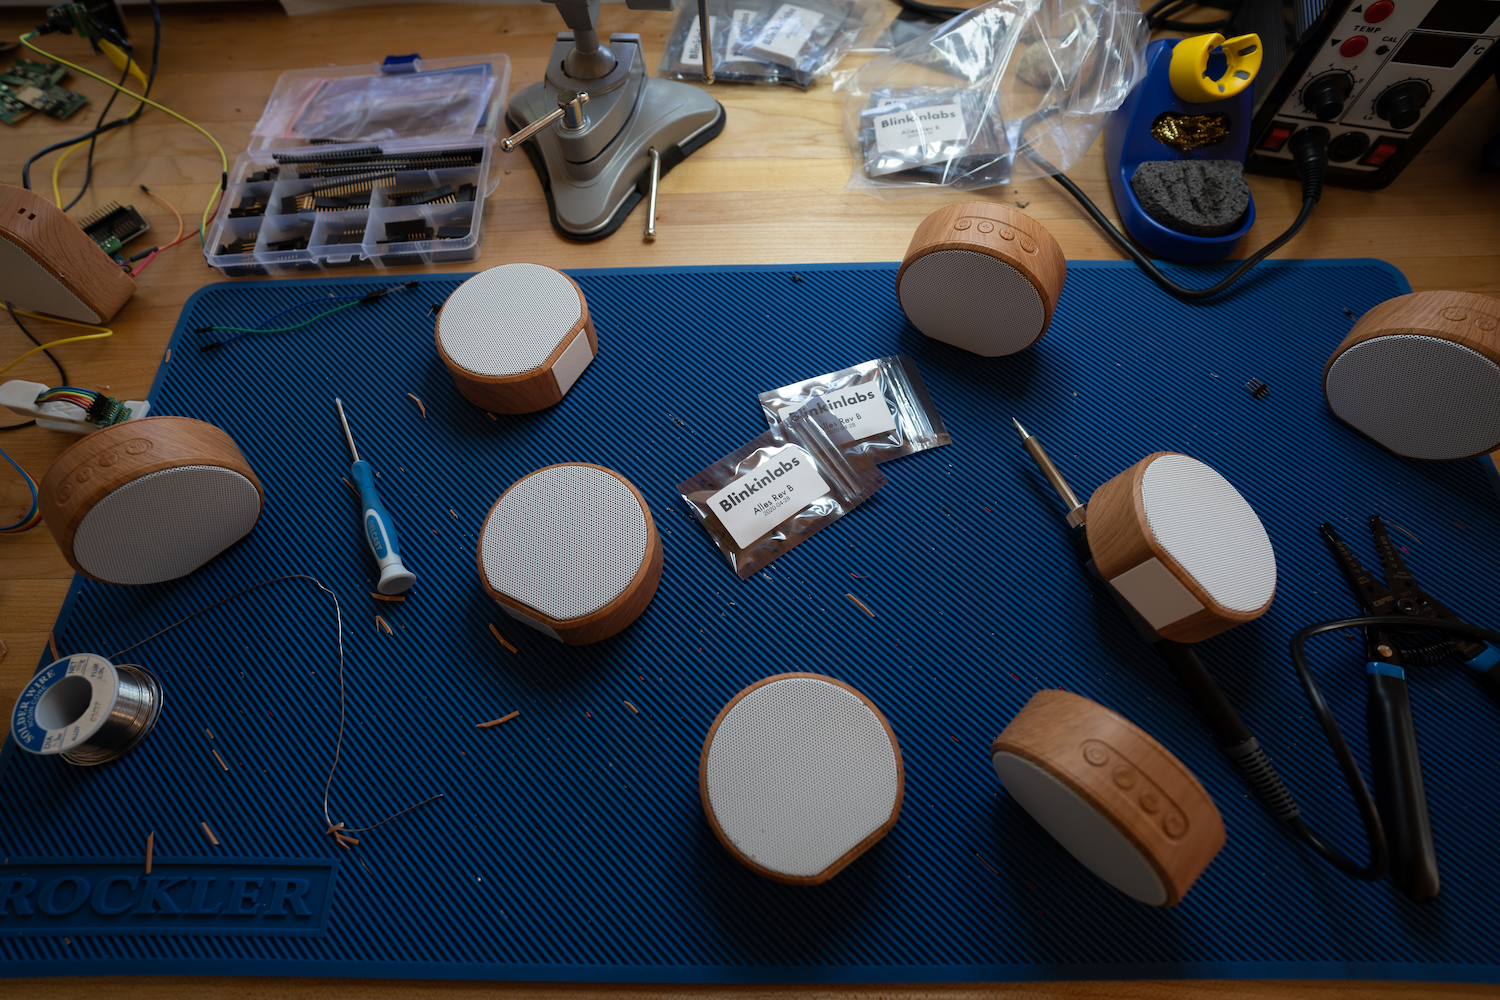
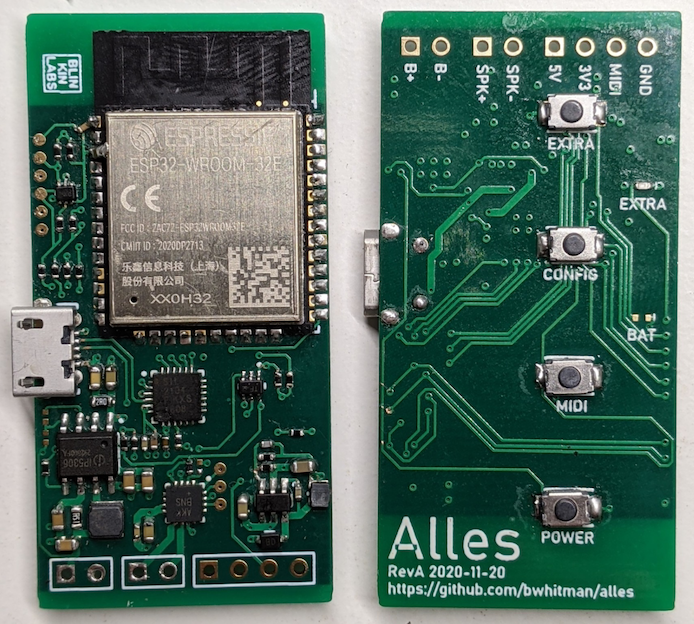
If you want the small circular speakers shown on this page and videos, they are easy to get. Here's a link to them on Alibaba: the round A60s – the square-shaped A70s also work! You then can buy an Alles PCB from us with no terminals for speaker and battery -- the connections for the shell solder directly to the board. It takes me about 3 minutes to assemble the Alles PCB inside the A60 or A70 speaker. To do it this way, you only need a wire stripper, a small screwdriver and a soldering iron.
IMPORTANT: Alles is sold on a "best effort" community support basis. We will send you working PCBs with the latest Alles firmware loaded on them. Anything that happens after that is up to the community to help with. Alles requires a little bit of computer and networking know-how to get going. We've made it as easy as possible, we hope, but we know we have more work to do before this is ready for a very wide audience. Please use GitHub issues for anything you're having trouble with and we'll do our best to help you figure it out.
DIY Alles
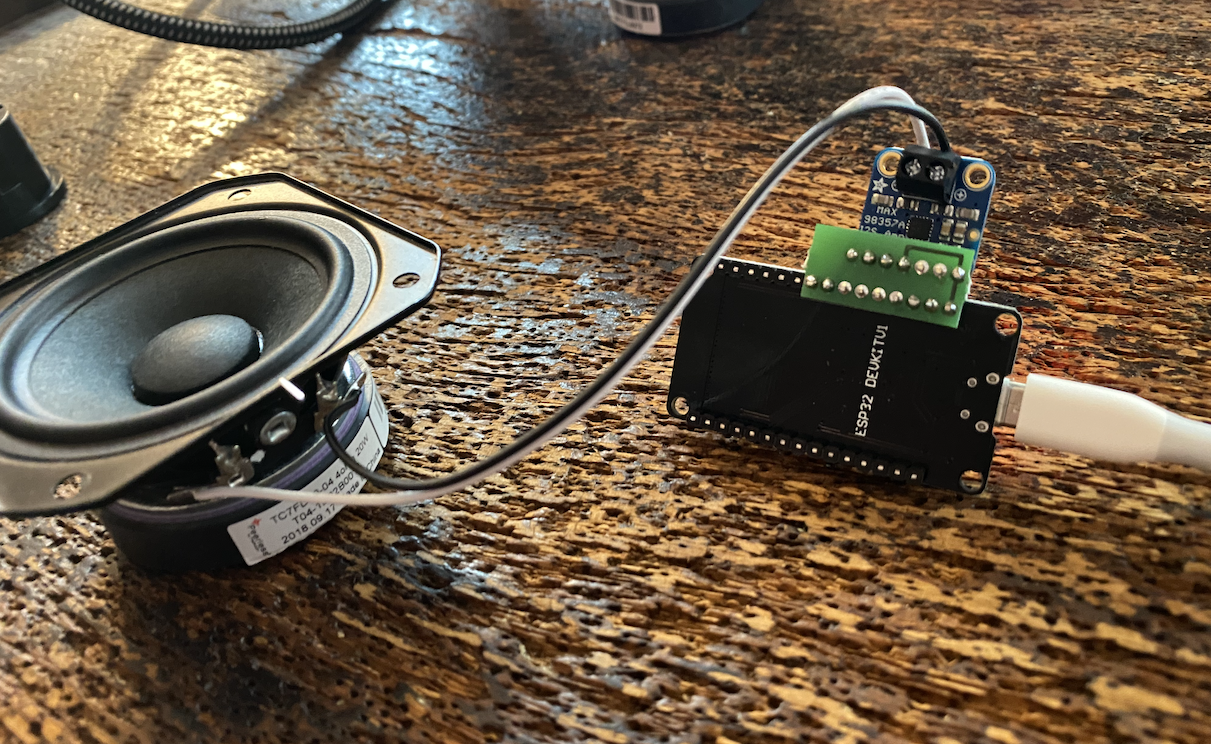
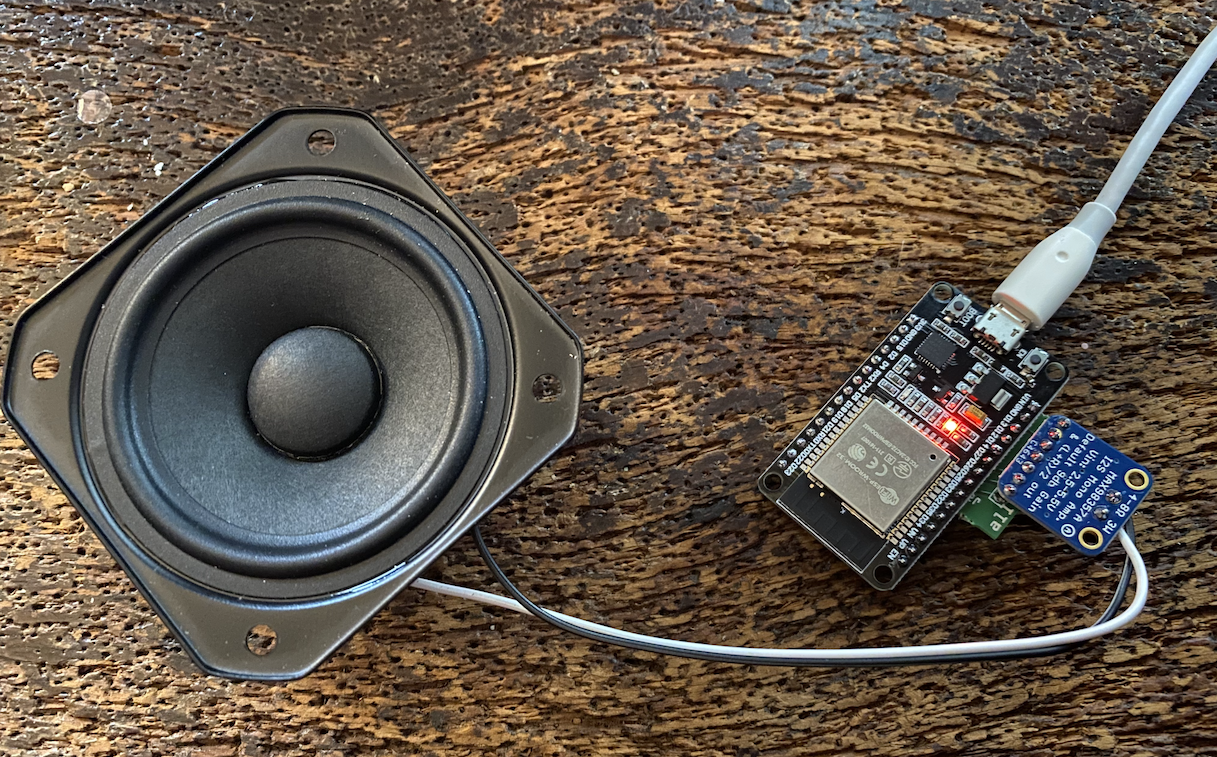
It's very simple to make one yourself with parts you can get from electronics distributors like Sparkfun, Adafruit or Amazon.
To make an Alles synth yourself, you need
- ESP32 dev board (any one will do, but you want pins broken out) (pack of 2, $7.45 each). Try to get a 8MB flash on yours if you want to have over-the-air updating.
- The Adafruit I2S mono amplifier ($5.95)
- 4 ohm speaker, this one is especially nice ($9.77, but you can save a lot of money here going lower-end if you're ok with the sound quality). I also like speakers with prebuilt cases, like these bookshelf speakers.
- A breadboard, custom PCB, or just some hookup wire!
A 5V input (USB battery, USB input, rechargeable batteries direct to power input) powers both boards and speaker at pretty good volumes. A 3.7V LiPo battery will also work, but note the I2S amp will not get as loud (without distorting) if you give it 3.7V. If you want your DIY Alles to be portable, I recommend using a USB battery pack that does not do low current shutoff. The draw of the whole unit at loud volumes is around 90mA, and at idle 40mA.
Wire up your DIY Alles like this (I2S -> ESP)
LRC -> GPIO25
BCLK -> GPIO26
DIN -> GPIO27
GAIN -> I2S Vin (i jumper this on the I2S board)
SD -> not connected
GND -> GND
Vin -> Vin / USB / 3.3 (or direct to your 5V power source)
Speaker connectors -> speaker
DIY bridge PCB
You don't need this PCB made to build a DIY Alles! -- it will work with just hookup wire. But if you're making a lot of DIY Alleses want more stability, I had a tiny little board made to join the boards together, like so:

This assumes you're using the suggested ESP32 dev board with its pin layout. If you use another one, you can probably change the GPIO assignments in alles.h. Fritzing file in the pcbs folder of this repository, and it's here on Aisler. This is a lot more stable and easier to wire up than snipping small bits of hookup wire, especially for the GAIN connection.
Disabling OTA for 4MB boards
If you are using your own dev board and it has less than 8MB of flash (4MB is common), first overwwrite alles_partitions.csv with the contents ofalles_4mb_partitions.csv as well as run idf.py menuconfig and change the flash size from 8MB to 4MB (in Serial Flasher Config) -- this will disable the OTA firmware upgrading, but will otherwise work fine. The binary for Alles is almost 4MB total and OTA needs space for two copies to be stored on the flash.
ESP32 Firmware
Alles is completely open source, and can be a fun platform to adapt beyond its current capabilities.
You can upgrade the firmware or write your own using the USB connection. See the guide on flashing a hardware Alles speaker (either DIY or one of ours).
THANK YOU TO
- Alles would not be possible without the help of DAn Ellis, who helped me with most of the oscillator stack, a lot of deep dives into our algorithm synth, and many great ideas / fixes on the ESP32 code.
- Douglas Repetto
- Raph Levien for his work on MSFA which gave us a lot of hints for our FM implementation
- mark fell
- esp32 WiFi Manager
- kyle mcdonald
- Matt Mets / Blinkinlabs
TODO
power buttonwifi setup should ask for default power saving / latency -- no for nowremove distortion at higher amplitudes for mixed sine wavesFMshould synths self-identify to each other? would make it easier to use in Maxsee what you can do about wide swings of UDP latency on the netgear routerenvelopes / note on/offs / LFOsconfirm UDP still works from Max/Pdbandlimit the square/saw/triangle oscillatorskarplus-strongwifi hotspot mode for in-field setupbroadcast UDP for multiplesdropped packetssync and enumerate across multiple devicesaddresses / communicate to one or groups, like "play this on half / one-quarter / all"do what i can about timing / jitter - sync time? timed messages?case / battery setupoverloading the volume (I think only on FM) crashesUDP message clicks- desktop USB flasher
- BT / app based config instead of captive portal (later)
