Awesome
Time MIDI sender
Sends MIDI notes according to a file. Made for use with DasLight
Setup in DasLight
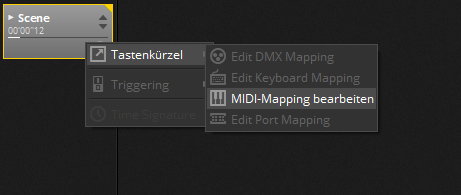
First open dasLight and setup MIDI in the settings. Then right-click on the scene you want to time trigger and select Shortcut>Edit midi-mapping

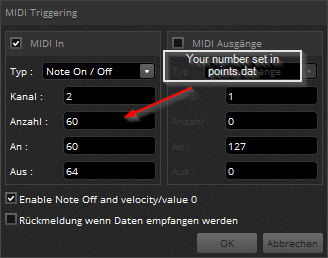
A popup will appear. Select the options shown in the image below.

Then edit your points.dat (you can rename it). The syntax is easy: time:yourNr.0/5 So time is the time in milliseconds counted from song start. yourNr is the "Amount" (or Anzahl in german). If you want to turn a scene on use yourNr.0, if you want to turn it off use yourNr.5. You can comment your code with #. When using #, you should be aware that 1500:60.5 # Test will fail. Example file:
# Valid comment
1500:60.0
2500:60.5  # Invalid comment
This file will start the scene "60" and turn it off after one second.
How to use config files
There are three attributes in a config file. The file should end with *.conf. All files(config, marker and music) need to be in the same folder. The folder needs to have the same name as the config and the makerfile (except for the file ending) Example file (when the file is called myProject.conf):
port:testLoopback 3
music:Eyes_of_Glory.mp3
marker:myProject.dat
music is your music file. port is your digital MIDI port. marker is your marker file.
How to use the GUI

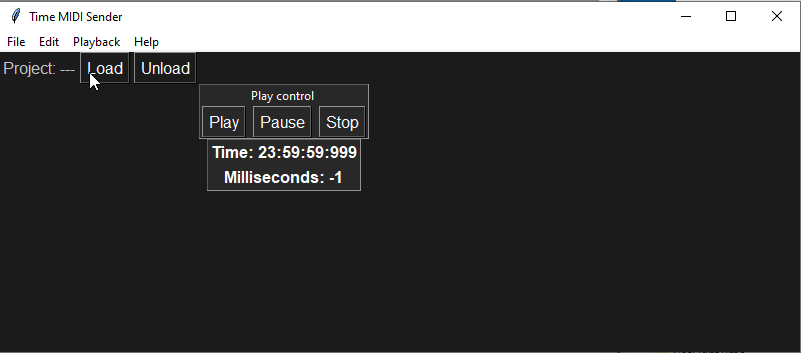
To start playing a project click File>Open and select your config file. Then click on load, to load the project. Now you can use the Play, Pause and Stop button to control playback.
What's in the box?
In the master branch download is an example project included.
Features
Already available:
- Sending midi notes
- Config files
- Pause/Play
- Loading/Unloading projects
WIP:
- GUI
Not yet available:
- "Live" Marker editing
- Update checker
- Command-line arguments
Known Bugs + Errors:
- Markers from 0000 to 500 may fail
Branches
There is the main branch, the main branch is kinda stable, it's called master. There is an unstable development branch, called dev.
Dependencies
- easygui
- mido
- python-rtmdidi
- pygame>=2.0.0dev6