Awesome
<h1 align="center"> <img src="https://github.com/OpenBMB/RepoAgent/assets/138990495/06bc2449-c82d-4b9e-8c83-27640e541451" width="50" alt="RepoAgent logo"/> <em>RepoAgent: An LLM-Powered Framework for Repository-level Code Documentation Generation.</em> </h1> <p align="center"> <img src="https://img.shields.io/pypi/dm/repoagent" alt="PyPI - Downloads"/> <a href="https://pypi.org/project/repoagent/"> <img src="https://img.shields.io/pypi/v/repoagent" alt="PyPI - Version"/> </a> <a href="Pypi"> <img src="https://img.shields.io/pypi/pyversions/repoagent" alt="PyPI - Python Version"/> </a> <img alt="GitHub License" src="https://img.shields.io/github/license/LOGIC-10/RepoAgent"> <img alt="GitHub Repo stars" src="https://img.shields.io/github/stars/LOGIC-10/RepoAgent?style=social"> <img alt="GitHub issues" src="https://img.shields.io/github/issues/LOGIC-10/RepoAgent"> <a href="https://arxiv.org/abs/2402.16667v1"> <img src="https://img.shields.io/badge/cs.CL-2402.16667-b31b1b?logo=arxiv&logoColor=red" alt="arXiv"/> </a> </p> <p align="center"> <img src="https://raw.githubusercontent.com/OpenBMB/RepoAgent/main/assets/images/RepoAgent.png" alt="RepoAgent"/> </p> <p align="center"> <a href="https://github.com/LOGIC-10/RepoAgent/blob/main/README.md">English readme</a> • <a href="https://github.com/LOGIC-10/RepoAgent/blob/main/README_CN.md">简体中文 readme</a> </p>:tv: Demo
👾 Background
In the realm of computer programming, the significance of comprehensive project documentation, including detailed explanations for each Python file, cannot be overstated. Such documentation serves as the cornerstone for understanding, maintaining, and enhancing the codebase. It provides essential context and rationale for the code, making it easier for current and future developers to comprehend the purpose, functionality, and structure of the software. It not only facilitates current and future developers in grasping the project's purpose and structure but also ensures that the project remains accessible and modifiable over time, significantly easing the learning curve for new team members.
Traditionally, creating and maintaining software documentation demanded significant human effort and expertise, a challenge for small teams without dedicated personnel. The introduction of Large Language Models (LLMs) like GPT has transformed this, enabling AI to handle much of the documentation process. This shift allows human developers to focus on verification and fine-tuning, greatly reducing the manual burden of documentation.
🏆 Our goal is to create an intelligent document assistant that helps people read and understand repositories and generate documents, ultimately helping people improve efficiency and save time.
✨ Features
- 🤖 Automatically detects changes in Git repositories, tracking additions, deletions, and modifications of files.
- 📝 Independently analyzes the code structure through AST, generating documents for individual objects.
- 🔍 Accurate identification of inter-object bidirectional invocation relationships, enriching the global perspective of document content.
- 📚 Seamlessly replaces Markdown content based on changes, maintaining consistency in documentation.
- 🕙 Executes multi-threaded concurrent operations, enhancing the efficiency of document generation.
- 👭 Offer a sustainable, automated documentation update method for team collaboration.
- 😍 Display Code Documentation in an amazing way. (with document book per project powered by Gitbook)
🚀 Getting Started
Installation Method
Using GitHub Actions
This repository supports GitHub Actions for automating workflows such as building, testing, and deploying. For detailed instructions on setting up and using GitHub Actions with this repository, please refer to the actions/run-repoagent.
Using pip (Recommended for Users)
Install the repoagent package directly using pip:
pip install repoagent
Development Setup Using PDM
If you're looking to contribute or set up a development environment:
-
Install PDM: If you haven't already, install PDM.
-
Use CodeSpace, or Clone the Repository:
- Use CodeSpace The easiest way to get RepoAgent enviornment. Click below to use the GitHub Codespace, then go to the next step.
- Clone the Repository
git clone https://github.com/LOGIC-10/RepoAgent.git cd RepoAgent -
Setup with PDM
-
Initialize the Python virtual environment. Make sure to run the below cmd in
/RepoAgentdirectory:pdm venv create --name repoagent -
Install dependencies using PDM
pdm install
-
Configuring RepoAgent
Before configuring specific parameters for RepoAgent, please ensure that the OpenAI API is configured as an environment variable in the command line:
export OPENAI_API_KEY=YOUR_API_KEY # on Linux/Mac
set OPENAI_API_KEY=YOUR_API_KEY # on Windows
$Env:OPENAI_API_KEY = "YOUR_API_KEY" # on Windows (PowerShell)
Run RepoAgent
Enter the root directory of RepoAgent and try the following command in the terminal:
repoagent run #this command will generate doc, or update docs(pre-commit-hook will automatically call this)
repoagent run --print-hierarchy # Print how repo-agent parse the target repo
The run command supports the following optional flags (if set, will override config defaults):
-m,--modelTEXT: Specifies the model to use for completion. Default:gpt-3.5-turbo-t,--temperatureFLOAT: Sets the generation temperature for the model. Lower values make the model more deterministic. Default:0.2-r,--request-timeoutINTEGER: Defines the timeout in seconds for the API request. Default:60-b,--base-urlTEXT: The base URL for the API calls. Default:https://api.openai.com/v1-tp,--target-repo-pathPATH: The file system path to the target repository. Used as the root for documentation generation. Default:path/to/your/target/repository-hp,--hierarchy-pathTEXT: The name or path for the project hierarchy file, used to organize documentation structure. Default:.project_doc_record-mdp,--markdown-docs-pathTEXT: The folder path where Markdown documentation will be stored or generated. Default:markdown_docs-i,--ignore-listTEXT: A list of files or directories to ignore during documentation generation, separated by commas.-l,--languageTEXT: The ISO 639 code or language name for the documentation. Default:Chinese-ll,--log-level[DEBUG|INFO|WARNING|ERROR|CRITICAL]: Sets the logging level for the application. Default:INFO
You can also try the following feature
repoagent clean # Remove repoagent-related cache
repoagent diff # Check what docs will be updated/generated based on current code change
If it's your first time generating documentation for the target repository, RepoAgent will automatically create a JSON file maintaining the global structure information and a folder named Markdown_Docs in the root directory of the target repository for storing documents.
Once you have initially generated the global documentation for the target repository, or if the project you cloned already contains global documentation information, you can then seamlessly and automatically maintain internal project documentation with your team by configuring the pre-commit hook in the target repository!
Use pre-commit
RepoAgent currently supports generating documentation for projects, which requires some configuration in the target repository.
First, ensure that the target repository is a git repository and has been initialized.
git init
Install pre-commit in the target repository to detect changes in the git repository.
pip install pre-commit
Create a file named .pre-commit-config.yaml in the root directory of the target repository. An example is as follows:
repos:
  - repo: local
    hooks:
    - id: repo-agent
      name: RepoAgent
      entry: repoagent
      language: system
      pass_filenames: false # prevent from passing filenames to the hook
      # You can specify the file types that trigger the hook, but currently only python is supported.
      types: [python]
For specific configuration methods of hooks, please refer to pre-commit. After configuring the yaml file, execute the following command to install the hook.
pre-commit install
In this way, each git commit will trigger the RepoAgent's hook, automatically detecting changes in the target repository and generating corresponding documents. Next, you can make some modifications to the target repository, such as adding a new file to the target repository, or modifying an existing file. You just need to follow the normal git workflow: git add, git commit -m "your commit message", git push The RepoAgent hook will automatically trigger at git commit, detect the files you added in the previous step, and generate corresponding documents.
After execution, RepoAgent will automatically modify the staged files in the target repository and formally submit the commit. After the execution is completed, the green "Passed" will be displayed, as shown in the figure below:

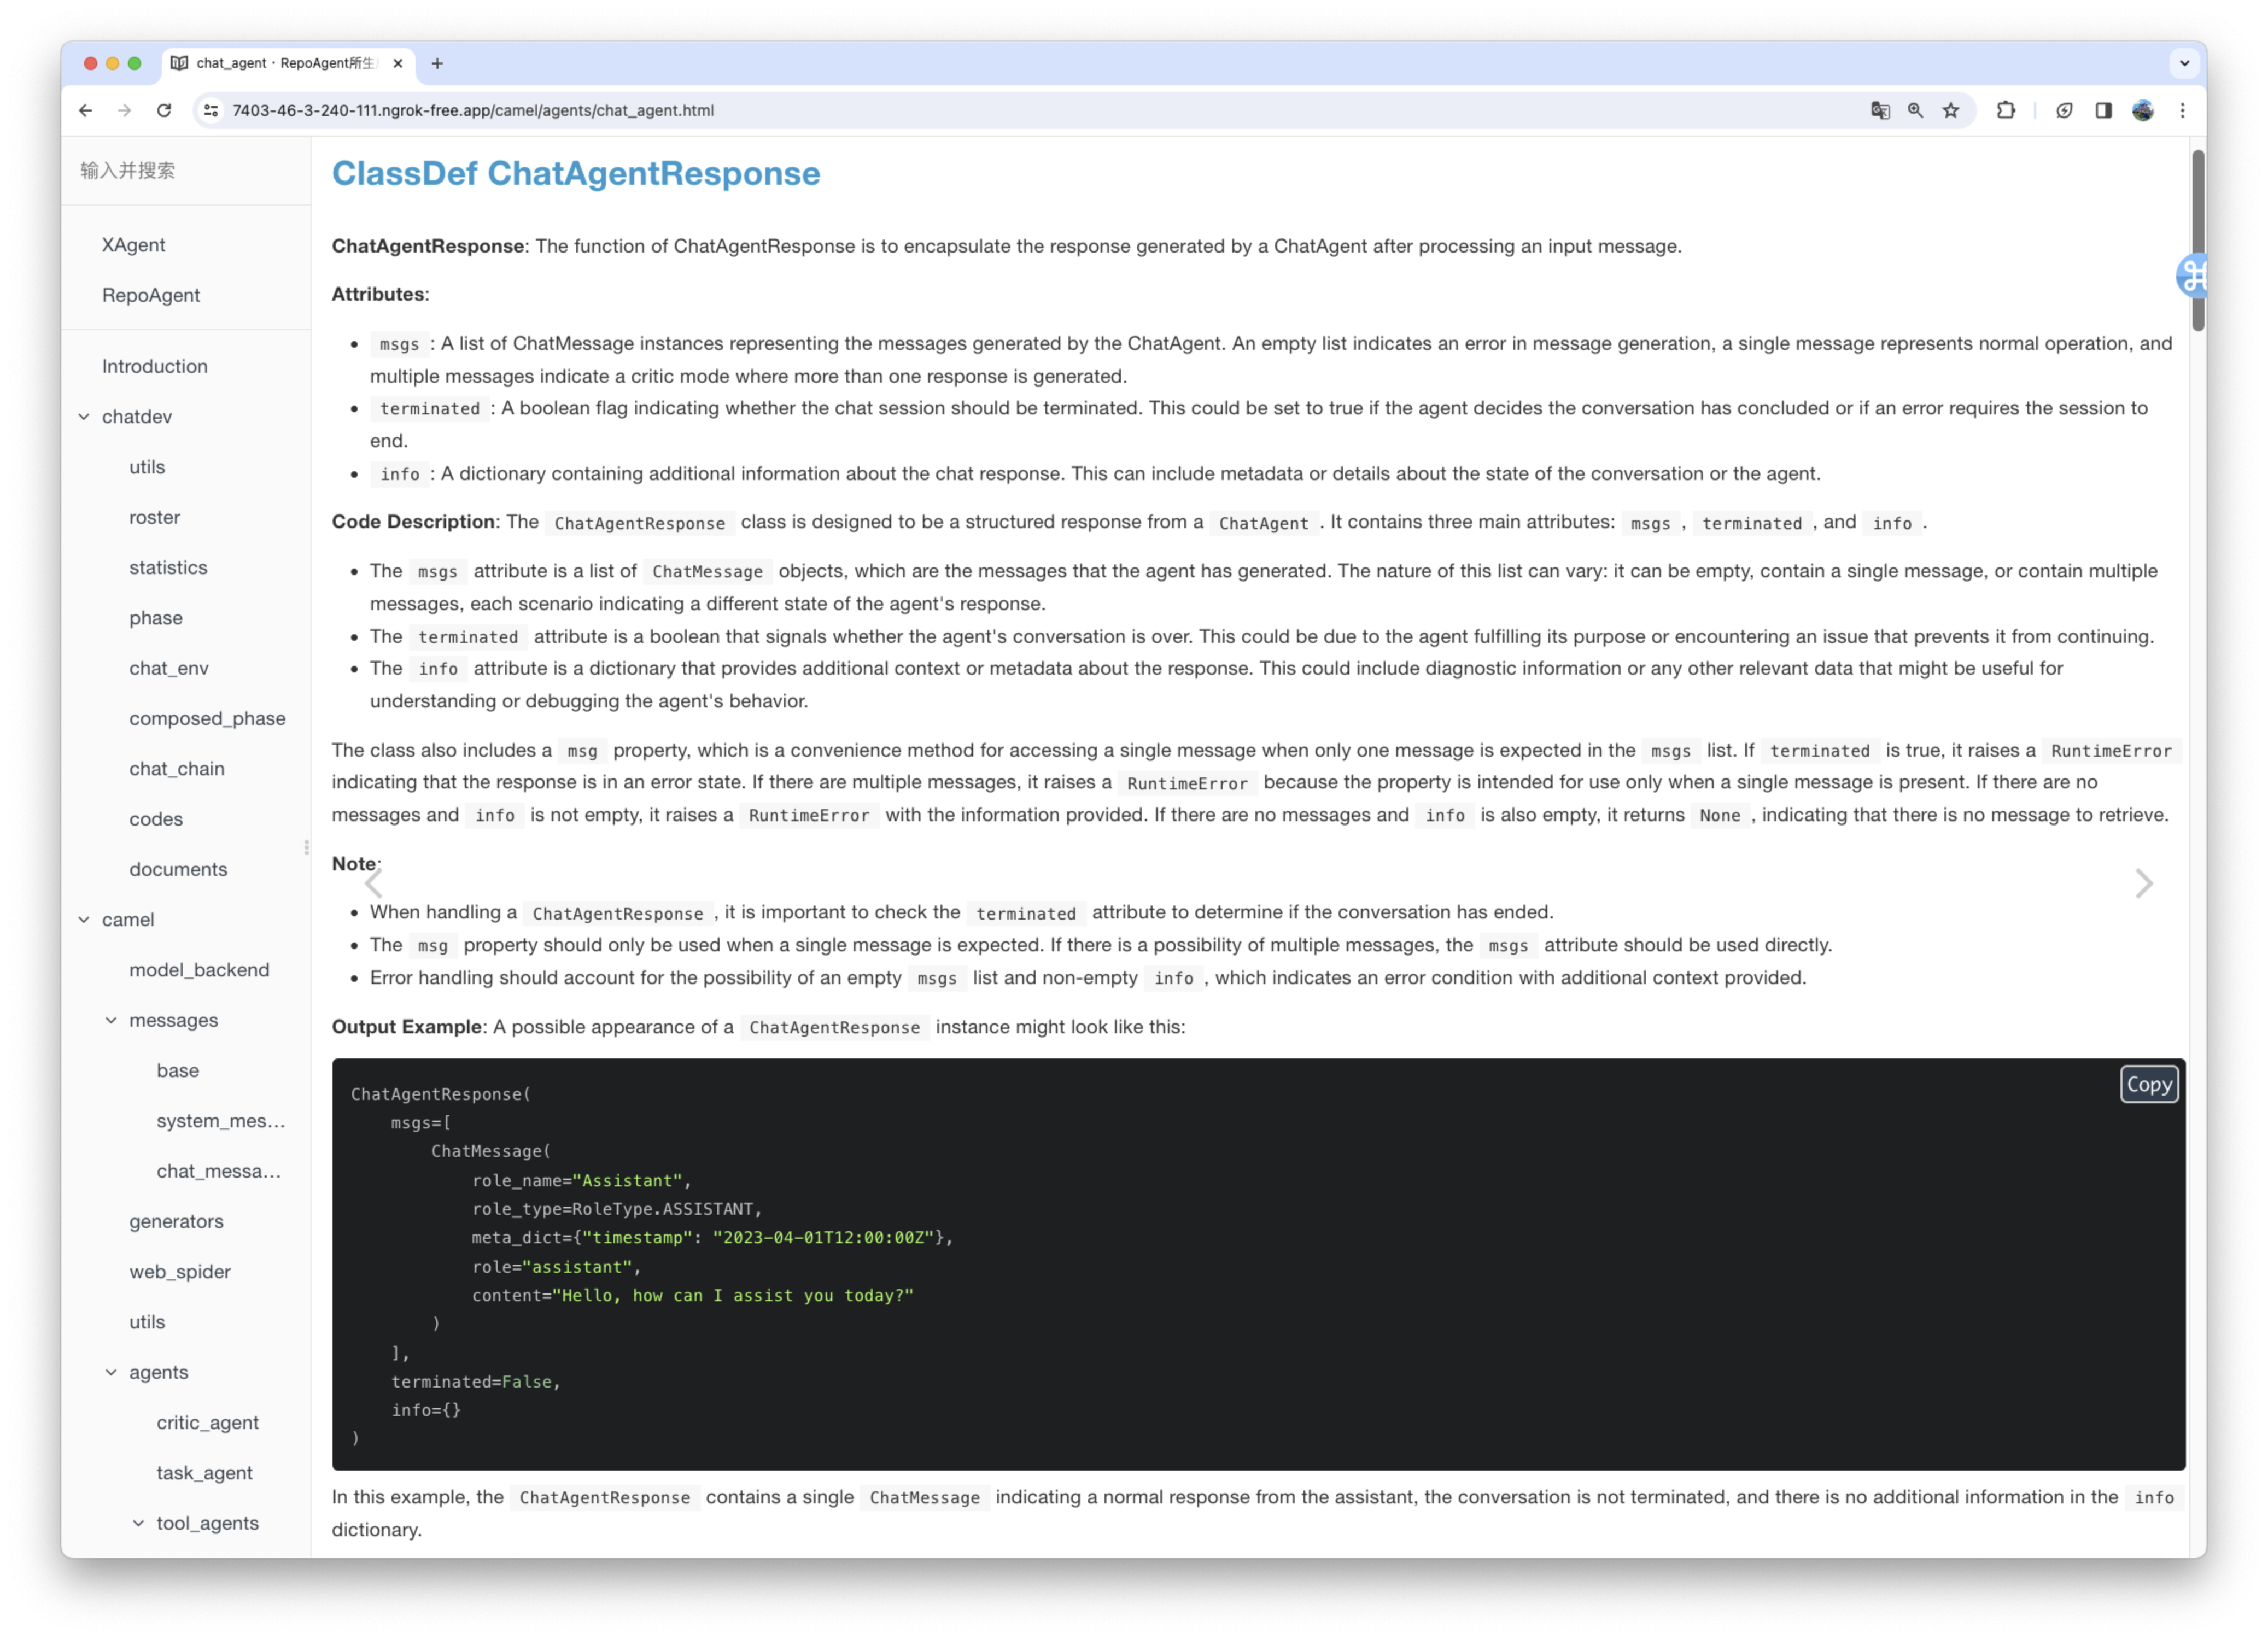
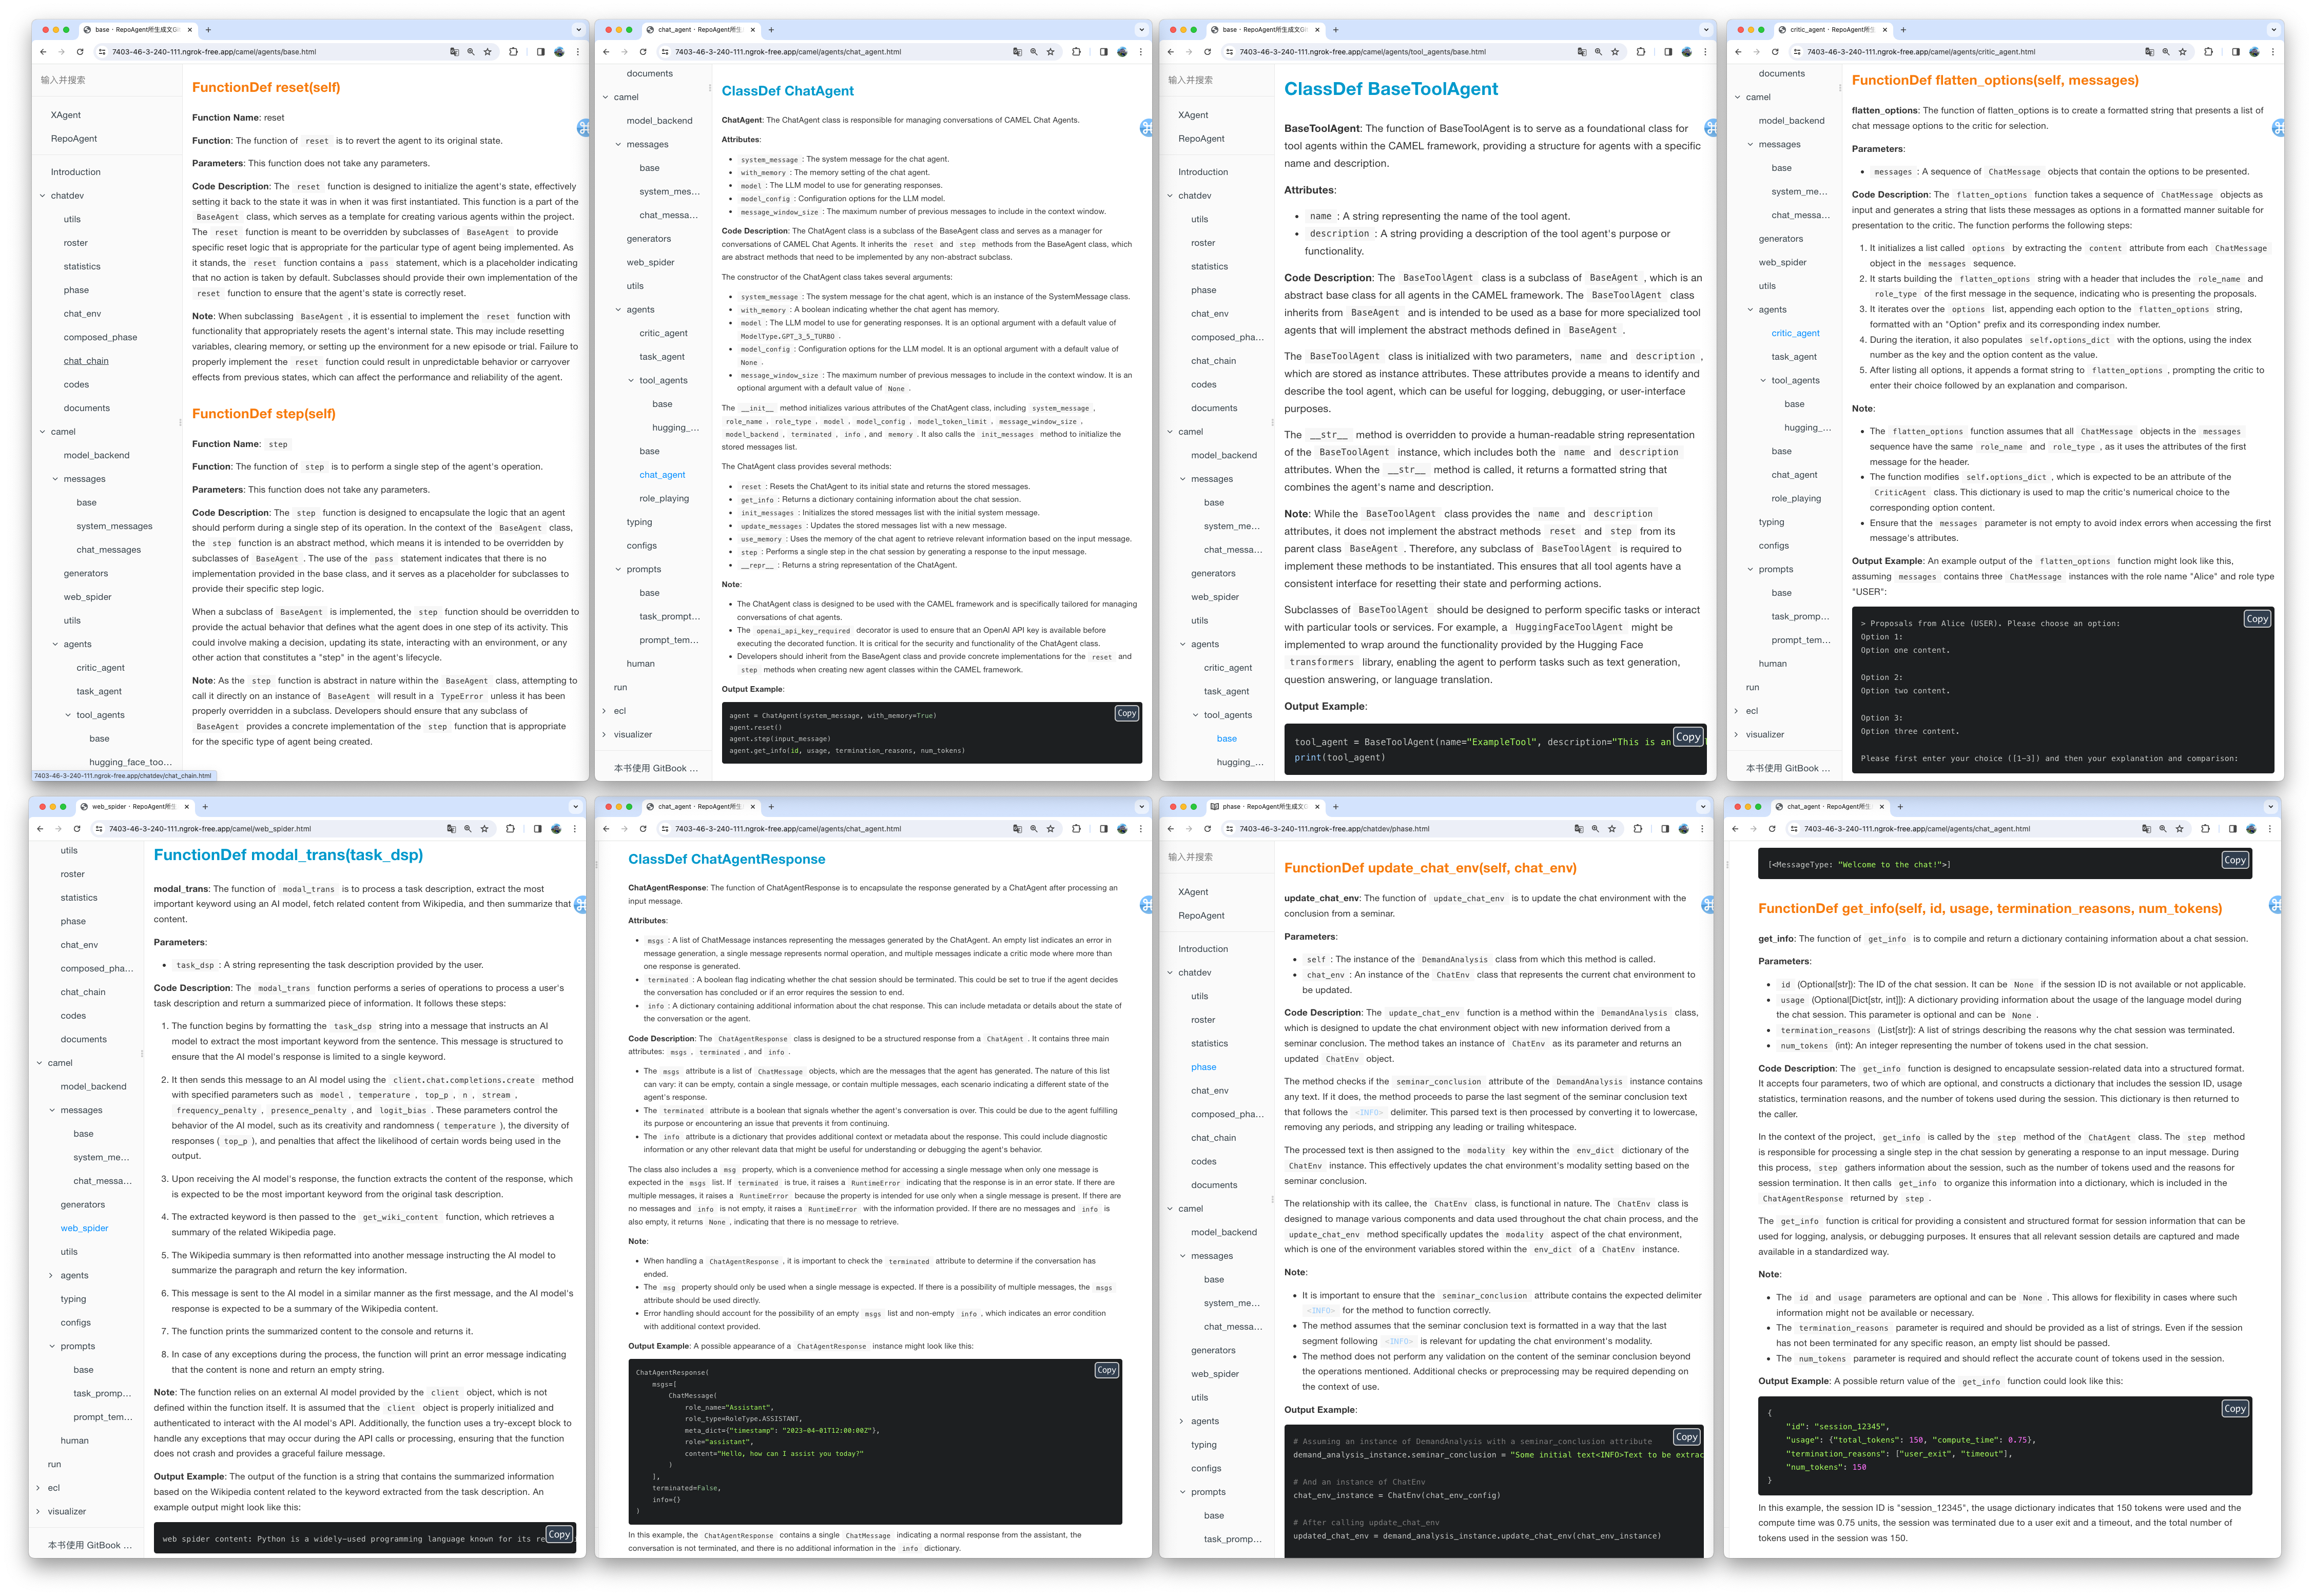
The generated document will be stored in the specified folder in the root directory of the target warehouse. The rendering of the generated document is as shown below:


We utilized the default model gpt-3.5-turbo to generate documentation for the XAgent project, which comprises approximately 270,000 lines of code. You can view the results of this generation in the Markdown_Docs directory of the XAgent project on GitHub. For enhanced documentation quality, we suggest considering more advanced models like gpt-4-1106 or gpt-4-0125-preview.
In the end, you can flexibly adjust the output format, template, and other aspects of the document by customizing the prompt. We are excited about your exploration of a more scientific approach to Automated Technical Writing and your contributions to the community.
Exploring chat with repo
We conceptualize Chat With Repo as a unified gateway for these downstream applications, acting as a connector that links RepoAgent to human users and other AI agents. Our future research will focus on adapting the interface to various downstream applications and customizing it to meet their unique characteristics and implementation requirements.
Here we demonstrate a preliminary prototype of one of our downstream tasks: Automatic Q&A for Issues and Code Explanation. You can start the server by running the following code.
pip install repoagent[chat-with-repo]
repoagent chat-with-repo
✅ Future Work
- Generate README.md automatically combining with the global documentation
- Multi-programming-language support Support more programming languages like Java, C or C++, etc.
- Local model support like Llama, chatGLM, Qwen, GLM4, etc.
🥰 Featured Cases
Here are featured cases that have adopted RepoAgent.
- MiniCPM: An edge-side LLM of 2B size, comparable to 7B model.
- ChatDev: Collaborative AI agents for software development.
- XAgent: An Autonomous LLM Agent for Complex Task Solving.
- EasyRL4Rec: A user-friendly RL library for recommender systems.
📊 Citation
@misc{luo2024repoagent,
      title={RepoAgent: An LLM-Powered Open-Source Framework for Repository-level Code Documentation Generation},
      author={Qinyu Luo and Yining Ye and Shihao Liang and Zhong Zhang and Yujia Qin and Yaxi Lu and Yesai Wu and Xin Cong and Yankai Lin and Yingli Zhang and Xiaoyin Che and Zhiyuan Liu and Maosong Sun},
      year={2024},
      eprint={2402.16667},
      archivePrefix={arXiv},
      primaryClass={cs.CL}
}
