Awesome
Features
- Facebook Messenger
- Message delivery status indication
- Reactions
- Bot support
Requirements
- Min 4.46 Live Helper Chat version. 1.8v
- Webhooks has to be enabled - https://github.com/LiveHelperChat/livehelperchat/blob/master/lhc_web/settings/settings.ini.default.php#L86
Changes
- All messenger workflow will be handled by lhc core, so less bugs.
- Instagram support added
- Required scopes are defined in the settings file.
To manage instagram and whatsapp they both has to be matched to you page
Permissions we request from facebook during login
Default scopes. You can change those in settings/settings.ini.php file
'email','pages_show_list','pages_messaging','instagram_manage_messages',
'instagram_basic','pages_manage_metadata','pages_read_engagement',
'whatsapp_business_management','whatsapp_business_messaging','business_management'
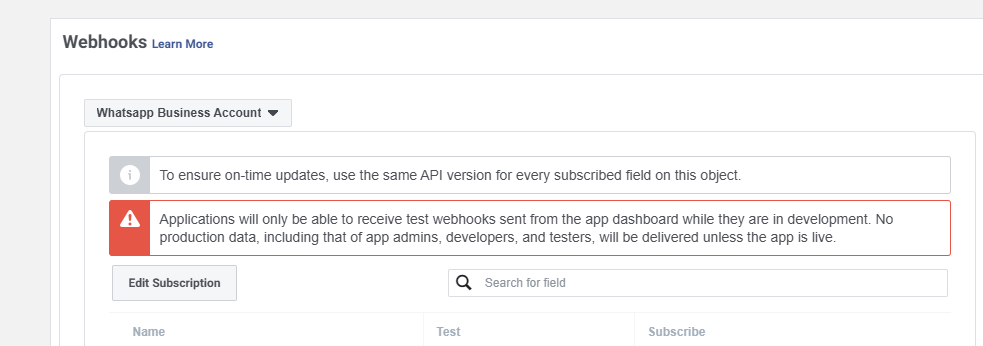
Webhook configuration and subscription fields
Webhooks configuration place

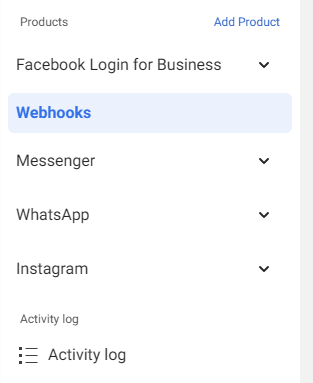
Products you should have

Facebook messenger
In webhooks page you have to choose Page and subscribe to those fields
Subscribed fields - message_deliveries,message_echoes,message_edits,message_reactions,message_reads,messages,messaging_postbacks
In webhooks page you have to choose Instagram and subscribe to those fields
Subscribed fields - messages,messages,messaging_postbacks,messaging_seen
In webhooks page you have to choose Whatsapp Business Account and subscribe to those fields
Subscribed fields - messages
Most common URL
URL if you are using Facebook Login flow without automated hosting environment
This is the most common installation method and you choose what page you managed during login flow.
Webhook URL's. Use same URL for webhook verification calls.
- Facebook Messenger -
https://example.com/fbmessenger/callbackgeneral - WhatsApp -
https://example.com/fbmessenger/callbackwhatsapp - Instagram -
https://example.com/fbmessenger/callbackinstagram
Valid OAuth Redirect URIs
https://example.com/site_admin/fbmessenger/fbcallback
Quick settings
app_idhttps://github.com/LiveHelperChat/fbmessenger/blob/master/settings/settings.ini.default.php#L29 | App IDapp_secrethttps://github.com/LiveHelperChat/fbmessenger/blob/master/settings/settings.ini.default.php#L29 | App Secretverify_tokenyou have to put in https://github.com/LiveHelperChat/fbmessenger/blob/master/settings/settings.ini.default.php#L31 file. | Facebook Messengerwhatsapp_verify_tokenhttps://github.com/LiveHelperChat/fbmessenger/blob/master/settings/settings.ini.default.php#L32C10-L32C31 file. | WhatsAppinstagram_verify_tokenhttps://github.com/LiveHelperChat/fbmessenger/blob/master/settings/settings.ini.default.php#L33 file. | Instagram
Webhook URL for facebook messenger if you define independent page
You create a facebook app and add pages manually to lhc back office without login flow.
- Facebook Messenger -
https://example.com/fbmessenger/callback/<page_id> - Verify token you enter manually in back office in that case
URL if you are using Facebook Login flow with automated hosting environment
Valid OAuth Redirect URIs. master.example.com in this scenario is our manager address
https://master.example.com/site_admin/fbmessenger/fbcallbackstandalone
Webhook URL's. Use same URL for webhook verification calls.
- Facebook Messenger -
https://master.example.com/fbmessenger/callbackstandalone - WhatsApp -
https://master.example.com/fbmessenger/callbackstandalonewhatsapp - Instagram -
https://master.example.com/fbmessenger/callbackstandaloneinstagram
Quick settings
app_idhttps://github.com/LiveHelperChat/fbmessenger/blob/master/settings/settings.ini.default.php#L29 | App IDapp_secrethttps://github.com/LiveHelperChat/fbmessenger/blob/master/settings/settings.ini.default.php#L29 | App Secretverify_tokenyou have to put in https://github.com/LiveHelperChat/fbmessenger/blob/master/settings/settings.ini.default.php#L31 file. | Facebook Messengerwhatsapp_verify_tokenhttps://github.com/LiveHelperChat/fbmessenger/blob/master/settings/settings.ini.default.php#L32C10-L32C31 file. | WhatsAppinstagram_verify_tokenhttps://github.com/LiveHelperChat/fbmessenger/blob/master/settings/settings.ini.default.php#L33 file. | Instagram- Put any random string there https://github.com/LiveHelperChat/fbmessenger/blob/master/settings/settings.ini.default.php#L25
- Set
enabledto true https://github.com/LiveHelperChat/fbmessenger/blob/master/settings/settings.ini.default.php#L24 file.
Facebook messenger extension
Integration with Facebook messenger API. You will be able to chat with Facebook page users directly in lhc back office.
- Bot support. [New] https://www.youtube.com/watch?v=_rLPJAdn4Us Supported bot elements
- Text messages including Quick Replies -
Send Text - Typing -
Send typing - Carrousel -
Send Carrousel - Buttons -
Button list - All other triggers including internal operations also will work.
- To listed for "Get Started" button action just listen for text message with content "GET_STARTED" also see demo bot in official demo.
- Text messages including Quick Replies -
- Support multiple pages without creating new app for each page.
- Supports multiple pages at once.
- Each page chat can be assigned to custom department.
Update instructions
- Make sure you have most recent Live Helper Chat version.
- Update database via
php cron.php -s site_admin -e fbmessenger -c cron/update_structurecommand Modules -> Facebook chat -> Save and Activate WhatsAppconfiguration. Click it if you are using WhatsApp integration.
Installation in your LHC server
- Upload the files to your
lhc_web/extension/fbmessengerfolder - Install database either by executing
doc/install.sqlfile or executing this commandphp cron.php -s site_admin -e fbmessenger -c cron/update_structure - Install dependencies using composer
- Make sure your composer.json file looks like https://github.com/LiveHelperChat/livehelperchat/blob/master/lhc_web/composer.json 4.41v
- Just for newbies if your web hosting does not have composer see https://www.vultr.com/docs/install-composer-on-centos-7
- don't run composer as root, login in your ssh as your hosting normal user.
- Activate extension in main settings file
lhc_web/settings/settings.ini.phpextension sectionfbmessengerby Adding lines:
'extensions' => array ( 'fbmessenger', ),
- If you don't see this in Module, check your
lhc_web/settings/settings.ini.phpand also clickClean Cachefrom back office - copy
extension/fbmessenger/settings/settings.ini.default.phptoextension/fbmessenger/settings/settings.ini.php
WhatsApp configuration
Notice - WhatsApp campaigns etc are supported only for statically defined WhatsApp accounts. Login based WhatsApp phone numbers for campaigns will be added later.
This configuration option is available with Permanent Access Token. In facebook Extension settings you have to enter
- Permanent WhatsApp access token - Permanent Access Token.
- WhatsApp Business Account ID - You will find it in
WhatsApp-> GettingStarted section of the facebook app - WhatsApp
Verify Token- just put any random string. - Click
Save and Activate WhatsApp configurationit will install and configure all the required webhooks etc. - Go to Facebook App
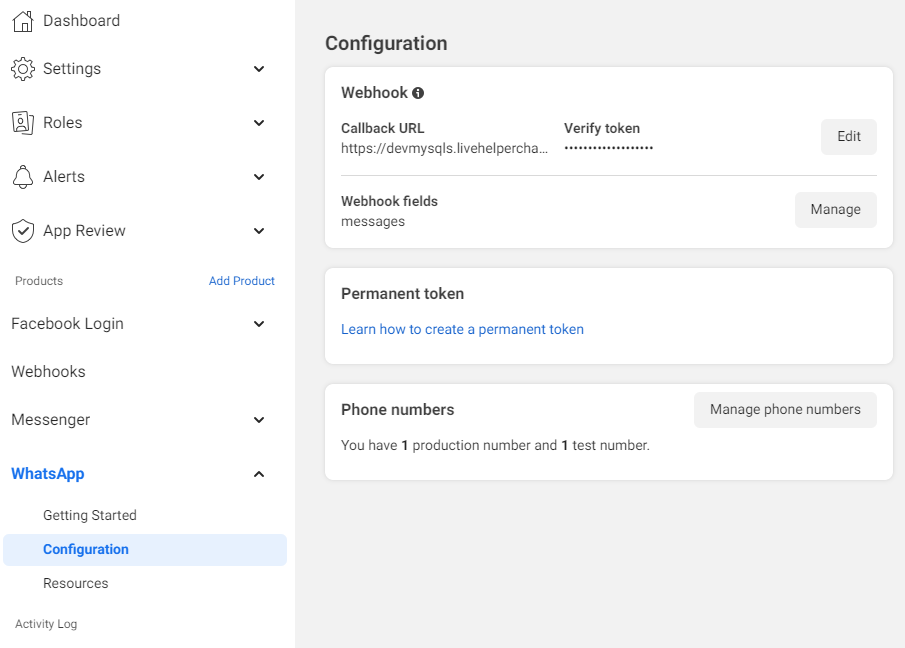
WhatsApp-> Configurationsection and set Callback URL while enteringVerify Tokenyou have put in settings page. - Subscribe to messages field.
- Bot sample what is supported can be found here
- If you change WhatsApp Access Token or updating click
Save And Remove WhatsApp configurationandSave and Activate WhatsApp configuration. You might need to setup webhook again. - If you are using PHPResque extension make sure you set correct domain
- Sample commands you can use in the bot while sending text message. To get exact command for specific template just send a test message and at the top you will see command.
Few documentation links in Meta platform
- Create Business Account - https://www.facebook.com/business/help/1710077379203657?id=180505742745347
- Create WhatsApp Business platform account - https://www.facebook.com/business/help/2087193751603668
- Create an app In Developer Mode - https://developers.facebook.com/apps/
- Add WhatsApp Product to Your Meta App
- Create a permanent access token https://developers.facebook.com/docs/whatsapp/business-management-api/get-started#1--acquire-an-access-token-using-a-system-user-or-facebook-login/
!fbtemplate {"template_name":"hello_world","template_lang":"en_us","args":{}}
!fbtemplate {"template_name":"quick_reply","template_lang":"en","args":{"field_1":"name","field_header_1":"header"}}

From WhatsApp perspective we support images, text, video, audio, contact, location, sticker, document messages types
To send campaign of template messages this cronjob has to be setup.
How to listen for quick reply actions from templates you send?
Each quick reply button send from lhc get's payload constructed as.
$item->template.'-quick_reply_'.$indexButton,=>quick_reply-quick_reply_0
This is needed because we don't have chat upfront and can't set payload upfront.
So just listen for Custom text matching with that keyword. This sample is provided in bot sample
I have bot for default department, but I want chat go directly to pending state if I send a template?
You have few options
- Setup
quick replybutton in your template and listen for those events in your bot - While sending a message template choose a department without a bot.
- We will look for message template without a chat and assign new chat to selected department.
Important
- In all those scenarios Visitor should NOT have any active chat, otherwise his message will go to active chat and the above rules won't be applied.
- In incoming webhook configuration
FacebookWhatsAppinChat optionschooseIf previous chat is found and it is closed we should => Create a new chat
Gotchas
- While app is in testing mode received callback phone number and received callback numbers can be different. E.g
- 3706111111 received from callback
- To send this number back you have to set 37086111111. Notice 8
- After you activate extension to handle this problem you might need to edit incoming webhook rule
- This rule depends on phone number you have
Chat ID field replace ruleset to/^370/isChat ID field replace valueset to3708
Cronjobs
This cronjob sends scheduled campaign messages and regular mass messages Should be run every minute or more frequent.
php cron.php -s site_admin -e fbmessenger -c cron/masssending
Collects campaign recipients and puts them in the main mass messages queue. Should be run every minute or more frequent.
php cron.php -s site_admin -e fbmessenger -c cron/whatsapp_campaign
One page one app installation workflow
This method is usefull if you are planning to use this extension by creating separate apps for each page you manage.
- Now you can create facebook page in
Modules -> Facebook chat -> Facebook pages -> Register new page(later you will have this info from facebook developer section) - While creating facebook page check
Application was verified by facebookotherwise we will not send request to facebook. Save page. - Once page is created you will see what callback url you have to put in facebook webhook. URL is presented in list. HTTPS is must!
- Facebook APP has to use 8.0v or newer
Actions to do in developers.facebook.com and Live Helper Chat back office
APP secret- Copy App Secret fromSettings -> BasicVerify token- put any random string without spaces.Page token- follow steps bellow- Click
Products +in facebook back office and chooseMessengeras product you want to add to your APP - Click
Messenger -> Settingsyour app page - In
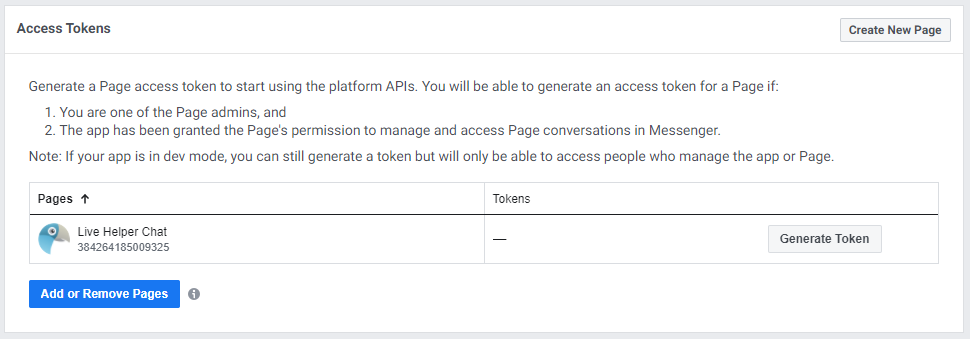
Access Tokenssection clickAdd or Removes pagesthere you will getTokenwhich you have to put inPage tokenfield. - Now in
Webhookssection ofMessenger -> SettingspageEdit Callback URL. Facebook to verify callback URL will ask you to enterVerify tokenand callback url. Callback URL you will see in pages list. - In same
Webhooksadd Page from which you want to receive messages. As subscription fields choosemessages, messaging_postbacks, message_deliveries, message_reads, messaging_pre_checkouts, messaging_checkout_updates, messaging_referrals, message_echoes, standby, messaging_handovers, message_reactions
So at the end everything should look like


One account multiple page installation workflow
This workflow is usefull if you are planning to use more than one page per facebook account.
- Your facebook application has to have "pages_messaging" permission for lhc to be able to extract visitor information and be able to send messages back to lhc. For that you will have to submit application and wait for FB to review it.
- Set webhook callback to url similar to this.
https://example.com/fbmessenger/callbackgeneralverify token you have to put inextension/fbmessenger/settings/settings.ini.phpfile. Valid OAuth Redirect URLsshould look likehttps://example.com/site_admin/fbmessenger/fbcallback- We request these scopes
email, pages_show_lis, pages_messaging, pages_messaging_subscriptions - If you did everything correctly you should be able to login from facebook and grant access Live Helper Chat to see your pages and subscribe to messages events.
One app multiple servers installation
This scenario is usefull in case you have multiple clients and each client has it's own server or address. You can have one master instance which will act as Master and will forward all incoming request from facebook to correct URL of child server.
To activate that option you have to edit extension/fbmessenger/settings/settings.ini.php and set options similar to below
'standalone' => array (
        'enabled' => true,
        'disable_manual_whatsapp' => false,
        'secret_hash' => 'random_string_to_out',
        'address' => 'https://mater.example.com' // Master instance address
    ),
In facebook Valid OAuth Redirect URIs has to be changed to E.g
https://mater.example.com/site_admin/fbmessenger/fbcallbackstandalone
Messenger -> Settings Webhooks Callback URL has to be set to
https://mater.example.com/fbmessenger/callbackstandalone
Then Submit to facebook to validate your app
- Before facebook validates your application keep settings
verifiedfalse (in your LHC facebook page configuration)* - After facebook has reviewed your application set "verified" to YES. So you will be able to send a messages. During testing, if you add some developer, you can set it to true to see how it works.
Finally Make your app public.
- After facebook has reviewed your application you need to make your app live and available
How it works
Once visitor writes a message in facebook page. You will receive a chat with visitor.
How to debug
in extension/fbmessenger/settings/settings.ini.php change setting to 'enable_debug' => true if you have verified site. Check cache/default.log for more detailed error.
How to grant permission to other facebook user to your page so he can subscribe to messenger
- Make sure messenger button is activated on your page
- Switch to your page profile
- Navigate to https://facebook.com/settings/?tab=profile_access
- Add a user to your page. It should NOT be
People with task access - This facebook user does not need to have full control over your page
How to install extensions using DigitalOcean?
Execute these commands
/opt/livehelperchat/lhc_upgrade.sh
cd /var/www/git
git clone https://github.com/LiveHelperChat/fbmessenger.git
cd /var/www/git/fbmessenger
php -r "copy('https://getcomposer.org/installer', 'composer-setup.php');"
php composer-setup.php
php -r "unlink('composer-setup.php');"
./composer.phar install
cd /var/www/html/extension
ln -s /var/www/git/fbmessenger
cp /var/www/html/extension/fbmessenger/settings/settings.ini.default.php /var/www/html/extension/fbmessenger/settings/settings.ini.php
php cron.php -s site_admin -e fbmessenger -c cron/update_structure
If you are using instance as standalone copy all content from master instance /var/www/html/extension/fbmessenger/settings/settings.ini.php
Activate extension by editing
vi /var/www/html/settings/settings.ini.php
And make extensions section look like
'extensions' =>
  array (
	0 => 'nodejshelper',
	1 => 'lhcphpresque',
	2 => 'fbmessenger',
  ),
Setup cronjob to renew SSL automatically
crontab -e
And add this line
0 */12 * * * /usr/bin/certbot renew --post-hook "systemctl reload nginx" >> /var/log/le-renew.log
Todo
- Add support for typing indicator
- Add support for messenger notifications campaigns