Awesome

Creating a Retail Chatbot using Watson Assistant, Discovery and Database Services
Read this in other languages: 한국어
Watson Conversation is now Watson Assistant. Although some images in this code pattern may show the service as Watson Conversation, the steps and processes will still work.
In this developer code pattern we will create a Watson Assistant based chatbot that allows a user to: 1) find items to purchase using Watson Discovery, and 2) add and remove items from their cart by updating a Cloudant NoSQL Database.
When the reader has completed this code pattern, they will understand how to:
- Create a chatbot dialog with Watson Assistant
- Dynamically store and update a Cloudant NoSQL database based on chatbot results
- Seed data into Watson Discovery and leverage its natural language capabilities
- Manage and customize a Slack group to add a chatbot

Flow
- The user sends a message to the slackbot for online store.
- Slack sends this message to the running application.
- The application orchestrates the interactions between the various Watson services.
- The application queries the Cloudant database for the user's information, including the contents of their shopping cart, and writes the contents back to the database as they change.
- The application interacts with Watson Assistant to determine which response to send to Slack, and information passed back and forth in the conversation context determines actions within the application.
- Watson Discovery is used to get information about the items in the online store.
Included Components
- Watson Assistant: Create a chatbot with a program that conducts a conversation via auditory or textual methods.
- Watson Discovery: A cognitive search and content analytics engine for applications to identify patterns, trends, and actionable insights.
- Cloudant NoSQL DB: A fully managed data layer designed for modern web and mobile applications that leverages a flexible JSON schema.
- Slack: Slack is a cloud-based set of team collaboration tools and services with chat bot integration.
Featured Technologies
- Python: Python is a programming language that lets you work more quickly and integrate your systems more effectively.
NOTE: Python 3 is required for this application to run locally.
Watch the Video

Steps
NOTE: Perform steps 1-7 OR click the Deploy to IBM Cloud button and hit Deploy and then jump to step 6.
NOTE: The Watson Discovery service is not available in the London region, so this application will require deployment in one of the other IBM Cloud regions.
Deploy to IBM Cloud

If you encounter deployment errors, refer to Troubleshooting.
You can use the
View appbutton to use a simple web UI to chat. For the Slack integration, use your Slack UI to chat after completing the additional slack configuration. Use the IBM Cloud dashboard to find and manage the app.
Run locally
- Clone the repo
- Create IBM Cloud services
- Get IBM Cloud credentials and add to .env
- Configure Watson Assistant
- Configure Watson Discovery
- Configure slack
- Run the application
1. Clone the repo
Clone the watson-online-store locally. In a terminal, run:
git clone https://github.com/ibm/watson-online-store
We’ll be using the file data/workspace.json and the folder
data/ibm_store/
2. Create IBM Cloud services
Create the following services:
NOTE: When provisioning Cloudant, for
Available authentication methodschooseUse both legacy credentials and IAM:

3. Get IBM Cloud services Credentials and add to .env file
As you create the IBM Cloud services, you'll need to create service credentials and get the username and password:
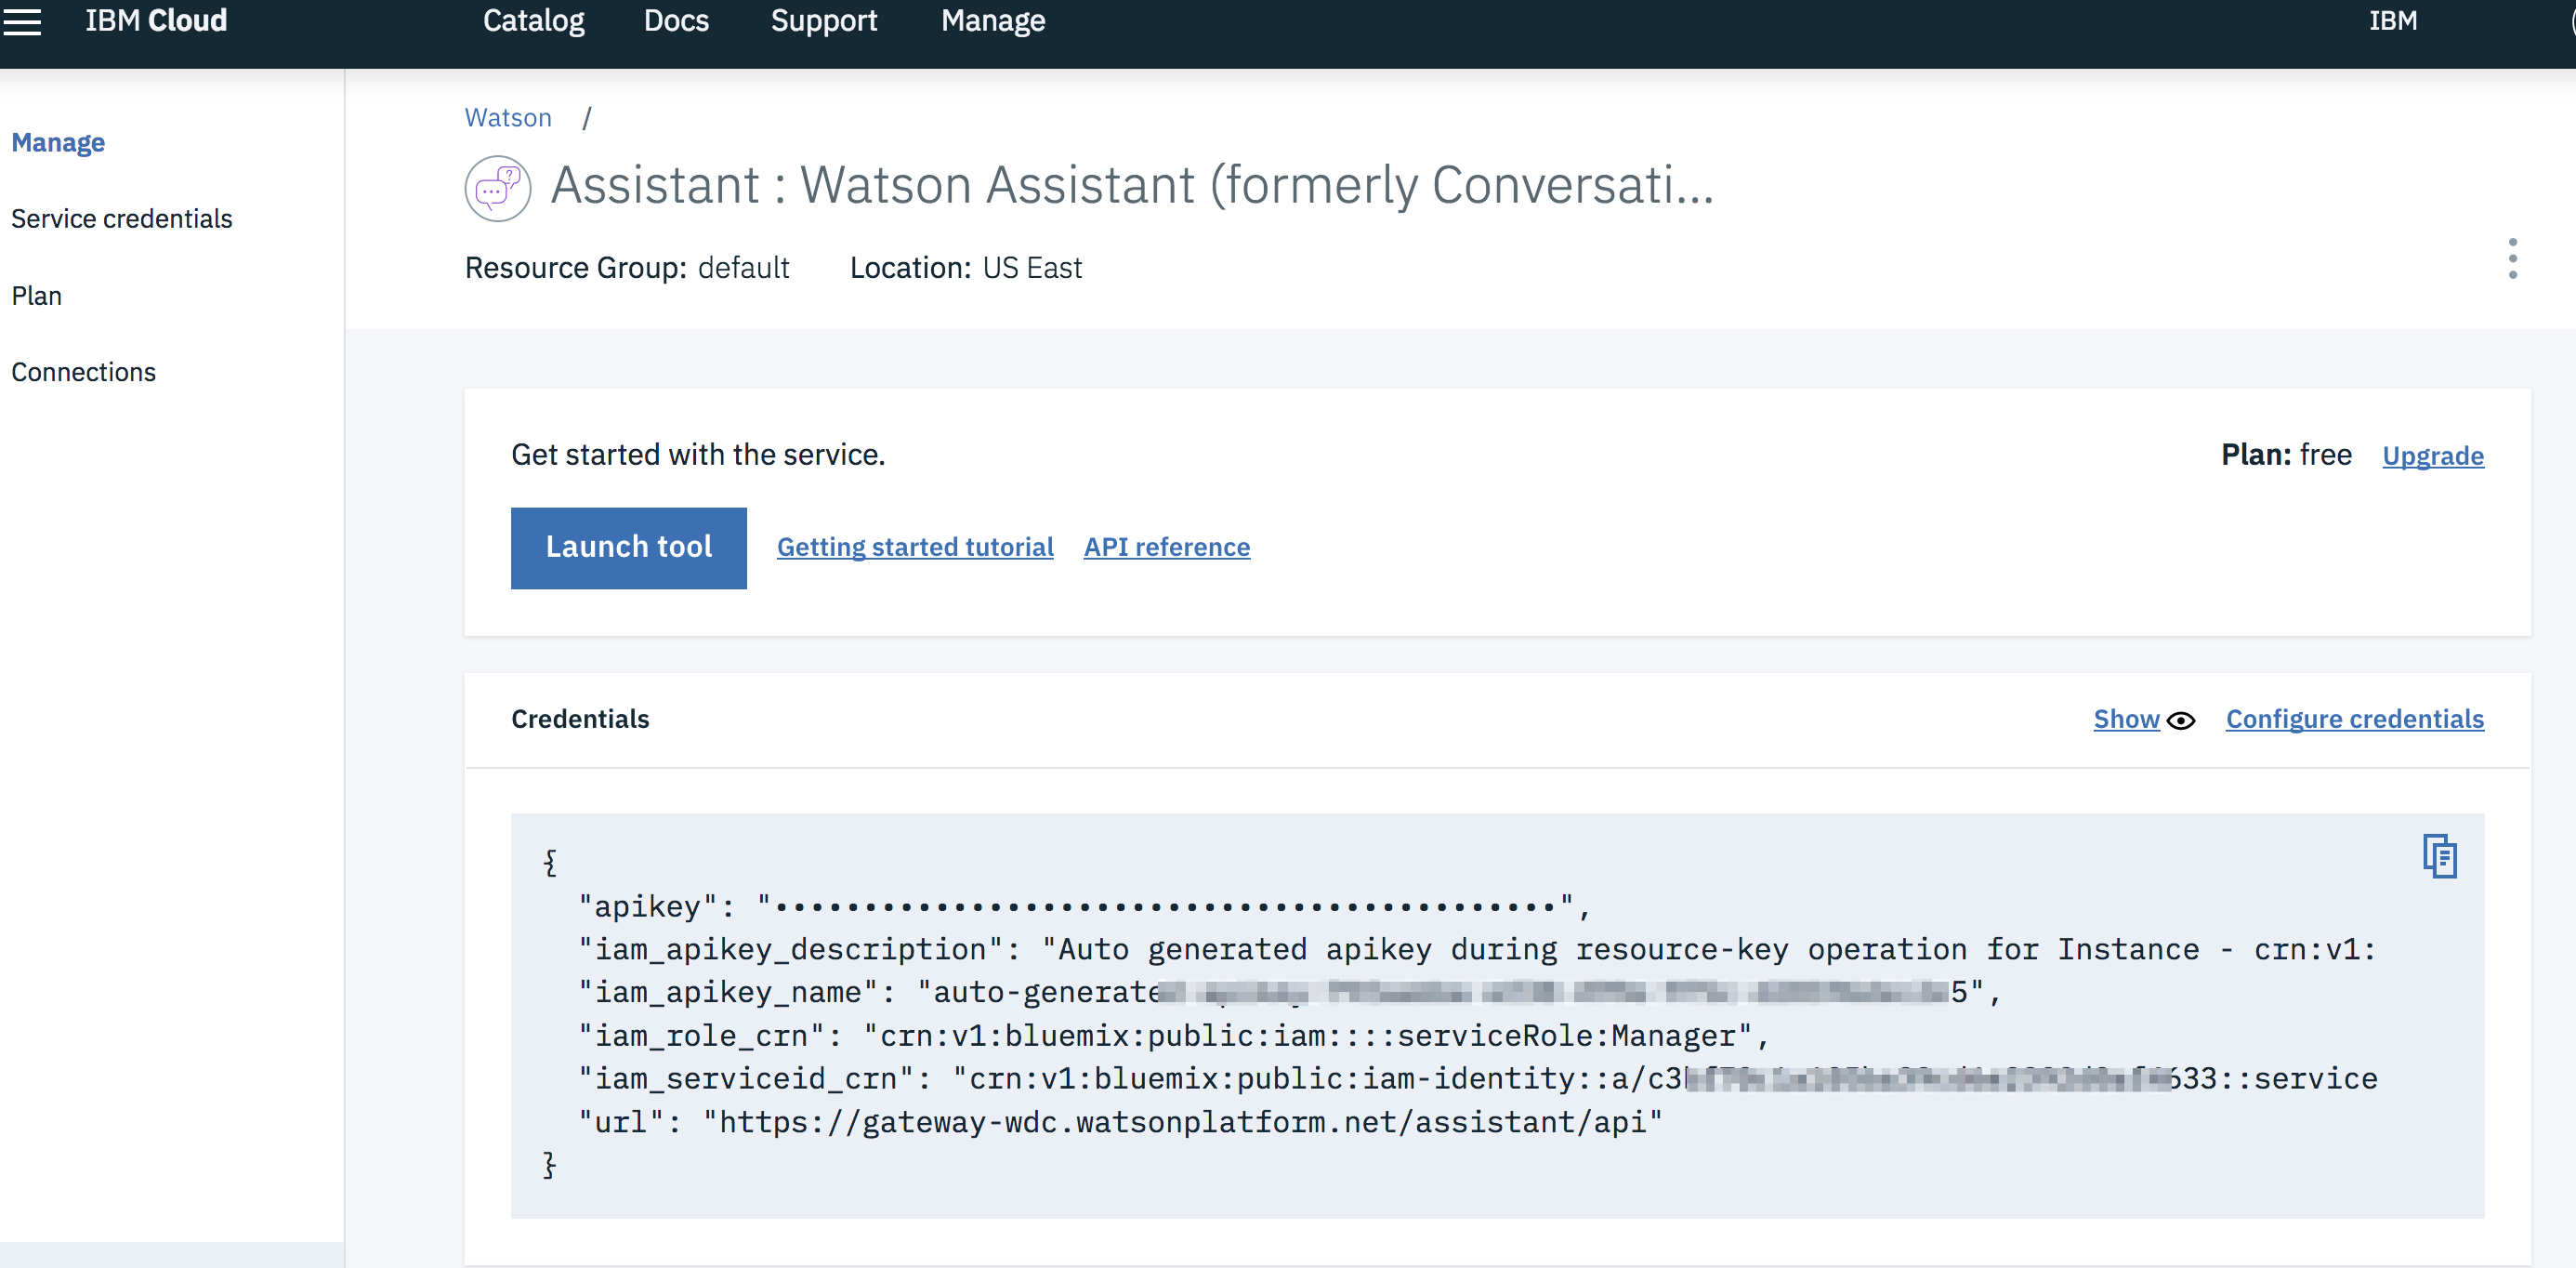
Copy the watson-online-store/env.sample file to watson-online-store/.env and populate the service
credentials and URLs as you create the credentials:
# Copy this file to .env and replace the credentials with
# your own before running run.py.

# Watson Assistant
ASSISTANT_ID=<add_assistant_workspace>
ASSISTANT_URL=<add_assistant_url>
ASSISTANT_APIKEY=<add_assistant_apikey>

# Cloudant DB
CLOUDANT_USERNAME=<add_cloudant_username>
CLOUDANT_DB_NAME=watson-online-store
CLOUDANT_URL=<add_cloudant_url>
CLOUDANT_IAM_APIKEY=<add_cloudant_iam_apikey>

# Watson Discovery
DISCOVERY_URL=<add_discovery_url>
DISCOVERY_ENVIRONMENT_ID=<add_discovery_environment>
DISCOVERY_COLLECTION_ID=<add_discovery_collection>
DISCOVERY_APIKEY=<add_discovery_apikey>

# <Optional> - Slack
# If not set, only the web UI is available to test.
SLACK_BOT_TOKEN=<add_slack_bot_token>
SLACK_BOT_USER=<add_slack_bot_username>
4. Configure Watson Assistant
Import the Assistant workspace.json
- Find the Assistant service in your IBM Cloud Dashboard.
- Click on the service and then click on
Launch tool. - Go to the
Skillstab. - Click
Create new - Click the
Import skilltab. - Click
Choose JSON file, go to your cloned repo dir, andOpenthe workspace.json file indata/workspace.json. - Select
Everythingand clickImport.
To find the ASSISTANT_ID for Watson Assistant:
- Go back to the
Skillstab. - Find the card for the workspace you would like to use. Look for
watson-online-store. - Click on the three dots in the upper right-hand corner of the card and select
View API Details. - Copy the
SKILL IDGUID. Save it for the .env file
Optionally, to view the conversation dialog select the workspace and choose the Dialog tab, here's a snippet of the dialog:

NOTE: If you want to modify the dialogs, there is a important context variable called
get_inputwhich accepts valuesyes/no. This controls if there is a need to wait for user input.
5. Configure Watson Discovery
Launch the Watson Discovery tool.
wait for the storage to be set up.
Create a new data collection by clicking Upload your own data
Discovery will setup your storage. (You may be invited to upgrade for production quality, but you will be able to use this code pattern with the free trial version).

Seed the content by using either Drag and drop your documents here or browse from your computer. Choose the JSON files under data/ibm_store/.
Click on the left menu Manage Data icon and then click your newly created Data collection:

Under the Overview tab, Collection Info section, click Use this collection in API and copy the Collection ID and the Environment ID into your .env file as DISCOVERY_COLLECTION_ID and DISCOVERY_ENVIRONMENT_ID.

6. Configure Slack
Note: This code pattern includes Slack integration, but if you are only interested in the web UI, you can skip this step.
Create a slack group or use an existing one if you
have sufficient authorization. (Refer to Slack's how-to
on creating new groups.) To add a new bot, go to the Slack group’s application settings
by navigating to https://<slack_group>.slack.com/apps/manage and selecting the
Custom Integrations menu on the left.

Click on Bots and then click the green Add Configuration button.
Give the bot a meaningful name. Note that the @ symbol is pre-populated by Slack
and you do not include that in your .env configuration file. Save this in .env
as SLACK_BOT_USER.

Once created save the API Token that is generated into the .env file
as SLACK_BOT_TOKEN if you are running locally, or save this if you are using
Deploy to IBM Cloud.

Run /invite <botame> in a channel to invite the bot, or message it directly.

7. Run the application
If you used the Deploy to IBM Cloud button...
If you used Deploy to IBM Cloud, most of the setup is automatic, but not
the Slack configuration. For that, we have to update a few environment variables.
In the IBM Cloud dashboard find the App that was created. Click on Runtime on the menu and navigate to the Environment variables tab.

Update the three environment variables:
- Set
SLACK_BOT_TOKENto the token you saved in Step 6 - Set
SLACK_BOT_USERto the name of your bot from Step 6 - Leave
CLOUDANT_DB_NAMEset towatson-online-store
Save the new values and restart the application, watch the logs for errors.
If you decided to run the app locally...
NOTE: python 3 is required. There is no support for python 2.
The general recommendation for Python development is to use a virtual environment (venv). To install and initialize a virtual environment, use the venv module on Python 3.
# Create the virtual environment using Python. Use one of the two commands depending on your Python version.

$ python -m venv mytestenv       # Python 3.X

# Note, it may be named python3 on your system. In that case run:
$ python3 -m venv mytestenv

# Now source the virtual environment. Use one of the two commands depending on your OS.

$ source mytestenv/bin/activate  # Mac or Linux
$ ./mytestenv/Scripts/activate   # Windows PowerShell
Now go to the cloned repo directory:
cd watson-online-store
Install the Python requirements for this code pattern. Run:
$ pip install -r requirements.txt

# Note, it may be named pip3 on your system. In that case run:
$ pip3 install -r requirements.txt
TIP :bulb: To terminate the virtual environment use the
deactivatecommand.
$ deactivate
Finally, run the application:
$ cd python-flask-server
$ python server.py
Demo
Slack Demo
Start a conversation with your bot:

Add an item to your cart:


Web UI Demo

Troubleshooting
-
Error deploying to IBM Cloud:

This indicates that the Discovery service is still being provisioned. Wait a few minutes and click the
Runbutton to restart the application. -
Large amount of Red Logging info appears.
This is expected. The color for logging in IBM Cloud will be red, regardless of the nature of the message. The log levels are set to
Debugto assist the developer in seeing how the code is executing. This can be changed tologging.WARNorlogging.ERRORin the python code.
Links
Learn more
- Artificial Intelligence Code Patterns: Enjoyed this code pattern? Check out our other AI code patterns.
- AI and Data Code Pattern Playlist: Bookmark our playlist with all of our code pattern videos
- With Watson: Want to take your Watson app to the next level? Looking to utilize Watson Brand assets? Join the With Watson program to leverage exclusive brand, marketing, and tech resources to amplify and accelerate your Watson embedded commercial solution.
License
This code pattern is licensed under the Apache License, Version 2. Separate third-party code objects invoked within this code pattern are licensed by their respective providers pursuant to their own separate licenses. Contributions are subject to the Developer Certificate of Origin, Version 1.1 and the Apache License, Version 2.