Awesome
Photo-SLAM
Homepage | Paper
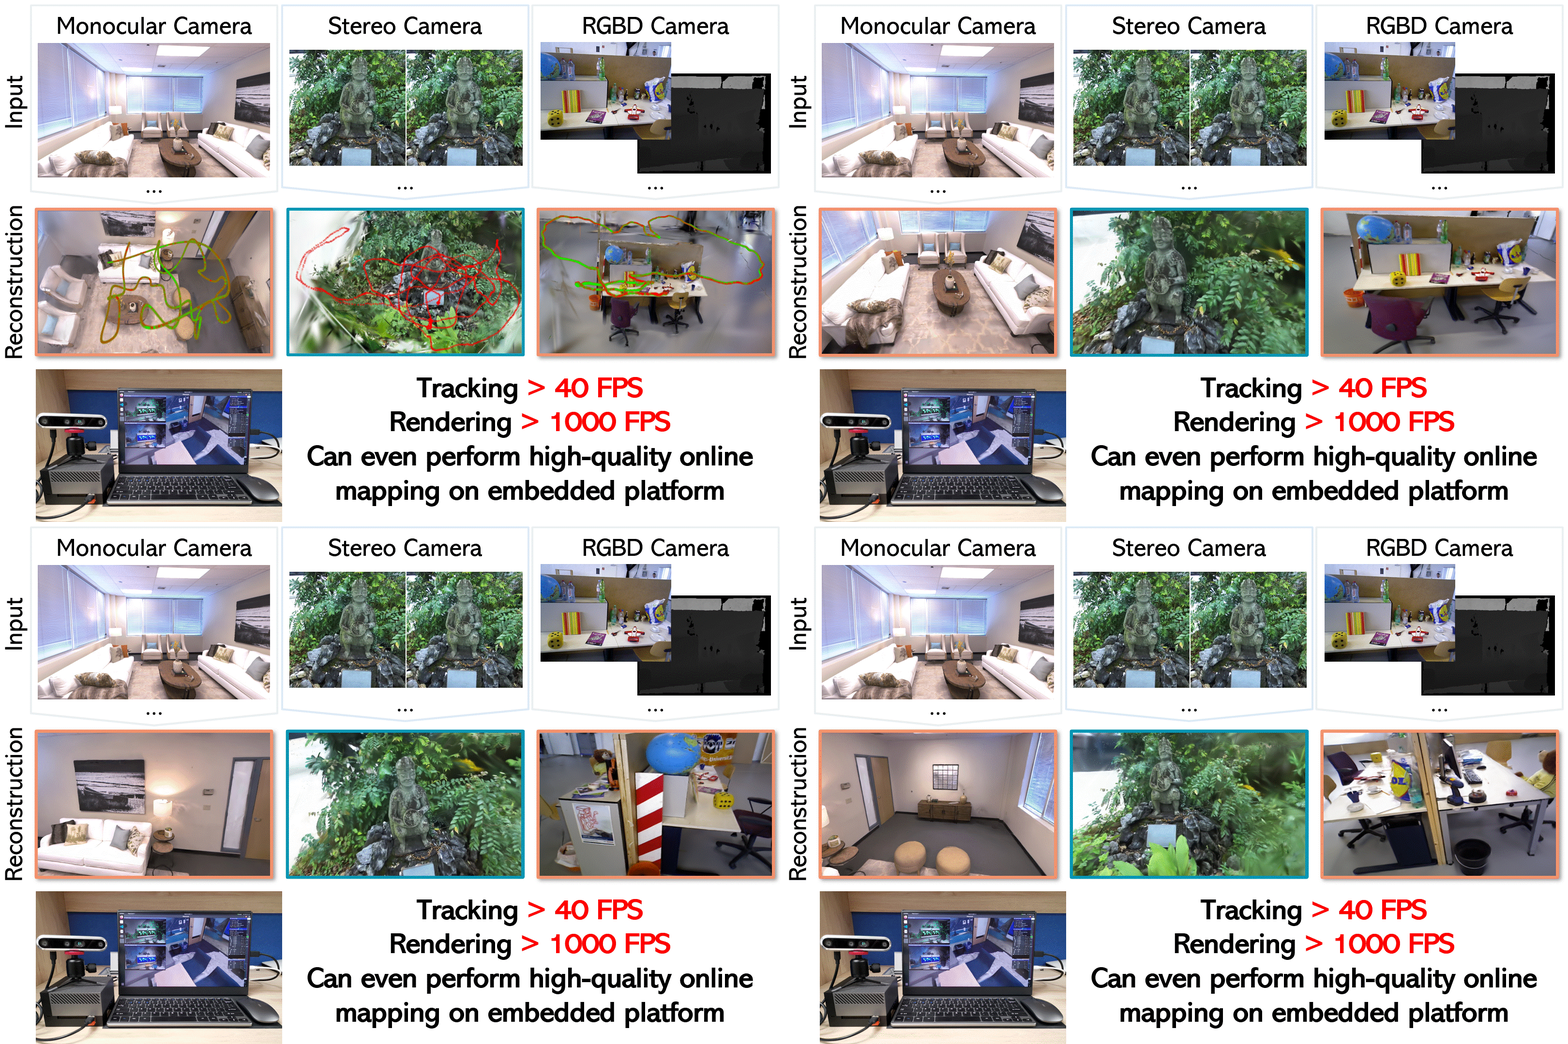
Photo-SLAM: Real-time Simultaneous Localization and Photorealistic Mapping for Monocular, Stereo, and RGB-D Cameras <br>
Huajian Huang<sup>1</sup>, Longwei Li<sup>2</sup>, Hui Cheng<sup>2</sup>, and Sai-Kit Yeung<sup>1</sup> <br>
The Hong Kong University of Science and Technology<sup>1</sup>, Sun Yat-Sen University<sup>2</sup> <br>
In Proceedings of Computer Vision and Pattern Recognition Conference (CVPR), 2024<br>

Prerequisites
(Optional) Using Docker
#2@XuYinzhe provides a Docker example.
Dependencies
sudo apt install libeigen3-dev libboost-all-dev libjsoncpp-dev libopengl-dev mesa-utils libglfw3-dev libglm-dev
Using LibTorch
The supported LibTorch version is up to 2.1.2.
If you do not have the LibTorch installed in the system search paths for CMake, you need to add additional options to build.sh help CMake find LibTorch. See build.sh for details. Otherwise, you can also add one line before find_package(Torch REQUIRED) of CMakeLists.txt:
[Option 1] You can download the libtorch, e.g., cu118 and then extract them to the folder ./the_path_to_where_you_extracted_LibTorch.
# In a Terminal
wget https://download.pytorch.org/libtorch/cu118/libtorch-cxx11-abi-shared-with-deps-2.0.1%2Bcu118.zip -O libtorch-cu118.zip
unzip libtorch-cu118.zip -d ./the_path_to_where_you_extracted_LibTorch
rm libtorch-cu118.zip

# In CMakeLists.txt
set(Torch_DIR ./the_path_to_where_you_extracted_LibTorch/libtorch/share/cmake/Torch)
[Option 2] Conda. If you are using Conda to manage your python packages and have installed compatible Pytorch, you could set the
# [For Jatson Orin] To install Pytorch in Jatson developer kit, you can run the below commands
# export TORCH_INSTALL=https://developer.download.nvidia.com/compute/redist/jp/v511/pytorch/torch-2.0.0+nv23.05-cp38-cp38-linux_aarch64.whl
# pip install --no-cache $TORCH_INSTALL

set(Torch_DIR /the_path_to_conda/python3.x/site-packages/torch/share/cmake/Torch)
Using OpenCV with opencv_contrib and CUDA
Take version 4.7.0 for example, look into OpenCV realeases and opencv_contrib, you will find OpenCV 4.7.0 and the corresponding opencv_contrib 4.7.0, download them to the same directory (for example, ~/opencv) and extract them. Then open a terminal and run:
cd ~/opencv
cd opencv-4.7.0/
mkdir build
cd build

# The build options we used in our tests:
cmake -DCMAKE_BUILD_TYPE=RELEASE -DWITH_CUDA=ON -DWITH_CUDNN=ON -DOPENCV_DNN_CUDA=ON -DWITH_NVCUVID=ON -DCUDA_TOOLKIT_ROOT_DIR=/usr/local/cuda-11.8 -DOPENCV_EXTRA_MODULES_PATH="../../opencv_contrib-4.7.0/modules" -DBUILD_TIFF=ON -DBUILD_ZLIB=ON -DBUILD_JASPER=ON -DBUILD_CCALIB=ON -DBUILD_JPEG=ON -DWITH_FFMPEG=ON ..

# Take a moment to check the cmake output, see if there are any packages needed by OpenCV but not installed on your device

make -j8
# NOTE: We found that the compilation of OpenCV may stuck at 99%, this may be caused by the final linking process. We just waited for a while until it was completed and exited without errors.
To install OpenCV into the system path:
sudo make install
If you prefer installing OpenCV to a custom path by adding -DCMAKE_INSTALL_PREFIX=/your_preferred_path option to the cmake command, remember to help Photo-SLAM find OpenCV by adding additional cmake options. See build.sh for details. Otherwise, you can also add the following line to CMakeLists.txt, ORB-SLAM3/CMakeLists.txt and ORB-SLAM3/Thirdparty/DBoW2/CMakeLists.txt, just like what we did for LibTorch.
set(OpenCV_DIR /your_preferred_path/lib/cmake/opencv4)
Installation of Photo-SLAM
git clone https://github.com/HuajianUP/Photo-SLAM.git
cd Photo-SLAM/
chmod +x ./build.sh
./build.sh
Photo-SLAM Examples on Some Benchmark Datasets
The benchmark datasets mentioned in our paper: Replica (NICE-SLAM Version), TUM RGB-D, EuRoC.
- (optional) Download the dataset.
cd scripts
chmod +x ./*.sh
./download_replica.sh
./download_tum.sh
./download_euroc.sh
- For testing, you could use the below commands to run the system after specifying the
PATH_TO_ReplicaandPATH_TO_SAVE_RESULTS. We would disable the viewer by addingno_viewerduring the evaluation.
./bin/replica_rgbd \
    ./ORB-SLAM3/Vocabulary/ORBvoc.txt \
    ./cfg/ORB_SLAM3/RGB-D/Replica/office0.yaml \
    ./cfg/gaussian_mapper/RGB-D/Replica/replica_rgbd.yaml \
    PATH_TO_Replica/office0 \
    PATH_TO_SAVE_RESULTS
    # no_viewer
- We also provide scripts to conduct experiments on all benchmark datasets mentioned in our paper. We ran each sequence five times to lower the effect of the nondeterministic nature of the system. You need to change the dataset root lines in scripts/*.sh then run:
cd scripts
chmod +x ./*.sh
./replica_mono.sh
./replica_rgbd.sh
./tum_mono.sh
./tum_rgbd.sh
./euroc_stereo.sh
# etc.
Photo-SLAM Evaluation
git clone https://github.com/HuajianUP/Photo-SLAM-eval.git
To use this toolkit, you have to ensure your results on each dataset are stored in the correct format. If you use our ./xxx.sh scripts to conduct experiments, the results are stored in
results
├── replica_mono_0
│   ├── office0
│   ├── ....
│   └── room2
├── replica_rgbd_0
│   ├── office0
│   ├── ....
│   └── room2
│
└── [replica/tum/euroc]_[mono/stereo/rgbd]_num  ....
    ├── scene_1
    ├── ....
    └── scene_n
Install required python package
pip install evo numpy scipy scikit-image lpips pillow tqdm plyfile
(Optional) install submodel for rendering
# If you have installed original GS submodel, you can skip these steps.

pip install submodules/simple-knn/
pip install submodules/diff-gaussian-rasterization/
Convert Replica GT camera pose files to suitable pose files to run EVO package
python ./Photo-SLAM-eval/shapeReplicaGT.py --replica_dataset_path PATH_TO_REPLICA_DATASET
Copy TUM camera.yaml to the corresponding dataset path
Since images on some sequences of TUM dataset contain distortion, we need to undistort the ground truth images before evaluation.
In addition, the file camera.yaml is used as an indicator in run.py.
cp ./Photo-SLAM-eval/TUM/fr1/camera.yaml PATH_TO_TUM_DATASET/rgbd_dataset_freiburg1_desk
cp ./Photo-SLAM-eval/TUM/fr2/camera.yaml PATH_TO_TUM_DATASET/rgbd_dataset_freiburg2_xyz
To get all metrics, you can run
python ./Photo-SLAM-eval/onekey.py --dataset_center_path PATH_TO_ALL_DATASET --result_main_folder RESULTS_PATH
Finally, you are supposed to get two files including RESULTS_PATH/log.txt and RESULTS_PATH/log.csv.
Photo-SLAM Examples with Real Cameras
We provide an example with the Intel RealSense D455 at examples/realsense_rgbd.cpp. Please see scripts/realsense_d455.sh for running it.