Awesome
Learning 3D Human Shape and Pose from Dense Body Parts
This repository contains the code for the following paper:
Learning 3D Human Shape and Pose from Dense Body Parts
Hongwen Zhang, Jie Cao, Guo Lu, Wanli Ouyang, Zhenan Sun
TPAMI, 2020
Requirements
- Python 3.6.10
packages
necessary files
DensePose UV data
- Run the following script to fetch DensePose UV data.
bash get_densepose_uv.sh
SMPL model files
- Collect SMPL model files from https://smpl.is.tue.mpg.de and UP. Rename model files and put them into the
./data/smpldirectory.
Download the pre-trained models and put them into the
./data/pretrained_modeldirectory.
After collecting the above necessary files, the directory structure of ./data is expected as follows.
./data
├── dataset_extras
│   └── .npz files
├── J_regressor_extra.npy
├── J_regressor_h36m.npy
├── pretrained_model
│   ├── .pt files
│   └── learned_ratio.pkl
├── smpl
│   ├── SMPL_FEMALE.pkl
│   ├── SMPL_MALE.pkl
│   └── SMPL_NEUTRAL.pkl
├── smpl_mean_params.npz
├── static_fits
│   └── .npy files
└── UV_data
    ├── UV_Processed.mat
    └── UV_symmetry_transforms.mat
Rendering IUV
The IUV_Renderer can be used to generate ground-truth IUV maps when given a batch of SMPL vertices and cameras. An example of usage can be found here.
Demo
- Run the demo code. Using
--use_opendrif theopendrpackage is successfully installed.
python3 demo.py --checkpoint=data/pretrained_model/danet_model_h36m_itw.pt --img_dir ./examples --use_opendr
- View visualization results in
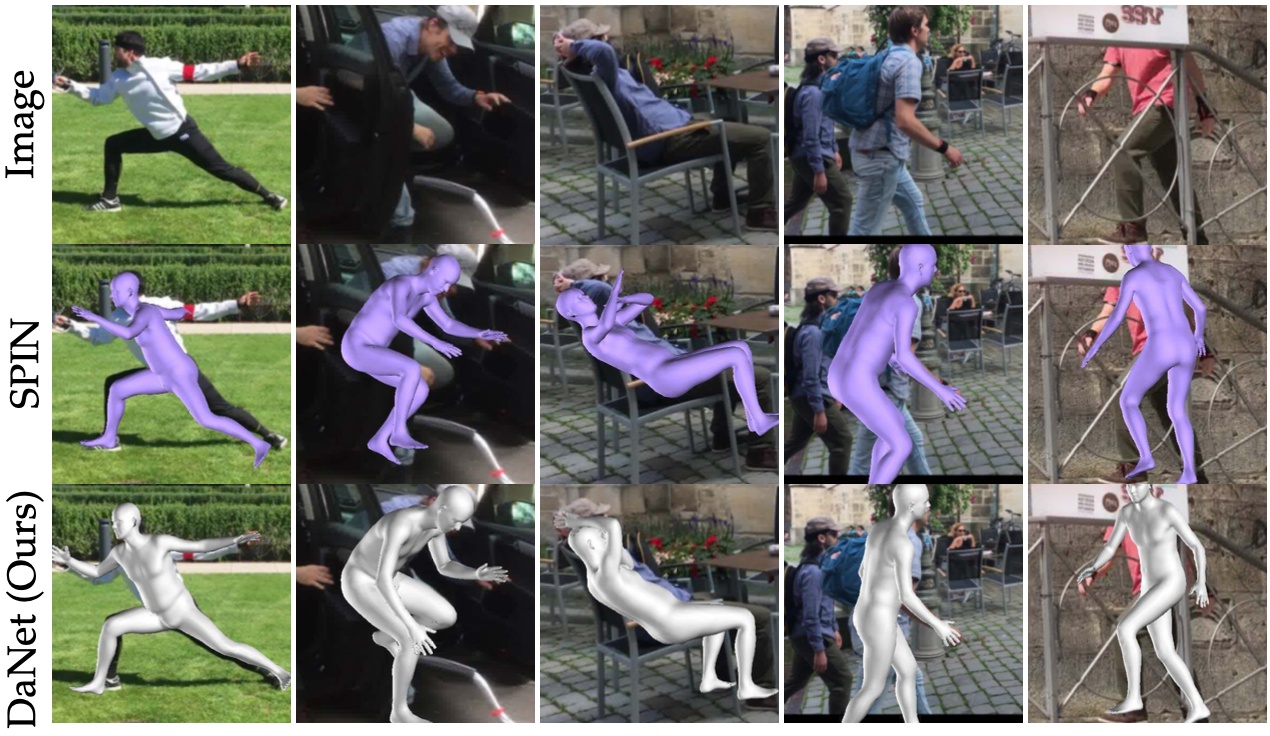
./output. Results are organized (from left to right) as the input image, the estimated IUV maps (global and partial), the rendered IUV of the predicted SMPL model, the predicted SMPL model (front and side views).
Evaluation
Human3.6M / 3DPW
Run the evaluation code. Using --dataset to specify the evaluation dataset.
# Example usage:

# Human3.6M Protocol 2
python3 eval.py --checkpoint=data/pretrained_model/danet_model_h36m_itw.pt --dataset=h36m-p2 --log_freq=20

# 3DPW
python3 eval.py --checkpoint=data/pretrained_model/danet_model_h36m_itw.pt --dataset=3dpw --log_freq=20
COCO Keypoint Localization
-
Download the preprocessed data coco_2014_val.npz. Put it into the
./data/dataset_extrasdirectory. -
Run the COCO evaluation code.
python3 eval_coco.py --checkpoint=data/pretrained_model/danet_model_h36m_dpcoco.pt
Training
To perform training, we need to collect pretraining models and preprocessed files of training datasets at first.
The pretraining models can be downloaded from HRNet. The preprocessed labels have the same format as SPIN and can be retrieved from here. Please refer to SPIN for more details about data preprocessing. As for DensePose-COCO, we provide the preprocessed data here.
The training of DaNet consists of two stages. We will train the IUV estimator alone at the first stage for around 5k iterations, then we involve other modules in training for the rest of 60k iterations at the second stage. Example usage:
python3 train.py --name danet --batch_size 16 --vis_interval 1000 --pretr_step 5000
Running the above command will use Human3.6M and DensePose-COCO for training by default. We can monitor the training process by setting up a TensorBoard at the directory ./logs.
Citation
If this work is helpful in your research, please cite the following paper.
@article{zhang2020densepose2smpl,
  title={Learning 3D Human Shape and Pose from Dense Body Parts},
  author={Zhang, Hongwen and Cao, Jie and Lu, Guo and Ouyang, Wanli and Sun, Zhenan},
  journal={IEEE Transactions on Pattern Analysis and Machine Intelligence},
  volume={44},
  number={5},
  pages={2610--2627},
  year={2022},
}
Acknowledgments
The code is developed upon the following projects. Many thanks to their contributions.

