Awesome
CM42 Central
CM42 Central is an application to provide a user story based backlog management system for agile development teams.


The Codeminer 42 Feature Set
CM42-Central is a fork of the discontinued Fulcrum project. The old project has not received anything new in the last couple of years, but our fork has evolved considerably and we consider it the new upstream for all intents and purposes.
Some of the improvements we added since the end of 2015:
- Fixing Pivotal Tracker project CSV import to properly get the Notes
- Added stories search through Pg_Search (low priority: maybe add option for Elastic)
- Adding superadmin role to manage projects and users
- proper users CRUD section
- Reorganize the user administration
- Adding Cloudinary/Attachinary support to upload assets to Stories and Notes
- Uploading is working but it is not showing properly yet
- Add uploads to Notes
- General project cleanup
- upgrading gems
- using rails-assets
- refactoring views to use Bootstrap elements
- fixing failing migrations
- fixing failing tests, including javascript tests
- adding phantomjs for feature tests
- remove StoryObserver and refactor main
- more markdown javascript to assets
- needs more testing and tweaking for tablets
- Backbone code needs more refactoring and cleanup (specially moving the render from story_view to an EJS template)
- (low priority) replace the polling system for a websockets channel and listener
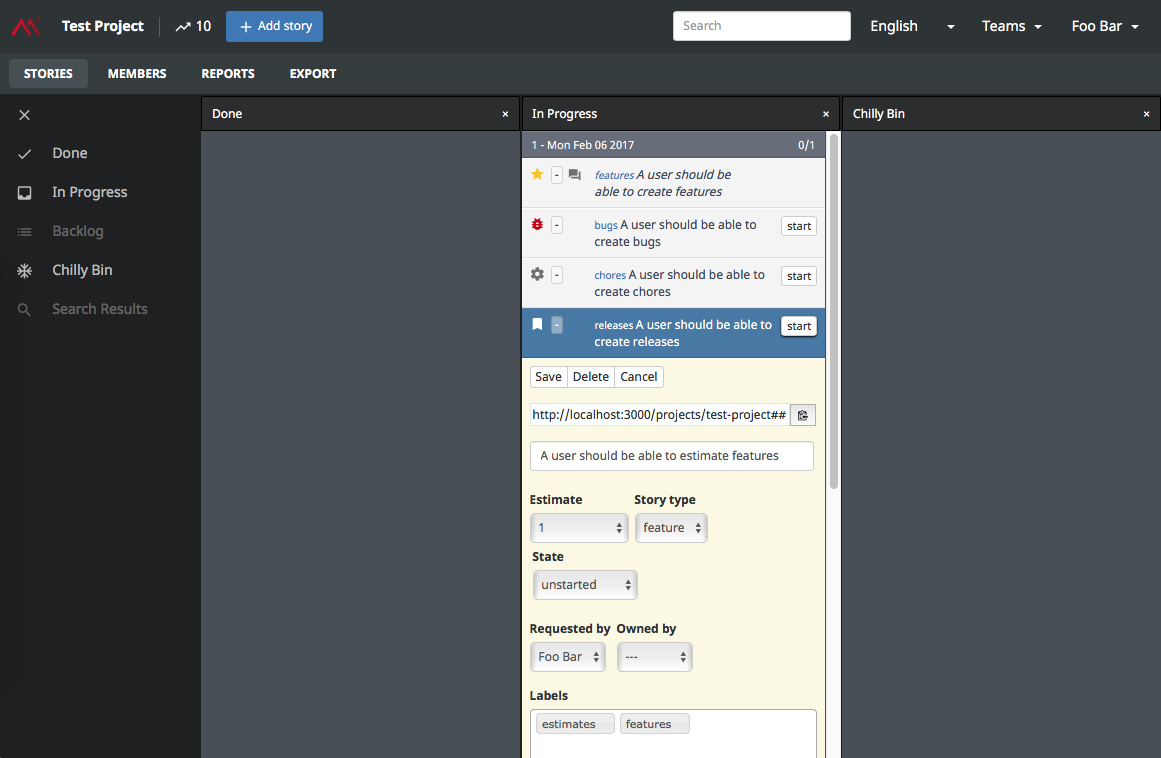
- Improved UI
- A little bit better icon set (Material Icons)
- Textarea in Story editing can now auto-resize
- Can collapse sprint groups
- Bugs and Chores shouldn't be estimated
- Basic task system inside a Story
- Labels work as "Epic" grouping
- Minimal responsiveness to make it usable in smartphones/tablets
- UI tweaking to make it prettier even without a total redesign
- Done stories can't be edited, so adding validations and disabling form UIs
- Added Mattermost basic integration to send story changes to project chat channel
- Added Slack integration to send story changes to project chat channel
- Add APIs for chat slash commands to be able to query projects (ex. /centralstatus project-x)
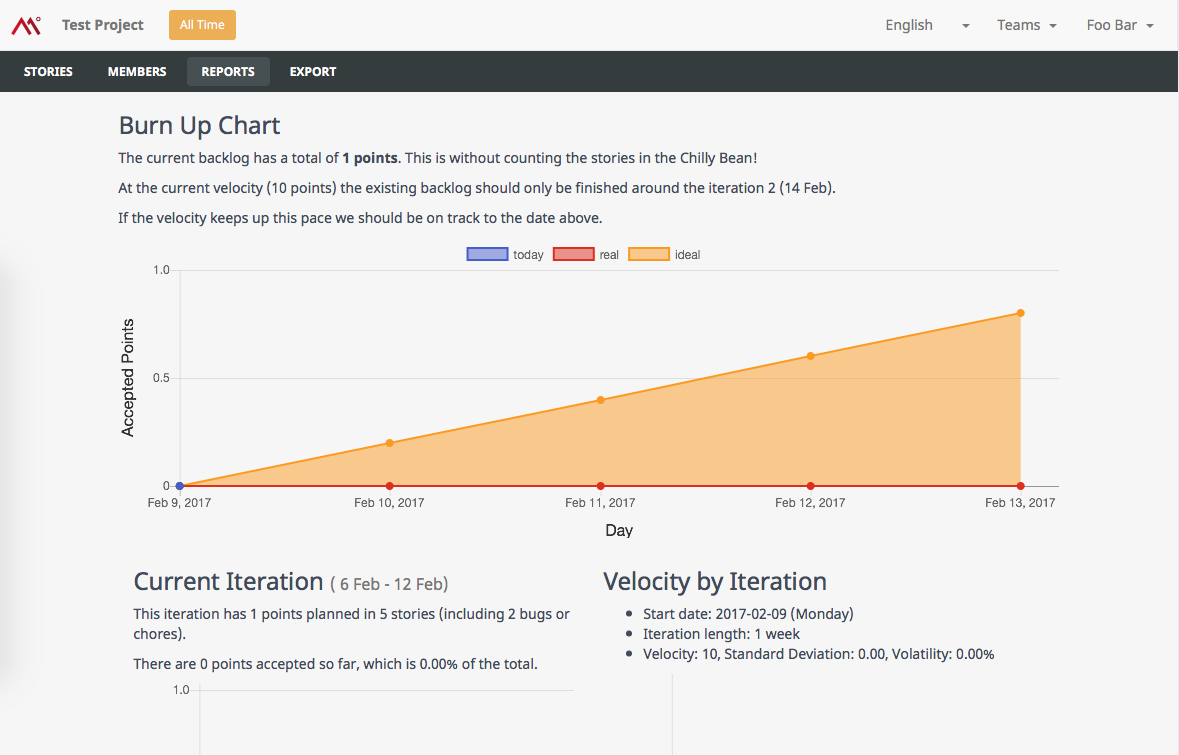
- Added basic reports
- Basic Current Iteration status
- Velocity per Iteration
- Bugs per Iteration
- Velocity per Member per Iteration
- Volatility calculation
- Burn Up Chart
- Teams
- Reorganize the project so the main object is a Team instead of the Project, and Teams can have many Projects
- Teams are isolated, so a user in a Team can't access a project from another Team
- Users can be assigned to multiple teams
- Projects can be transferred between Teams
We already have more features in development and you can follow what needs to be built or fixed in the Issues page.
Goals
CM42-Central starts as a clone of Pivotal Tracker.
We want to make it a drop-in replacement first, by having all of the main functionalities and to later surpass it, by making it not only smarter but also more user-friendly and easier to use than what we consider "incomplete" commercial offerings such as Trello.
The principles that we believe in are:
- Estimation is not optional, but more like Story Points (proportions) than Time-based estimation.
- Projects must be divided in short, fixed Iterations.
- Velocity is the the key managerial element.
- Stakeholders must test and accept/reject stories within the same Iteration.
Installation
WARNING: It is NOT recommended to create the database using the db:migrate command during the installation process. Some migrations in the project have become outdated due to Rails updates during the application's development. Therefore, if you create the database from scratch using these outdated migrations instead of loading the current schema, the application will not function as intended, and some tests will fail. Be aware!
First up, your system will need the prerequisites for running Ruby on Rails installed Once you have these:
# Checkout the project
$ git clone git://github.com/Codeminer42/cm42-central.git
$ cd cm42-central

# copy and edit the configuration
$ cp .env.sample .env
$ cp config/database.yml.example config/database.yml

# Install the project dependencies
$ gem install bundler
$ bundle install
$ npm install (or yarn install)

# If you want working with import option, have to activated the option memcached
$ CentOS 6.4
 - sudo yum install memcached
$ Debian/Ubuntu
 - sudo apt-get install memcached
$ MacOS
 - brew install memcached
$ Option memcached
 - sudo /etc/init.d/memcached start
 - sudo /etc/init.d/memcached stop
 - sudo /etc/init.d/memcached restart

# Prepare husky
$ npm run prepare (or yarn prepare)

# Set up the development database
$ bundle exec rake fulcrum:setup db:setup

# Start the local web server
$ bundle exec foreman start -f Procfile.development
Or using docker:
# Checkout the project
$ git clone git://github.com/Codeminer42/cm42-central.git
$ cd cm42-central

# copy and edit the configuration
$ cp .env.sample .env
$ cp config/database.yml.example config/database.yml

# Prepare container
$ docker compose build
$ docker compose run --rm web yarn install
$ docker compose run --rm web bundle exec rake db:setup

# Prepare husky
$ npm install (to install husky locally)
$ npm run prepare (or yarn prepare)

# Up container
$ docker compose up
You should then be able to navigate to http://cm42-central.localhost/ in a web browser.
You can log in with the test username foo@bar.com, password asdfasdf.
To manage the postgres database, you can access http://adminer.cm42-central.localhost, using the following credentials:
- server: postgres
- username: postgres
- passowrd: postgres
If you need to cleanup your docker install, run:
$ docker compose down -v
Heroku setup
You can use the Deploy button above or manually install like this:
You will need a Heroku Postgresql plan, and you will also need:
- Postgresql (ex. Heroku Postgresql)
- Redis (ex. Heroku Redis)
- Memcached (ex. Memcachier)
- Mailgun (for email notifications)
- Cloudinary (for direct client-side uploads, we don't want Carrierwave)
- Google Recaptcha keys (create for free here)
You will also need to add the buildpacks for Node and webpack-rails:
$ heroku buildpacks:add --index 2 https://github.com/heroku/heroku-buildpack-nodejs#v83
$ heroku buildpacks:add --index 3 https://github.com/febeling/webpack-rails-buildpack.git
You may want to skip recaptcha in development, for that you can manually add this to the environment:
Recaptcha.configuration.skip_verify_env << 'development'
To deploy it to Heroku, make sure you have a local copy of the project; refer to the previous section for instructions. Then:
$ gem install heroku

# Define secret tokens
$ heroku config:set SECRET_TOKEN=`rake secret` SECRET_KEY_BASE=`rake secret` DEVISE_SECRET_KEY=`rake secret`

# Create your app. Replace APPNAME with whatever you want to name it.
$ heroku create APPNAME --stack cedar-14

# Set APP_HOST heroku config so outbound emails have a proper host
# Replace APPNAME below with the value from `heroku create`
$ heroku config:set APP_HOST=APPNAME.herokuapp.com

# Define where the user emails will be coming from
# (This email address does not need to exist)
$ heroku config:set MAILER_SENDER=noreply@example.org

# Tell Heroku to exclude parts of the Gemfile
$ heroku config:set BUNDLE_WITHOUT='development:test:travis:mysql:sqlite'

# How many stories a project will load at once (so very old, done stories, stay out of the first load), (optional, default is 300)
$ heroku config:set STORIES_CEILING=300

# CDN URL - Go to AWS and create a CloudFront configuration (optional)
$ heroku config:set CDN_URL=http://xpto.cloudfront.net

# Google Recaptcha keys
$ heroku config:set RECAPTCHA_SITE_KEY=xyz RECAPTCHA_SECRET_KEY=xyz

# Add postgresql
$ heroku addons:create heroku-postgresql:hobby-dev

# Add Redis for Sidekiq
$ heroku addons:create heroku-redis:hobby-dev

# Add memcache to speed things up (optional)
$ heroku addons:add memcachier:dev

# Allow emails to be sent
$ heroku addons:add mailgun:starter

# Add Cloudinary
$ heroku addons:create cloudinary:starter

# Deploy the first version
$ git push heroku master

# Set up the database
$ heroku run rake db:setup
Once that's done, you will be able to view your site at
http://APPNAME.herokuapp.com.
The recommendation is to create a proper domain and add the herokuapp URL as the CNAME.
Translating
Below is an example of how you might go about translating to German.
- Find the name of your locale, in this case we are using
de - Copy the
config/locales/en.ymlfile toconfig/locales/de.yml - Edit the file and update all the translated strings in quotes on the right hand side.
- Add your new locale to
config.i18n.available_localesinconfig/application.rb
Thats it! Ideally you should send your translation as a pull request so you get credit for it, but if you do not wish to do this please send the file to one of the mailing lists.
If we have already translated for your language, please take the time
to check the translation database is complete for your language. You can do
this by running the rake i18n:missing_keys task. If you find any missing
keys for your language please add them.
Disabling registration
To disable public registration you can set the enviroment variable DISABLE_REGISTRATION
to true. If set to true, users will need to be invited to a project rather than being
able to self sign-up.
Development
If you'd like to help:
- Check the issue queue for a
list of the major features which are yet to be implemented. These have the
featureandunstartedlabels. If a feature you'd like to work on isn't there, add an issue. - Leave a description of how you are going to implement the feature. Failure to do this may lead to you implementing the feature in a way that might conflict with future plans, and so increase the chances of your work being rejected or needing a rework.
Here are some general guidelines for contributing:
- Make your changes on a branch, and use that branch as the base for pull requests.
- Try to break changes up into the smallest logical blocks possible. We'd prefer to receive many small commits to one large one in a pull request.
- Feel free to open unfinished pull requests if you'd like to discuss work in progress, or would like other developers to test it.
- All patches changes be covered by tests, and should not break the existing
tests, unless a current test is invalidated by a code change. This includes
Javascript, which is covered with a Jasmine test suite in
spec/javascripts/. - Run
bundle exec rspec spec/to check the Rails test suite is green. You will need Chrome installed to run the integration tests. - To run the Javascript test suite, run
npm test.
License
Copyright 2011-2015, Malcolm Locke. Copyright 2015-2022, Codeminer42.
CM42-Central is made available under the Affero GPL license version 3, see LICENSE.txt.