Awesome
imGuIZMO.quat v3.0
imGuIZMO.quat is a ImGui widget: like a trackball it provides a way to rotate models, lights, or objects with mouse, and graphically visualize their position in space, also around any single axis (Shift/Ctrl/Alt/Super). It uses quaternions algebra, internally, to manage rotations, but offers the possibility also to interfacing with vec3, vec4 or mat4x4 (rotation)
- Since v3.0 you can also move/zoom objects via new Pan & Dolly features
With imGuIZMO.quat you can manipulate an object with only 4 code lines! (read below)
imGuIZMO.quat is written in C++ (C++11) and consist of two files imGuIZMOquat.h and imGuIZMOuat.cpp, uses vGizmo.h virtualGizmo3D (my header only screen manipulator tool in Immediate Mode) and vgMath a compact (my single file header only) vectors/matrices/quaternions tool/lib that makes imGuIZMO.quat standalone.
No other files or external libraries are required, except ImGui (of course).
You can use vgMath also externally, for your purposes: it contains classes to manipulate vectors (with 2/3/4 components), quaternions, square matricies (3x3 and 4x4), both as simple single precision float classes (Default) or, enabling template classes (simply adding a #define), both as float and double data types (also int and uint vec*). It contains also 4 helper functions to define Model/View matrix: perspective, frustum, lookAt, ortho
If need a larger/complete library, as alternative to vgMath, is also possible to interface imGuIZMO.quat with glm mathematics library (simply adding a #define)
==> *Please, read Configure ImGuIZMO.quad section.
Live WebGL2 demo
You can run/test WebGL 2 examples of imGuIZMO from following links:
- imGuIZMO.quat ImGui widget + 3D Pan/Dolly (move/zoom) screen manipulator
- imGuIZMO.quat ImGui widget manipulator (only), now with 3D Pan/Dolly (move/zoom) features - *since v3.0
It works only on browsers with WebGl 2 and webAssembly support (FireFox/Opera/Chrome and Chromium based). Test if your browser supports WebGL2, here: WebGL2 Report
*imGuIZMO.quat was originally developed (currently used) for my glChAoS.P project: consult the source code for more examples.
Mouse buttons and key modifiers
These are all mouse and keyModifiers controls internally used:
- leftButton & drag -> free rotation axes
- rightButton & drag -> free rotation spot *(used only in Axes+Spot widget)
- middleButton / bothButtons & drag -> move together axes & spot *(used only in Axes+Spot widget)
Based on the type of widget it can do
- Rotation around a fixed axis
- leftButton+SHIFT & drag -> rotation around X
- leftButton+CTRL & drag -> rotation around Y
- leftButton+ALT|SUPER & drag -> rotation around Z
- Pan & Dolly (move / zoom) - *since v3.0
- Shft+btn -> Dolly/Zoom
- Wheel -> Dolly/Zoom
- Ctrl+btn -> Pan/Move
*you can change default key modifier for Pan/Dolly movements, read below
<p><br></p>How to use imGuIZMO.quat to manipulate an object with 4 code lines
To use imGuIZMO.quat need to include imGuIZMOquat.h file in your code.
#include "imGuIZMOquat.h"
You can think of declaring declare an object of type quat (quaternion), global or static or as member of your class, to maintain track of rotations:
// For imGuIZMO, declare static or global variable or member class quaternion
    quat qRot = quat(1.f, 0.f, 0.f, 0.f);
In your ImGui window you call/declare a widget...
ImGui::gizmo3D("##gizmo1", qRot /*, size, mode */);
Finally in your render function (or where you prefer) you can get back the transformations matrix
    mat4 modelMatrix = mat4_cast(qRot);
    // now you have modelMatrix with rotation then can build MV and MVP matrix
now you have modelMatrix with rotation then can build MV and MVP matrix
alternately
Maybe can be more elegant to add two helper functions
// two helper functions, not really necessary (but comfortable)
    void setRotation(const quat &q) { qRot = q; }
    quat& getRotation() { return qRot; }
And to change the widget call
    quat qt = getRotation();
    if(ImGui::gizmo3D("##gizmo1", qt /*, size,  mode */)) {  setRotation(qt); }
but the essence of the code does not change
Pan & Dolly - v3.0
From ver. 3.0 you can use all widgets also to "move" the objects, using Pan (x,y) & Dolly (z):
    // declare static or global variable or member class (quat -> rotation)
    quat qRot = quat(1.f, 0.f, 0.f, 0.f);
    // declare static or global variable or member class (vec3 -> Pan/Dolly)
    vec3 PanDolly(0.f);
In your ImGui window you call/declare a widget...
    // Call new function available from v.3.0 imGuIZMO.quat
    ImGui::gizmo3D("##gizmo1", PanDolly, qRot /*, size,  mode */);
    // PanDolly returns/changes (x,y,z) values, depending on Pan/Dolly movements
In your render function (or where you prefer) you can get back the transformations matrix
    // if you need a "translation" matrix with Pan/Dolly values
    mat4 mTranslate(1.f); translate(mTranslate, vec4(PanDolly, 1.f));

    mat4 modelMatrix = mat4_cast(qRot);
    // now you have modelMatrix with rotation then can build MV and MVP matrix
Widget types
Axes mode:
    quat qt = getRotation();
// get/setRotation are helper funcs that you have ideally defined to manage your global/member objs
    if(ImGui::gizmo3D("##gizmo1", qt /*, size,  mode */)) {  setRotation(qt); }
    // or explicitly
    static vec4 dir;
    ImGui::gizmo3D("##Dir1", dir, 100, imguiGizmo::mode3Axes|guiGizmo::cubeAtOrigin);

    // Default size: ImGui::GetFrameHeightWithSpacing()*4
    // Default mode: guiGizmo::mode3Axes|guiGizmo::cubeAtOrigin -> 3 Axes with cube @ origin
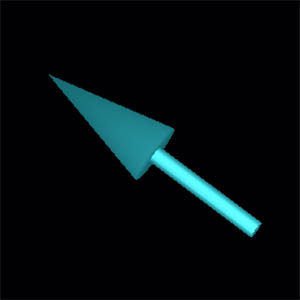
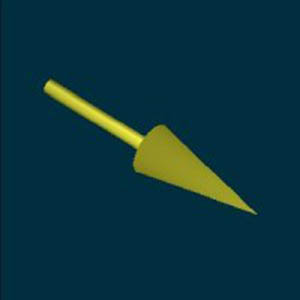
Directional arrow:
// I assume, for a vec3, a direction starting from origin, so if you use a vec3 to identify
// a light spot toward origin need to change direction
    vec3 light(-getLight()));
// get/setLigth are helper funcs that you have ideally defined to manage your global/member objs
    if(ImGui::gizmo3D("##Dir1", light /*, size,  mode */)  setLight(-light);
    // or explicitly
    if(ImGui::gizmo3D("##Dir1", light, 100, imguiGizmo::modeDirection)  setLight(-light);

    // Default arrow color is YELLOW: ImVec4(1.0, 1.0, 0.0, 1.0);
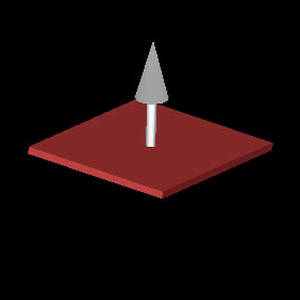
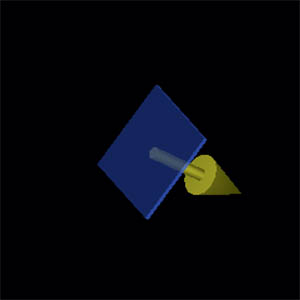
Directional plane:
    static vec3 dir(1.0, 0.0, 0.0);
    if(ImGui::gizmo3D("##Dir1", dir, 100,  imguiGizmo::modeDirPlane)  { }

    // Default direction color is same of default arrow color: YELLOW -> ImVec4(1.0, 1.0, 0.0, 1.0);
    // Default plane color is: ImVec4(0.0f, 0.5f, 1.0f, STARTING_ALPHA_PLANE);
Axes + spot:
// I assume, for a vec3, a direction starting from origin, so if you use a vec3 to identify
// a light spot toward origin need to change direction, it's maintained for uniformity even in spot
    vec3 light(-getLight()));
    quat qt = getRotation();
// get/setLigth get/setRotation are helper funcs that you have ideally defined to manage your global/member objs
    if(ImGui::gizmo3D("##gizmo1", qt, light /*, size,  mode */))  {
        setLight(-light);
        setRotation(qt);
    }
    // Default size: ImGui::GetFrameHeightWithSpacing()*4
    // Default mode: guiGizmo::mode3Axes|guiGizmo::cubeAtOrigin -> 3 Axes with cube @ origin
    // Default spot color is same of default arrow color: YELLOW -> ImVec4(1.0, 1.0, 0.0, 1.0);
Added since version 3.0
To each of the functions listed above was added a vec3 parameter, as second parameter, to get the object movement: Pan/Dolly, so the Axes mode function becomes:
Axes mode + Pan/Dolly:
    quat qt = getRotation();
    vec3 pos = getPosition();
// get/setRotation and get/setPosition are helper funcs that you have ideally defined to manage your global/member objs
    if(ImGui::gizmo3D("##gizmo1", pos, qt /*, size,  mode */)) {  setRotation(qt); setPosition(pos); }
    // or explicitly
    static quat q(1.f, 0.f, 0.f, 0.f);
    static vec3 pos(0.f);
    ImGui::gizmo3D("##Dir1", pos, q, 100, imguiGizmo::mode3Axes|guiGizmo::cubeAtOrigin);

    // Default size: ImGui::GetFrameHeightWithSpacing()*4
    // Default mode: guiGizmo::mode3Axes|guiGizmo::cubeAtOrigin -> 3 Axes with cube @ origin
... and so on, for all listed above functions: *look the new function prototypes, below.
Prototypes
All possible widget calls (rotations only):
IMGUI_API bool gizmo3D(const char*, quat&, float=IMGUIZMO_DEF_SIZE, const int=imguiGizmo::mode3Axes|imguiGizmo::cubeAtOrigin);
IMGUI_API bool gizmo3D(const char*, vec4&, float=IMGUIZMO_DEF_SIZE, const int=imguiGizmo::mode3Axes|imguiGizmo::cubeAtOrigin);
IMGUI_API bool gizmo3D(const char*, vec3&, float=IMGUIZMO_DEF_SIZE, const int=imguiGizmo::modeDirection);

IMGUI_API bool gizmo3D(const char*, quat&, quat&, float=IMGUIZMO_DEF_SIZE, const int=imguiGizmo::modeDual|imguiGizmo::cubeAtOrigin);
IMGUI_API bool gizmo3D(const char*, quat&, vec4&, float=IMGUIZMO_DEF_SIZE, const int=imguiGizmo::modeDual|imguiGizmo::cubeAtOrigin);
IMGUI_API bool gizmo3D(const char*, quat&, vec3&, float=IMGUIZMO_DEF_SIZE, const int=imguiGizmo::modeDual|imguiGizmo::cubeAtOrigin);
from v.3.0 have been added other calls that pass/return Pan/Dolly (x,y,z) position: same as above, but with vec3 (Pan/Dolly position) as second parameter:
//with Pan & Dolly feature
IMGUI_API bool gizmo3D(const char*, vec3&, quat&, float=IMGUIZMO_DEF_SIZE, const int=imguiGizmo::mode3Axes|imguiGizmo::cubeAtOrigin);
IMGUI_API bool gizmo3D(const char*, vec3&, vec4&, float=IMGUIZMO_DEF_SIZE, const int=imguiGizmo::mode3Axes|imguiGizmo::cubeAtOrigin);
IMGUI_API bool gizmo3D(const char*, vec3&, vec3&, float=IMGUIZMO_DEF_SIZE, const int=imguiGizmo::modeDirection);

IMGUI_API bool gizmo3D(const char*, vec3&, quat&, quat&, float=IMGUIZMO_DEF_SIZE, const int=imguiGizmo::modeDual|imguiGizmo::cubeAtOrigin);
IMGUI_API bool gizmo3D(const char*, vec3&, quat&, vec4&, float=IMGUIZMO_DEF_SIZE, const int=imguiGizmo::modeDual|imguiGizmo::cubeAtOrigin);
IMGUI_API bool gizmo3D(const char*, vec3&, quat&, vec3&, float=IMGUIZMO_DEF_SIZE, const int=imguiGizmo::modeDual|imguiGizmo::cubeAtOrigin);
For for more details, more customizations, or how to change sizes, color, thickness, etc... examine the attached example source code (uiMainDlg.cpp file), or again imGuIZMOquat.h, imGuIZMOquat.cpp files: they are well commented.
The widget are also used in glChAoS.P project.
*If you want use (also) full-screen manipulator, outside ImGui widget, look at virtualGizmo3D (is its feature)... also in attached example, enabling #define GLAPP_USE_VIRTUALGIZMO define in glWindow.cpp file
Sizes and colors
To change size and color of one or all widgets, imGuIZMO.quat have some helper funcs
Just an example...
To change the default color for all ARROW-Direction widgets call once (maybe in your ImGui style-settings func):
imguiGizmo::setDirectionColor(ImVec4(0.5, 1.0, 0.3, 1.0)); // change the default ArrowDirection color
Instead to change the color of a single widget:
    imguiGizmo::setDirectionColor(ImVec4(0.5, 1.0, 0.3, 1.0)); // change ArrowDirection color
    ImGui::gizmo3D("##Dir1", dir);                             // display widget with changed color
    imguiGizmo::restoreDirectionColor();                       // restore old ArrowDirection color
It's like the push/pop mechanism used in ImGui, but only that I don't have a stack (for now I don't see the reason): just a single variable where to save the value. The other functions work in the same way.
Mouse sensitivity - since v2.2
    // Call it once, to set all widgets... or if you need it
    // default 1.0, >1 more mouse sensitivity, <1 less mouse sensitivity
    static void setGizmoFeelingRot(float f) { gizmoFeelingRot = f; }
    static float getGizmoFeelingRot() { return gizmoFeelingRot; }
Pan/Dolly change/set key modifier - since v3.0
// available vgModifiers values:
//      evShiftModifier   -> Shift - default for Dolly
//      evControlModifier -> Ctrl  - default for Pan
//      evAltModifier     -> Alt
//      evSuperModifier   -> Super
    static void setPanModifier(vgModifiers v) { panMod = v; }    // Change default assignment for Pan
    static void setDollyModifier(vgModifiers v) { panMod = v; }  // Change default assignment for Dolly
Pan/Dolly scale - since v3.0
    // Call it once, to set all widgets... or if you need it
    // default 1.0, >1 more, <1 less

    //  Set the mouse response for the dolly operation... also wheel
    static void setDollyScale(float  scale) { dollyScale = scale;  }
    static float getDollyScale() { return dollyScale;  }

    //  Set the mouse response for pan
    static void setPanScale(float scale) { panScale = scale; }
    static float getPanScale() { return panScale; }
All widgets visualization
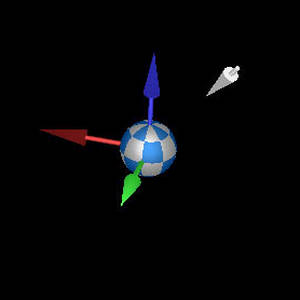
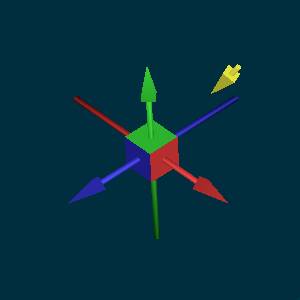
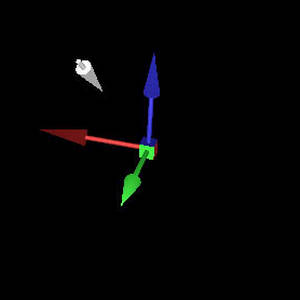
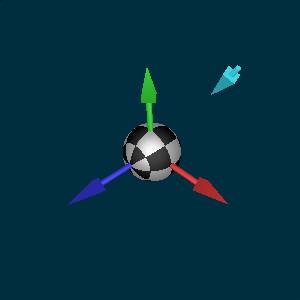
FOUR widget types are provided, (six function calls with different parameters: quaternion, vec4, vec3 for different uses) each of them customizable with several graphics options:
Axes mode
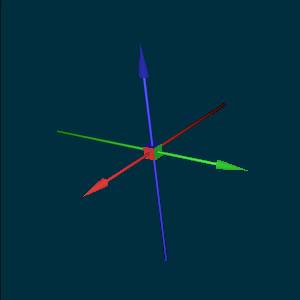 | 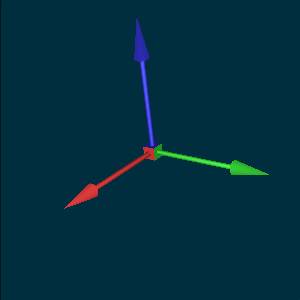 | 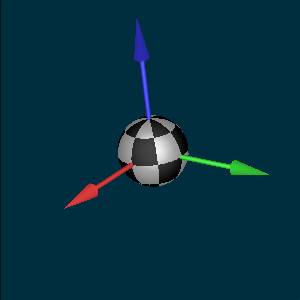 | 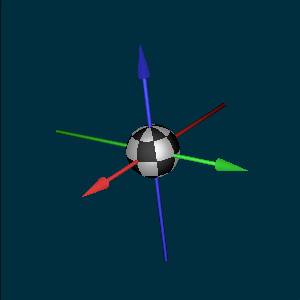 |
|---|
Directional arrow
 |  |  |  |
|---|
Plane direction
 |  |  |  |
|---|
Axes + spot
 |  |  |  |
|---|
And much more...
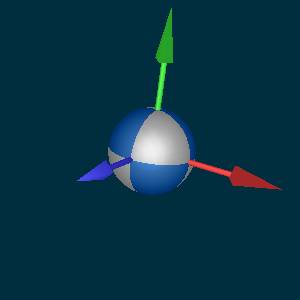
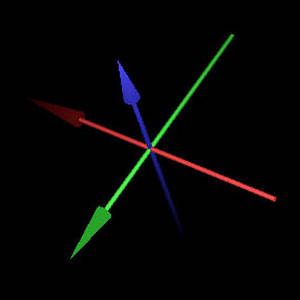
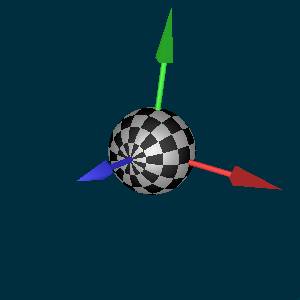
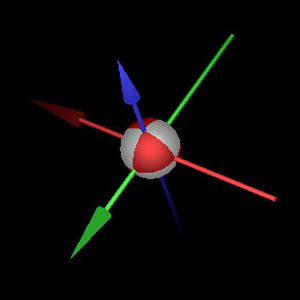
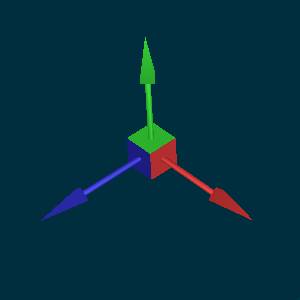
Full configurable: length, thickness, dimensions, number of polygon slices, colors and sphere tessellation:
 |  |  |  |  |
|---|
Helper on specific feature
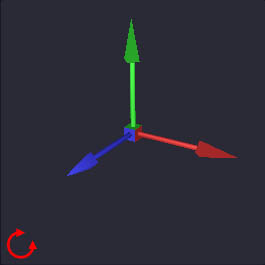
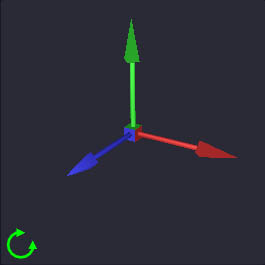
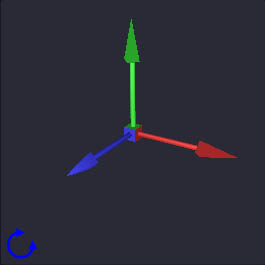
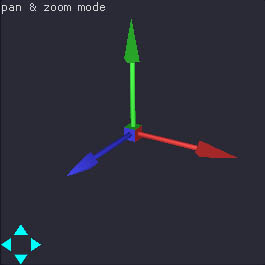
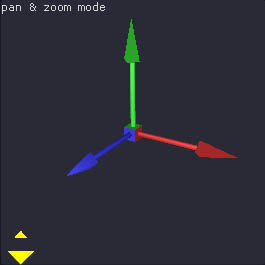
Now, when the mouse is hovered and the modifier key is pressed, a graphic helper is displayed to identify the relative functionality currently set:
| rotation around X | rotation around Y | rotation around Z | Pan / move | Dolly / zoom |
|---|---|---|---|---|
 |  |  |  |  |
Configure ImGuIZMOquat
ImGuIZMOquat and virtualGizmo3D use vgMath tool, it contains a group of vector/matrices/quaternion classes, operators, and principal functions. It uses the "glsl" convention for types and function names so is compatible with glm types and function calls: vgMath is a subset of glm mathematics library and so you can use first or upgrade to second via a simple #define. However vgMath does not want replicate glm, is only intended to make virtalGizmo3D / ImGuIZMOquat standalone, and avoid template classes use in the cases of low resources or embedded systems.
The file vgConfig.h allows to configure internal math used form ImGuIZMO.quat and virtalGizmo3D. In particular is possible select between:
- simple float classes (Default) / template classes
- internal vgMath tool (Default) / glm mathematics library
- Right (Default) / Left handed coordinate system (lookAt, perspective, ortho, frustum - functions)
- Add additional HLSL types name convention
- enable (Default) / disable the automatic entry of
using namespace vgm;at end ofvgMath.h(it influences only your external use ofvgMath.h)
You can do this simply by commenting / uncommenting a line in vgConfig.h or adding related "define" to your project, as you can see below:
// uncomment to use TEMPLATE internal vgMath classes/types
//
// This is if you need to extend the use of different math types in your code
//      or for your purposes, there are predefined alias:
//          float  ==>  vec2 / vec3 / vec4 / quat / mat3|mat3x3 / mat4|mat4x4
//      and more TEMPLATE (only!) alias:
//          double ==> dvec2 / dvec3 / dvec4 / dquat / dmat3|dmat3x3 / dmat4|dmat4x4
//          int    ==> ivec2 / ivec3 / ivec4
//          uint   ==> uvec2 / uvec3 / uvec4
// If you select TEMPLATE classes the widget too will use internally them
//      with single precision (float)
//
// Default ==> NO template
//------------------------------------------------------------------------------
//#define VGM_USES_TEMPLATE
// uncomment to use "glm" (0.9.9 or higher) library instead of vgMath
//      Need to have "glm" installed and in your INCLUDE research compiler path
//
// vgMath is a subset of "glm" and is compatible with glm types and calls
//      change only namespace from "vgm" to "glm". It's automatically set by
//      including vGizmo.h or vgMath.h or imGuIZMOquat.h
//
// Default ==> use vgMath
//      If you enable GLM use, automatically is enabled also VGM_USES_TEMPLATE
//          if you can, I recommend to use GLM
//------------------------------------------------------------------------------
//#define VGIZMO_USES_GLM
// uncomment to use LeftHanded
//
// This is used only in: lookAt / perspective / ortho / frustrum - functions
//      DX is LeftHanded, OpenGL is RightHanded
//
// Default ==> RightHanded
//------------------------------------------------------------------------------
//#define VGM_USES_LEFT_HAND_AXES
Since v.2.1
// uncomment to avoid vgMath.h add folow line code:
//      using namespace vgm | glm; // if (!VGIZMO_USES_GLM | VGIZMO_USES_GLM)
//
// Automatically "using namespace" is added to the end vgMath.h:
//      it help to maintain compatibilty between vgMath & glm declaration types,
//      but can go in confict with other pre-exist data types in your project
//
// note: this is only if you use vgMath.h in your project, for your data types:
//       it have no effect for vGizmo | imGuIZMO internal use
//
// Default ==> vgMath.h add: using namespace vgm | glm;
//------------------------------------------------------------------------------
//#define VGM_DISABLE_AUTO_NAMESPACE
// uncomment to use HLSL name types (in addition!)
//
// It add also the HLSL notation in addition to existing one:
//      alias types:
//          float  ==>  float2 / float3 / float4 / quat / float3x3 / float4x4
//      and more TEMPLATE (only!) alias:
//          double ==> double2 / double3 / double4 / dquat / double3x3 / double4x4
//          int    ==> int2 / int3 / int4
//          uint   ==> uint2 / uint3 / uint4
//
// Default ==> NO HLSL alia types defined
//------------------------------------------------------------------------------
//#define VGM_USES_HLSL_TYPES
Since v.3.0
//------------------------------------------------------------------------------
// imGuiZmo.quat - v3.0 and later - (used only inside it)
//
//      Used to remove Pan & Dolly feature to imGuIZMO.quat widget and to use
//          only rotation feature (like v2.2 and above)
//
//          Pan/Dolly use virtualGizmo3DClass just a little bit complex of
//          virtualGizmoClass that uses only "quat" rotations
//          uncomment for very low resources ==> Pan & Dolly will be disabled
//
// Default ==> Pan & Dolly enabled
//------------------------------------------------------------------------------
//#define IMGUIZMO_USE_ONLY_ROT
For default imGuIZMO.quat search dear imgui .h files inside a imgui subfolder insert in your INCLUDE search paths, according this call: #include <imgui/imgui.h>
You can modify this behavior modifing the following parameter/define:
//------------------------------------------------------------------------------
// imGuiZmo.quat - v3.0 and later - (used only inside it)
//
//      used to specify where ImGui include files should be searched
//          #define IMGUIZMO_IMGUI_FOLDER
//              is equivalent to use:
//                  #include <imgui.h>
//                  #include <imgui_internal.h>
//          #define IMGUIZMO_IMGUI_FOLDER myLibs/ImGui/
//              (final slash is REQUIRED) is equivalent to use:
//                  #include <myLib/ImGui/imgui.h>
//                  #include <myLib/ImGui/imgui_internal.h>
//          Default: IMGUIZMO_IMGUI_FOLDER commented/undefined
//              is equivalent to use:
//                  #include <imgui/imgui.h>
//                  #include <imgui/imgui_internal.h>
//
// N.B. Final slash to end of path is REQUIRED!
//------------------------------------------------------------------------------
// #define IMGUIZMO_IMGUI_FOLDER ImGui/
*about this last #define you can read also the issue #5
- If your project grows you can upgrade/pass to glm, in any moment
- My glChAoS.P project can switch from internal vgMath (
VGIZMO_USES_TEMPLATE) to glm (VGIZMO_USES_GLM), and vice versa, only changing defines: you can examine it as example
Building Example
The source code example shown in the animated gif screenshot, is provided.
In example I use GLFW or SDL2 (via #define GLAPP_USE_SDL) with OpenGL, but it is simple to change if you use Vulkan/DirectX/etc, other frameworks (like GLUT) or native OS access.
To build it you can use CMake (3.10 or higher) or the Visual Studio solution project (for VS 2017) in Windows. You need to have GLFW (or SDL) in your compiler search path (LIB/INCLUDE). Instead copy of ImGui is attached and included in the example.
If want use glm, in place of internal vgMath, you need to download it
CMake
Use the following command-line defines to enable different options:
-DUSE_SDL:BOOL=TRUEto enable SDL framework instead of GLFW-DUSE_VIRTUALGIZMO:BOOL=TRUEto use also (together) virtualGizmo3D to manipulate objects
*these flags are available also in CMakeGUI
To build EMSCRIPTEN example, use batch/script files:
emsCMakeGen.cmd %EMSCRIPTEN% %BUILD_TYPE%for Windows userssh emsCMakeGen.sh %EMSCRIPTEN% %BUILD_TYPE%for Linux or OS/X users
where:
%EMSCRIPTEN%is your emscripten installation path (e.g.C:\emsdk\emscripten\1.38.10)%BUILD_TYPE%is build type:Debug | Release | RelWithDebInfo | MinSizeRel
They are located in root example directory, or examine their content to pass appropriate defines/parameters to CMake command line.
*To build with EMSCRIPTEN, obviously you need to have installed EMSCRIPTEN SDK on your computer (1.38.10 or higher)
Emscripten in Windows
To build the EMSCRIPTEN version, in Windows, with CMake, need to have mingw32-make.exe in your computer and search PATH (only the make utility is enough): it is a condition of EMSDK tool to build with CMake in Windows.
VS2017 project solution
- To build SDL or GLFW, select appropriate build configuration
- If you have GLFW and/or SDL headers and library directory paths added to
INCLUDEandLIBenvironment vars, the compiler find them. - If you want use (also) full-screen manipulator virtualGizmo3D together with imGuIZMO.quat, enable
#define GLAPP_USE_VIRTUALGIZMOdefine inglWindow.cppfile. - The current VisualStudio project solution refers to my environment variable RAMDISK (
R:), and subsequent VS intrinsic variables to generate binary output:$(RAMDISK)\$(MSBuildProjectDirectoryNoRoot)\$(DefaultPlatformToolset)\$(Platform)\$(Configuration)\, so without a RAMDISK variable, executable and binary files are outputted in base to the values of these VS variables, starting from root of current drive. (you will find built binary here... or change it)